Sunday’s workshop at the Studio is Beeswax Collage (it’s sold out, yay!), and I’m going to ask the participants to bring a sepia-toned photo to work with. I’m sending them the link to this post to show them how to do a sepia effect with iPiccy, and you can find out, too, by following these instructions!
First, you need to choose a photo that you want to transform to sepia, and remember what file it’s in so you can find it to upload it. Then go to iPiccy and choose Start Editing!
You’ll see a window that asks you to upload a photo.
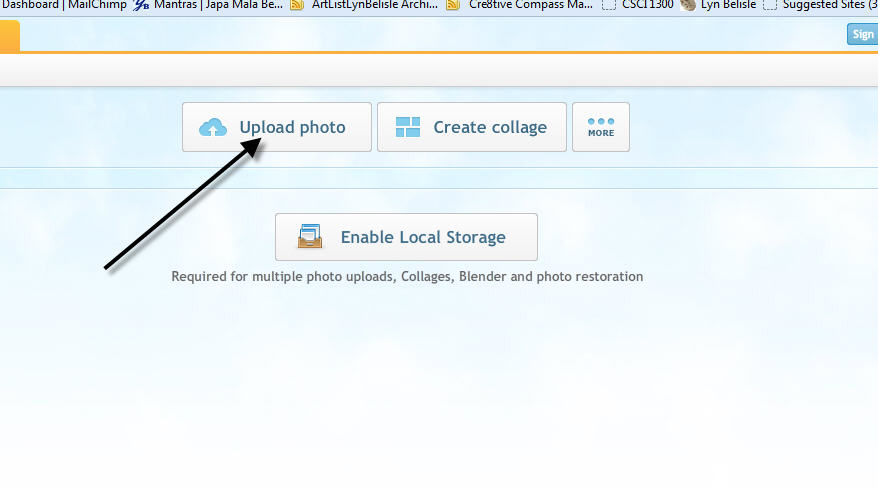 Browse to the file on your own computer that has the photo you want to change from color to sepia and select it
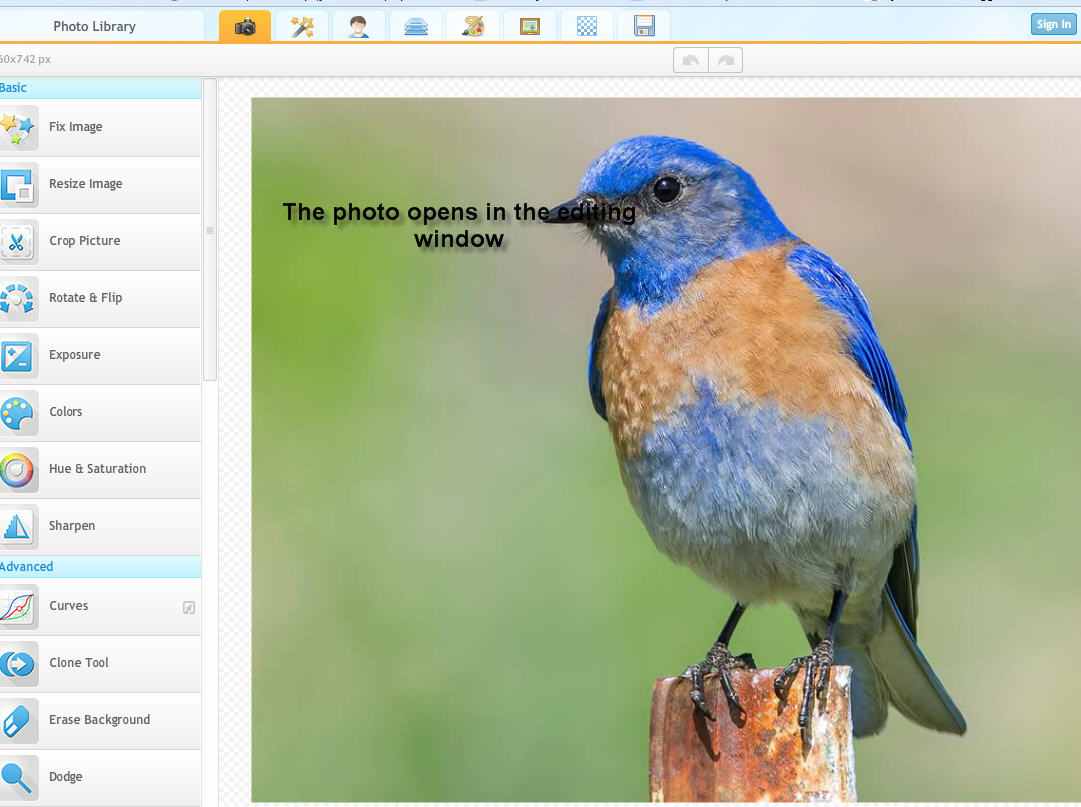
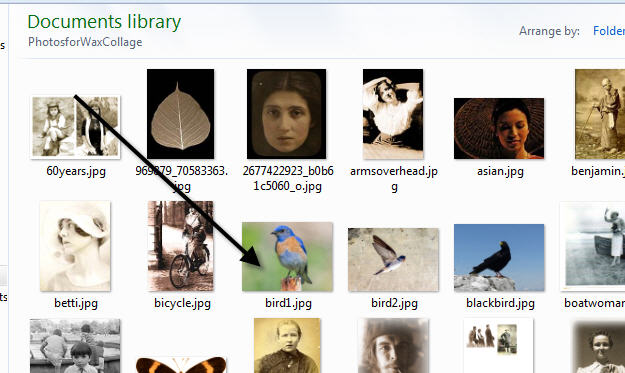 Your photo uploads into the editing window.
Look on the left side and find the bar that says Colors.
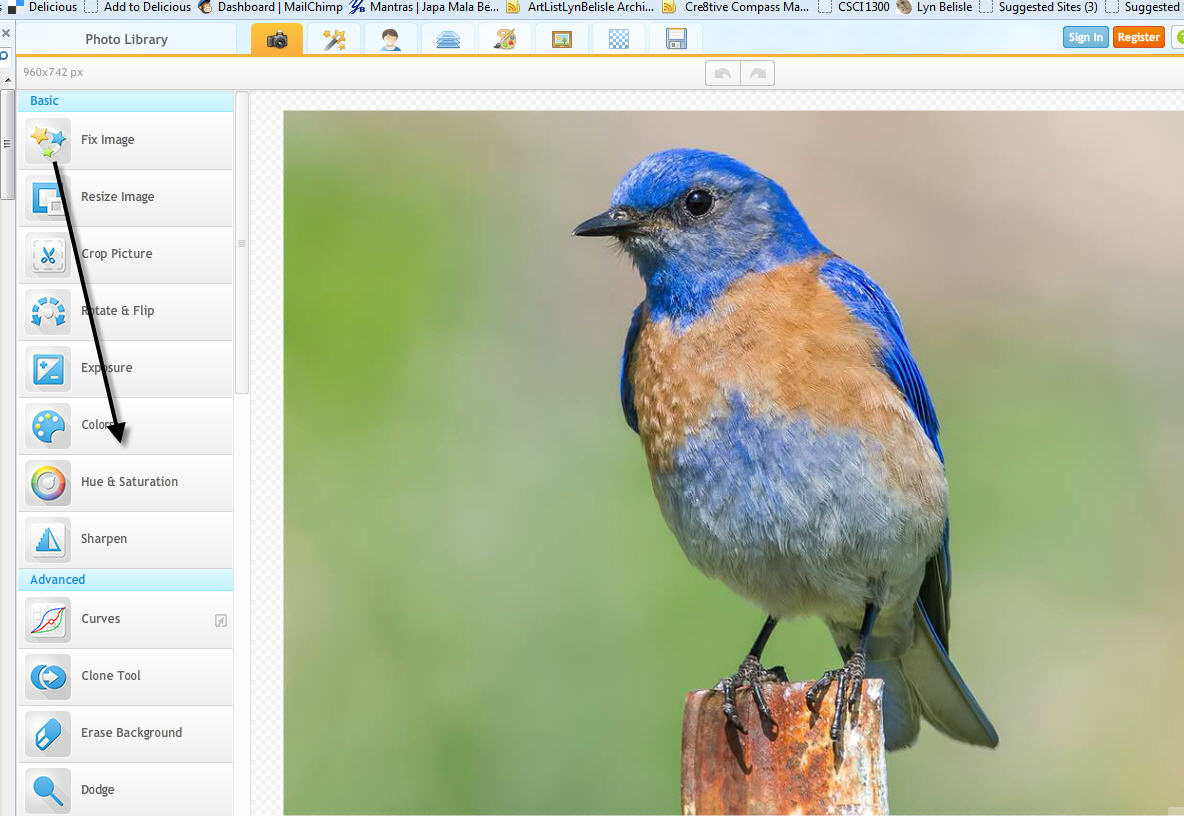 Click on it and scroll down that list until you come to the bar that says Sepia – choose the sepia tone that you like.
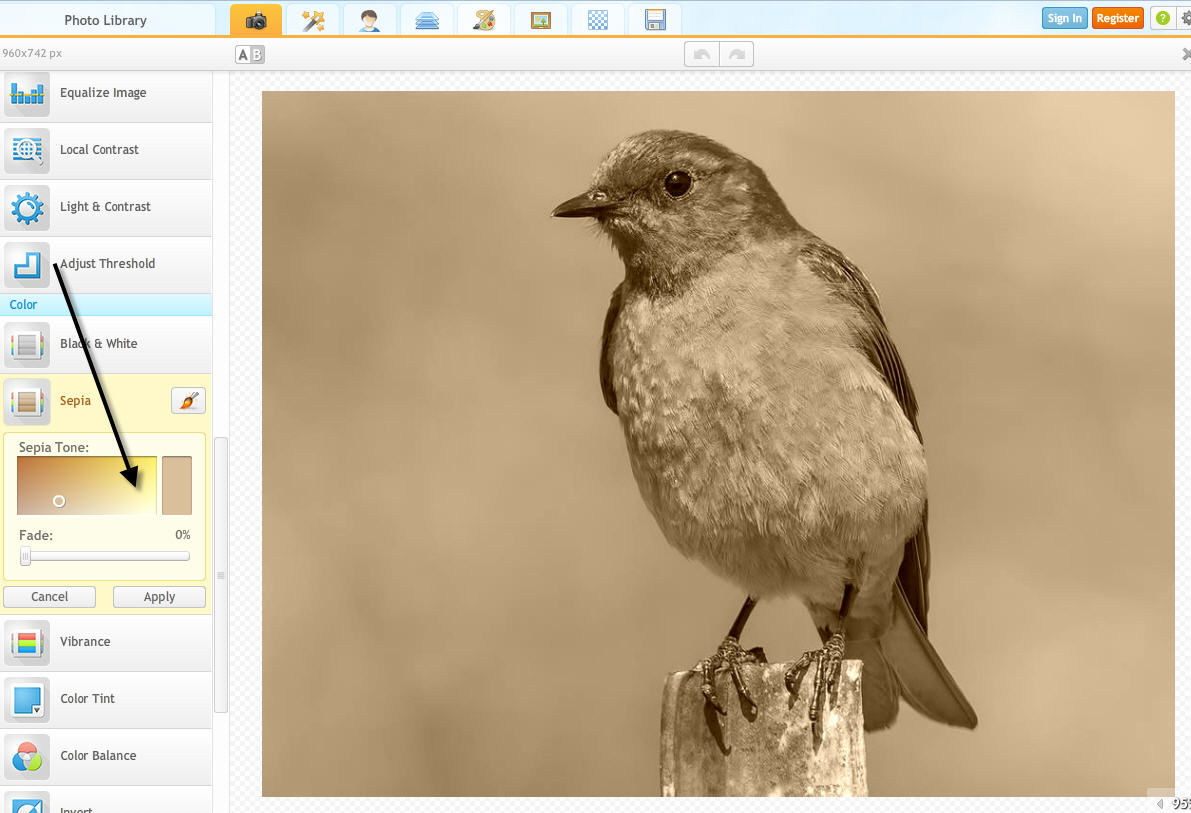 Once you’ve transformed the image to sepia, you can click on the Save icon at the top right and save it back to your computer
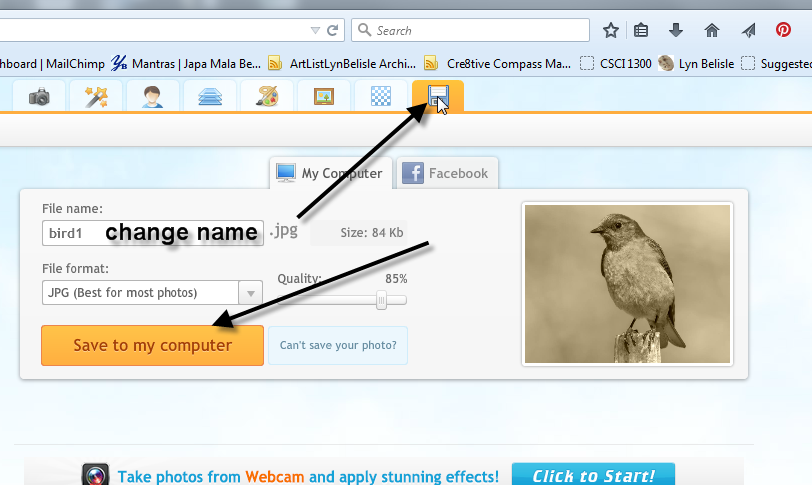 Give it a different name so it doesn’t overwrite our original color photo. Now you are ready to print it out and use it for your beeswax collage – or whatever creative purpose you desire!
Happy weekend, everyone!


Dear Shards;
I have a new email address
haroldrodinsky@!gmail.com
Thanks you,