Susie King Taylor – Inspiring Discovery, Remarkable Woman

Upcoming Black History Month is the perfect time to share what I have learned about a remarkable woman named Susie King Taylor.

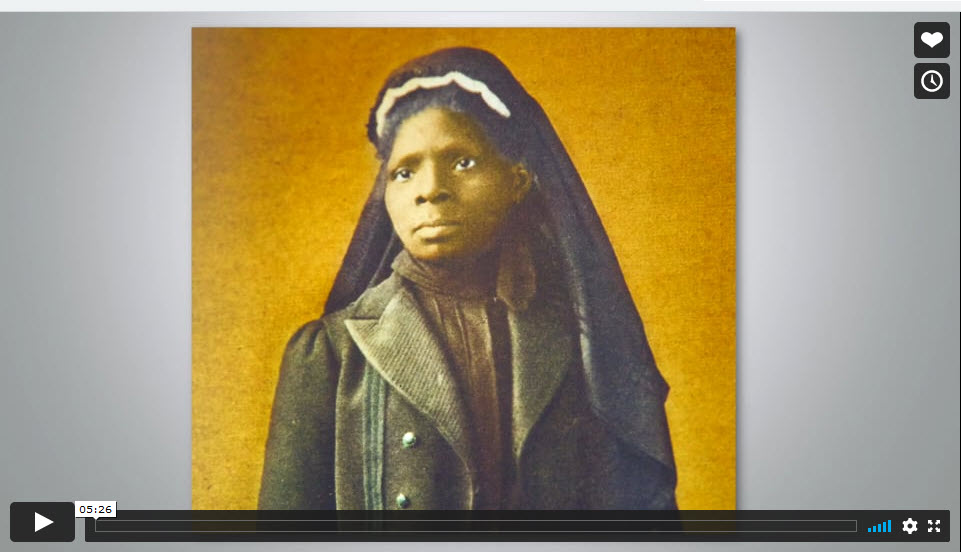
Several months ago, I was looking thrugh old photos in the archives of the Library of Congress and saw this one. Sometimes, images reach out like a compelling force, and this was one of them. What a presence!

After I learned that her name was Susie King Taylor, I started researching her remarkable life, then used her image to inspire an artwork.

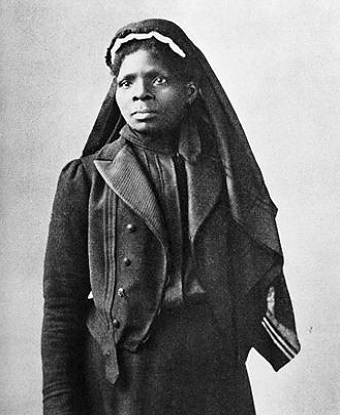
Born into slavery in Georgia in 1848, Susie King Taylor (born Susan Baker) lived on a plantation for the first seven years of her life. In 1855, Susie was allowed to go live with her free grandmother in Savannah. Despite Georgia’s harsh laws prohibiting formal education for African Americans, Susie attended two secret schools taught by black women and was tutored by two white youths.

In April 1862, Susie was able to escape slavery with her uncle and other African Americans who fled to a federal gunboat near Confederate-held Fort Pulaski. She went to live on Union-occupied St. Simons Island off the southern Georgia coast along with hundreds of other formerly enslaved refugees. There, at only 14 years old, Susie became the first black teacher to openly educate African Americans in Georgia.

That same year Susie married Edward King, a black officer in the 33rd United States Colored Infantry Regiment, and began serving as a nurse and laundress for his regiment. Off hours she taught the soldiers reading and writing and, according to her memoirs, “…learned to handle a musket very well…and could shoot straight and often hit the target.”

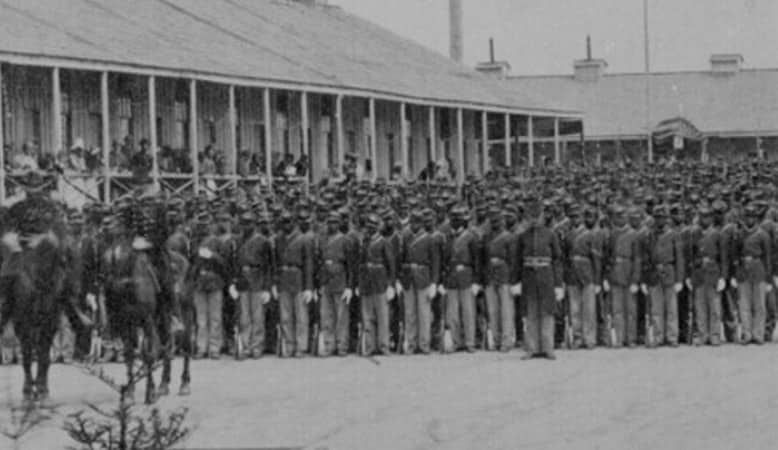
Susie served as a nurse at a hospital for African American soldiers in Beaumont, South Carolina, where she met and worked with Clara Barton. For four years and three months, she served the Union military without pay. Susie and Edward remained with the 33rd Regiment until they were mustered out at the end of the war. (Source)

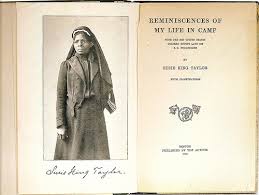
Susie King Taylor’s autobiographic book, Reminiscences of My Life in Camp, was written in 1906 and is still in publication. I ordered her book and  was transported by her wisdom and graciousness. She is a skilled and objective writer.

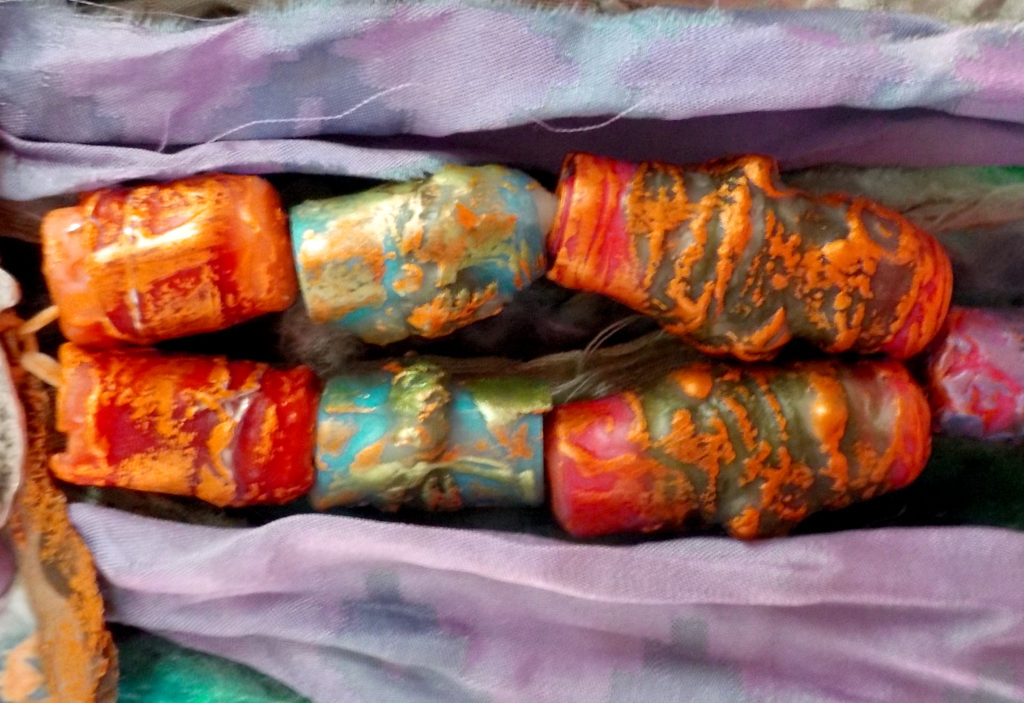
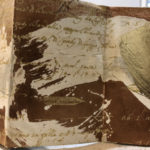
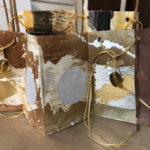
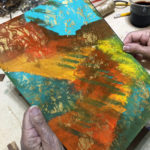
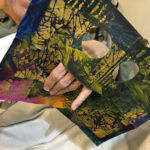
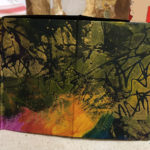
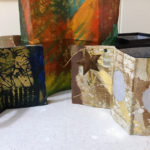
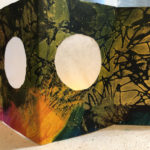
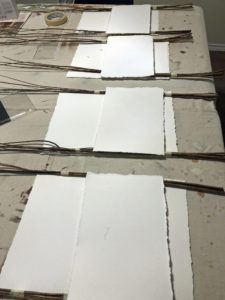
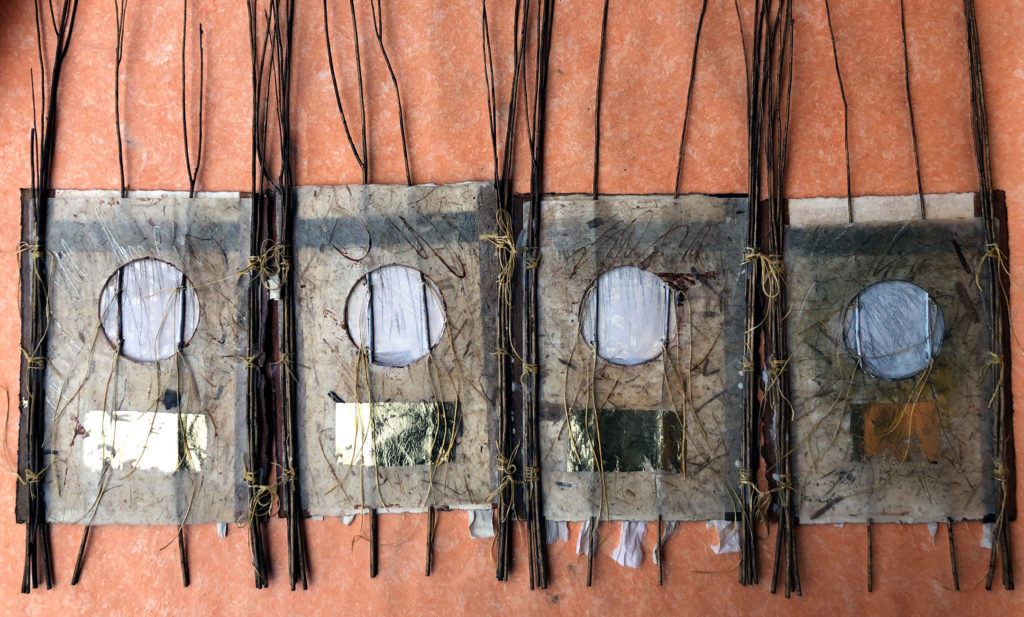
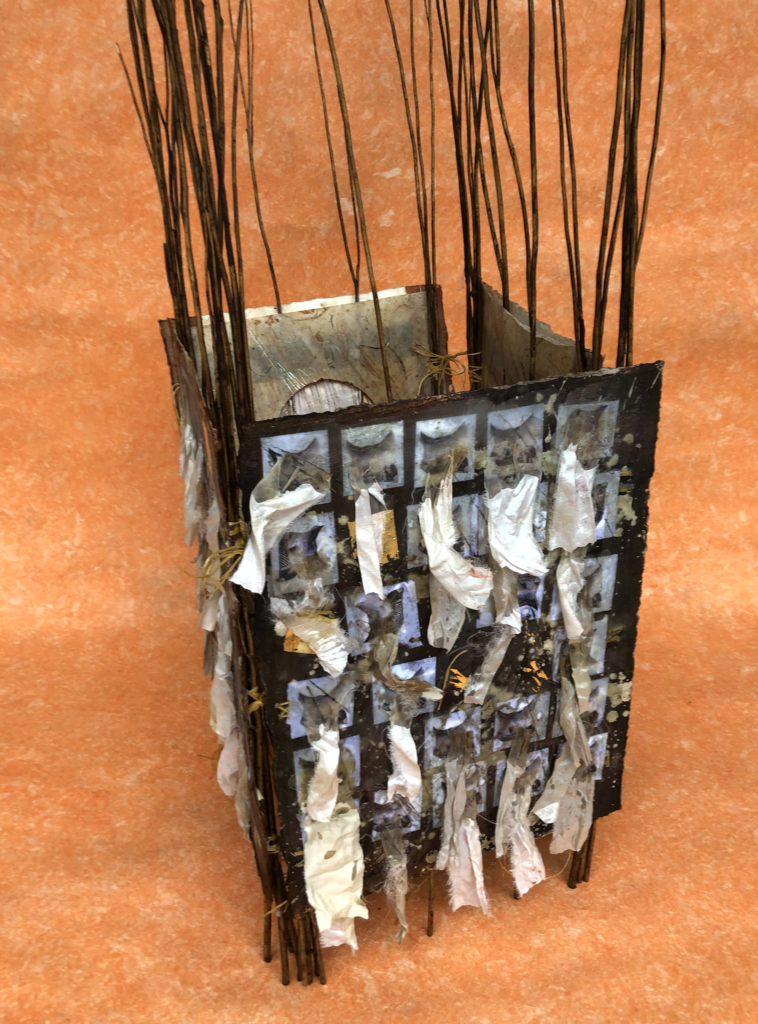
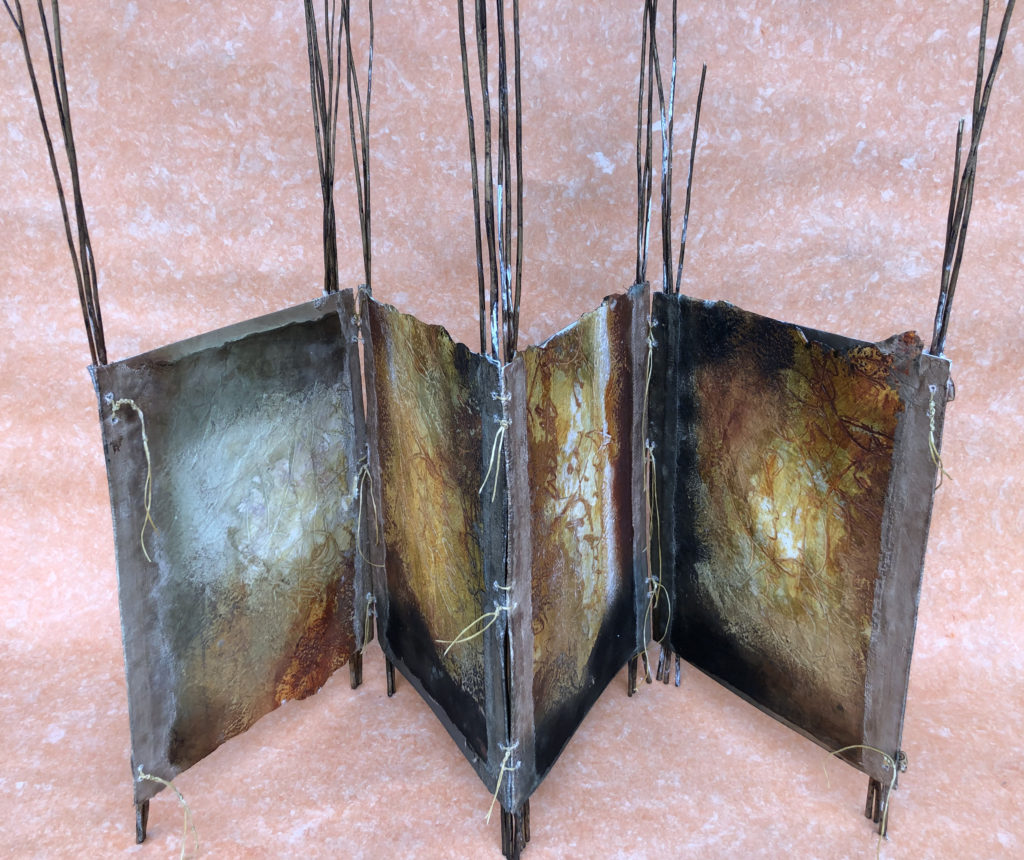
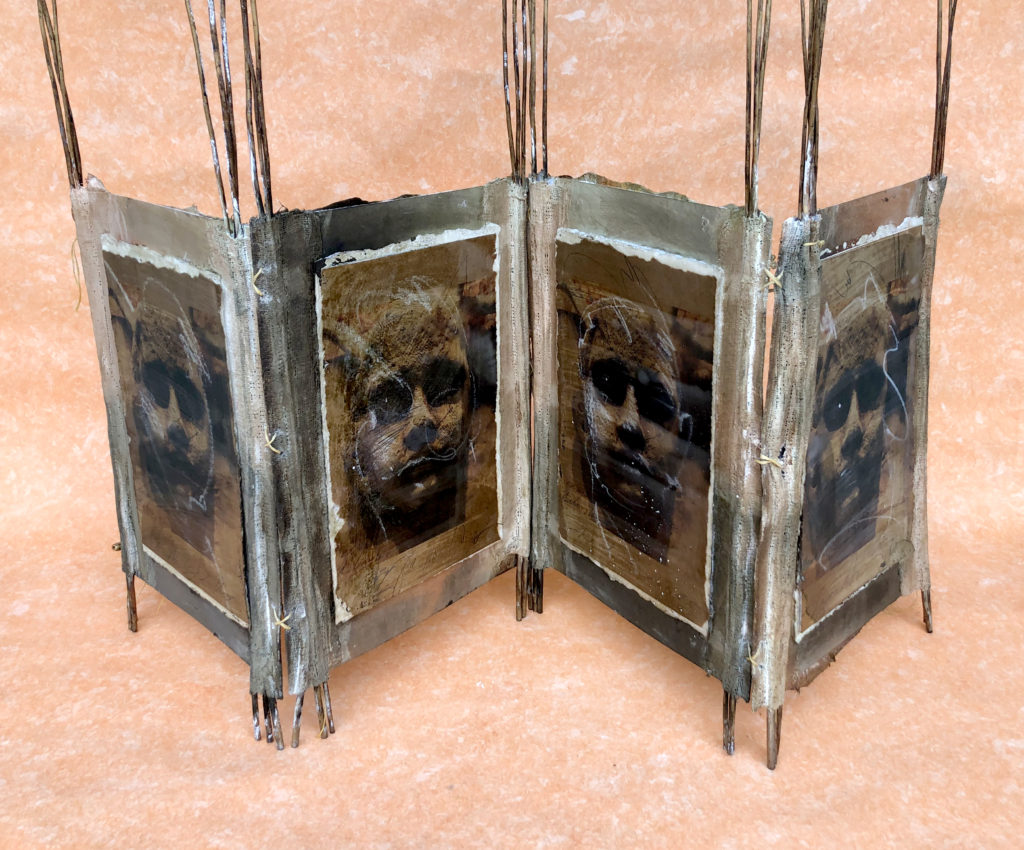
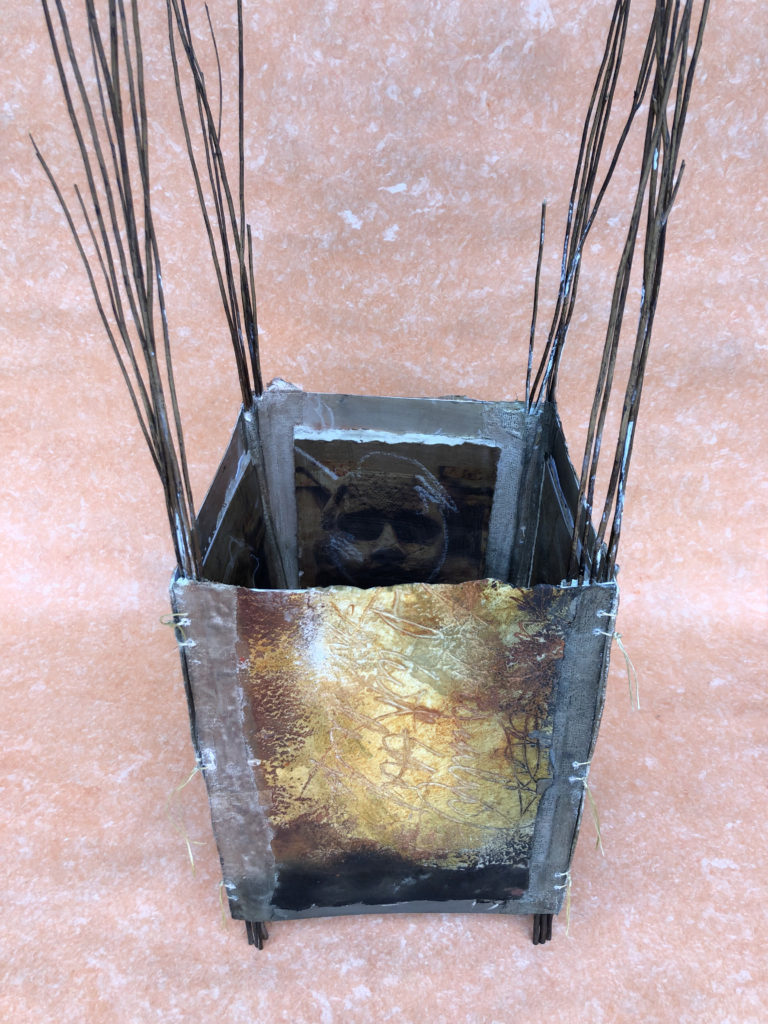
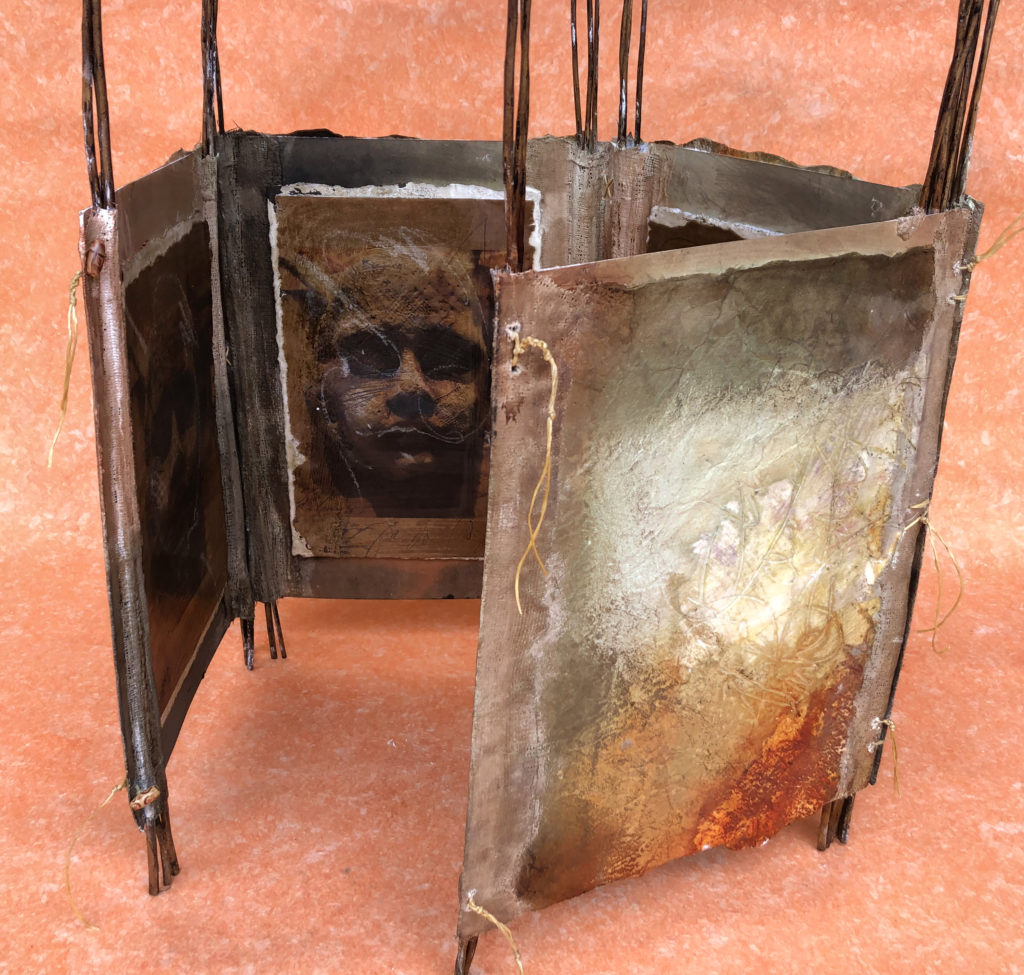
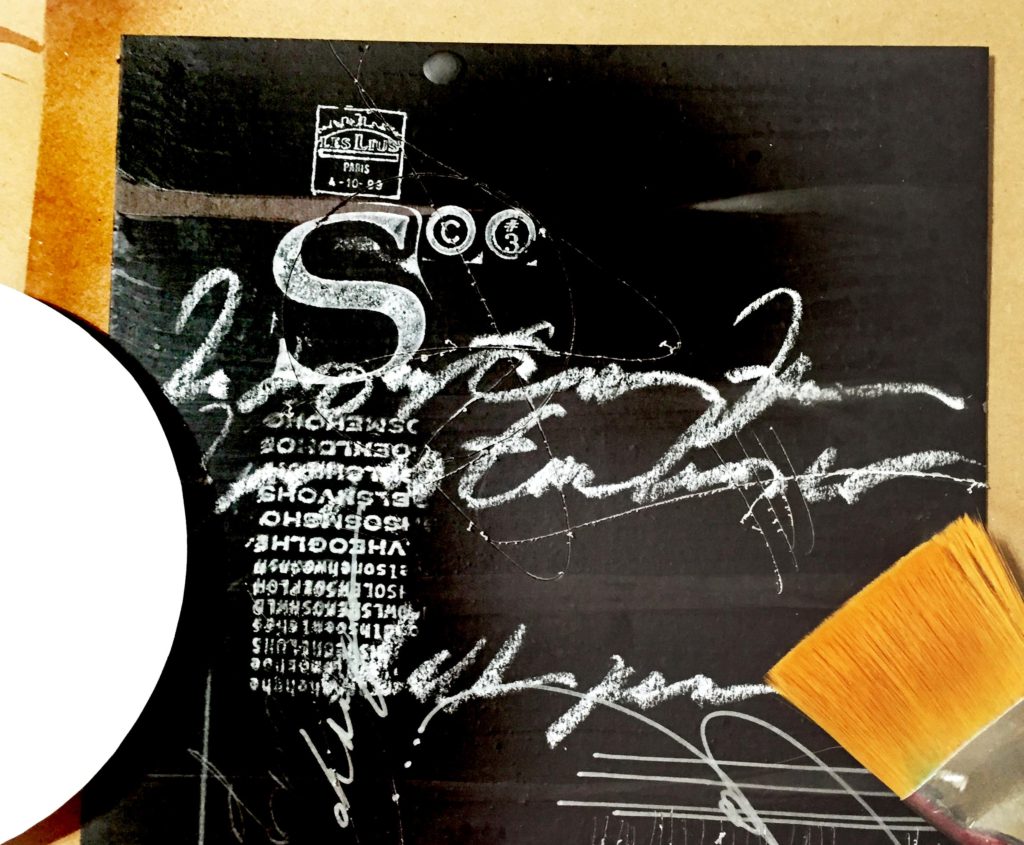
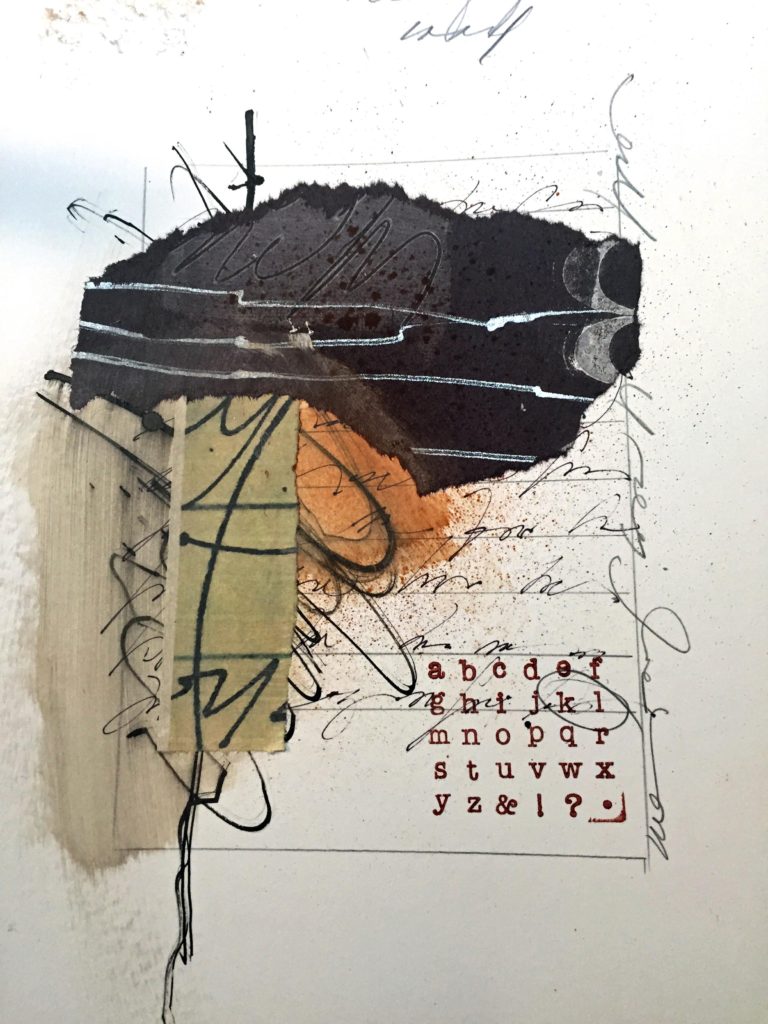
I was compelled to use her striking mage in an encaustic mixed-media collage, which was recently included in an article in the Winter 2020 issue of Encaustic Arts magazine.

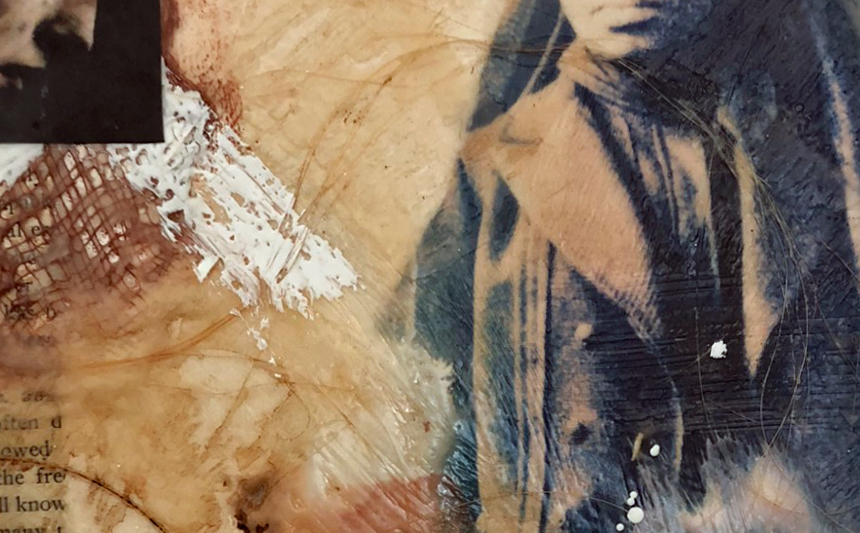
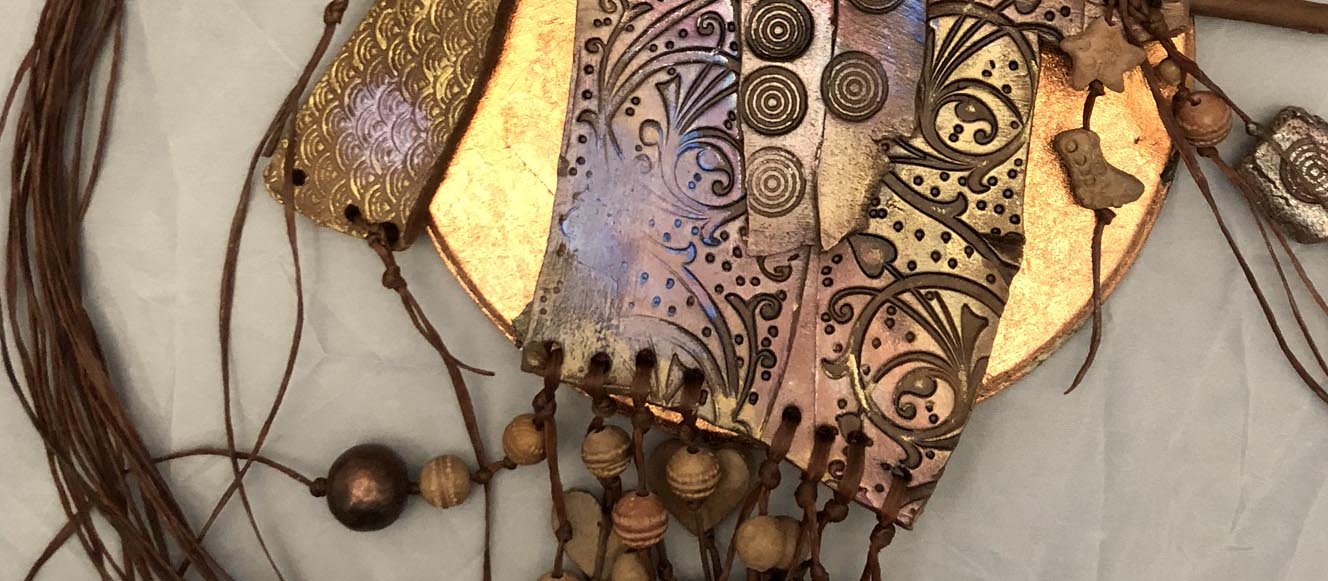
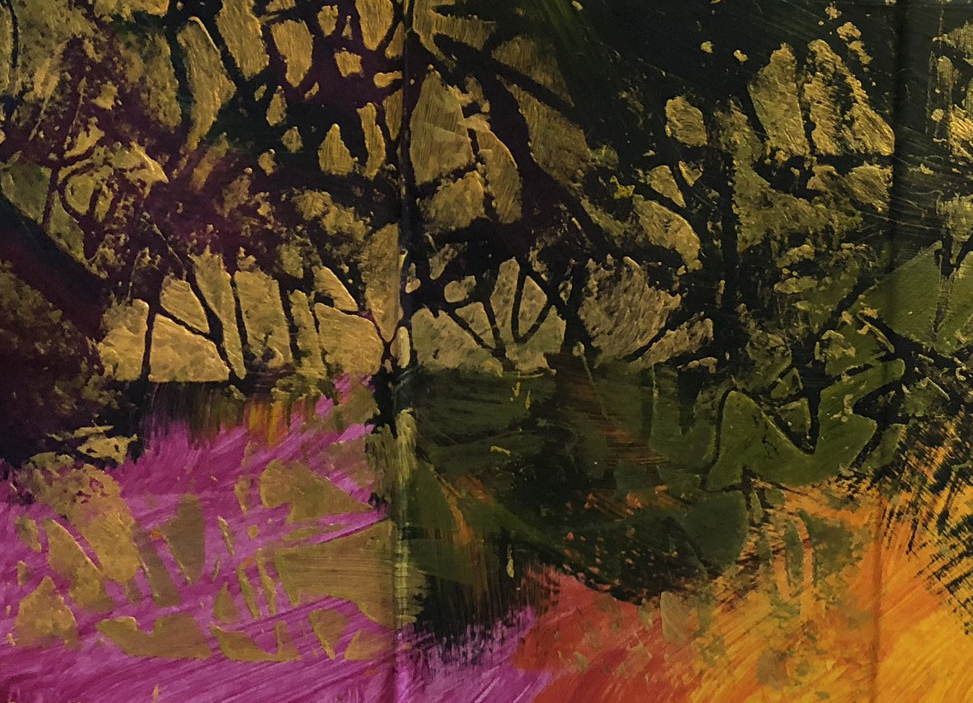
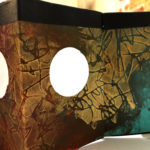
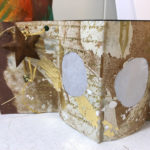
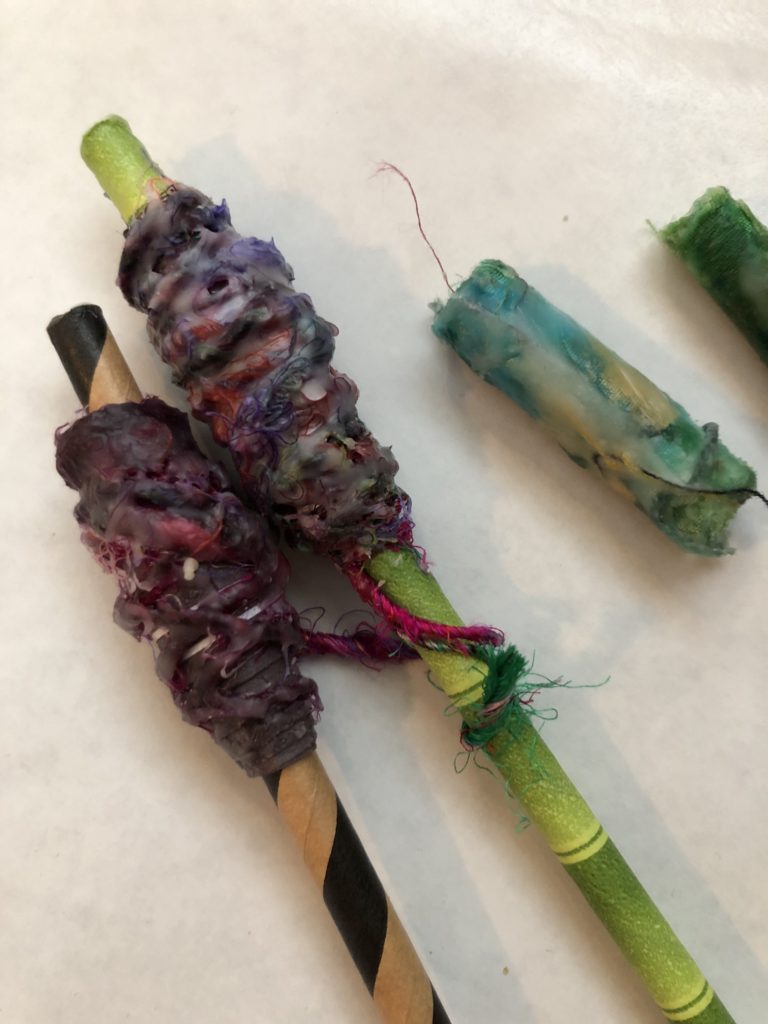
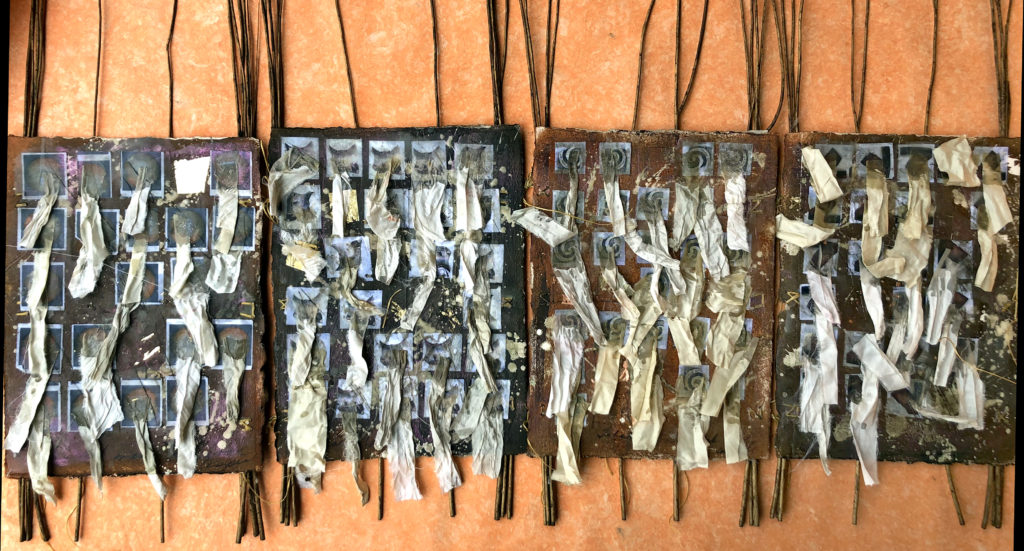
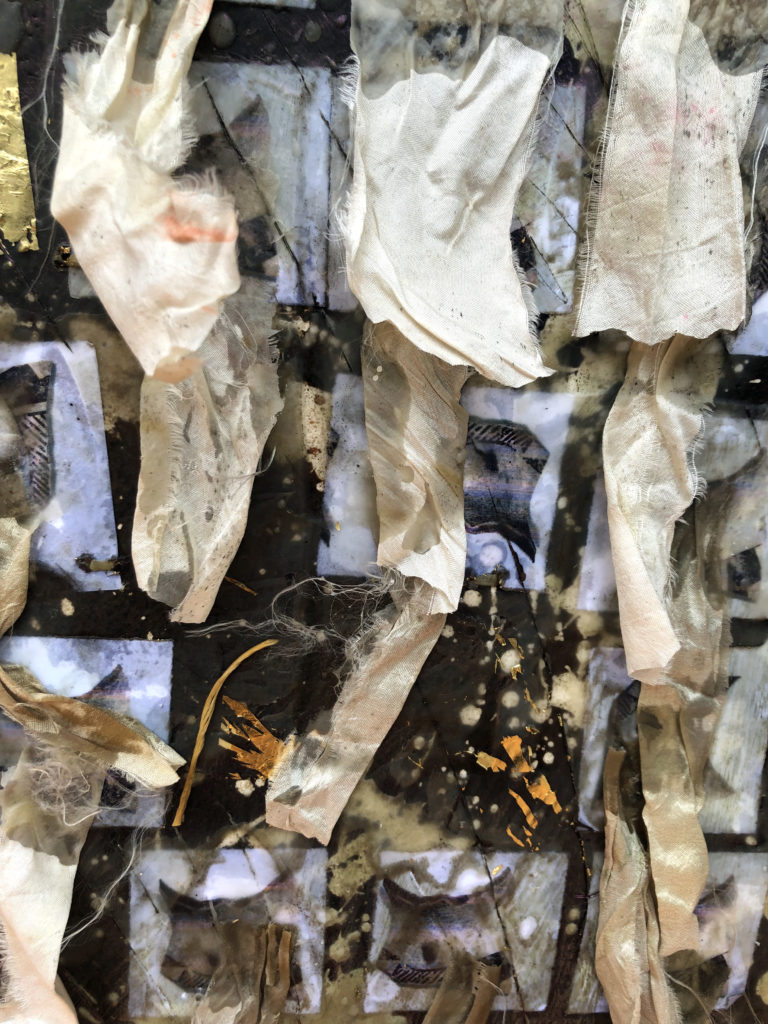
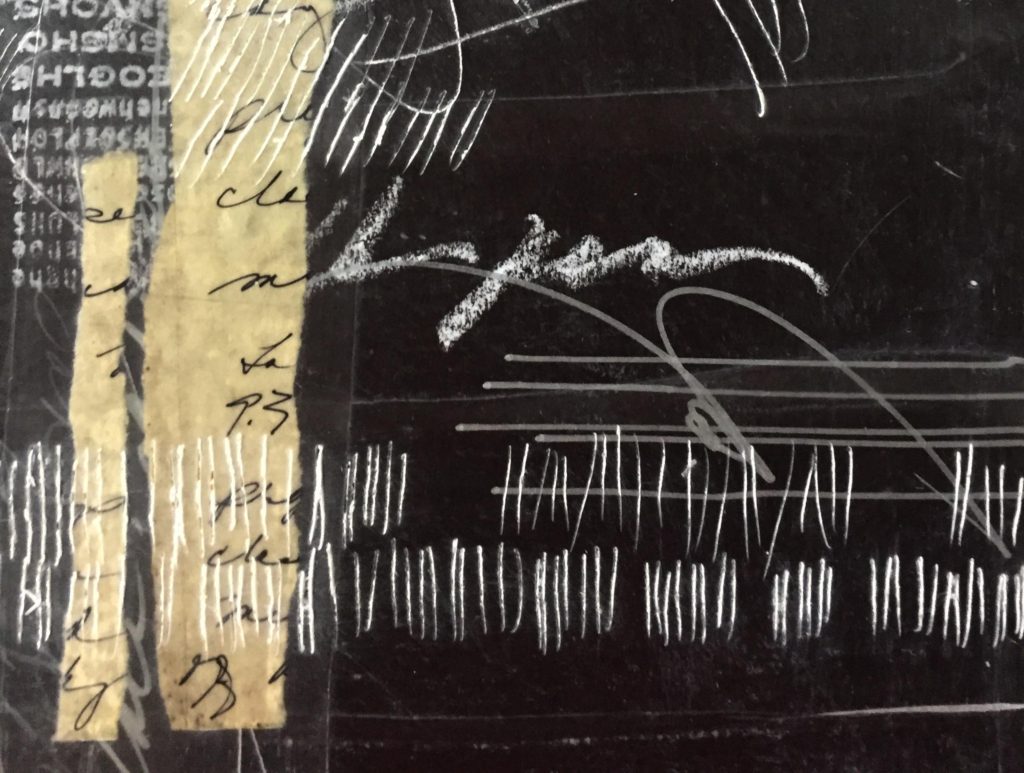
In the article, I wrote, “In one of my latest pieces, the subject is a striking African American woman. As usual, I knew nothing about her until her photograph almost leaped out at me from the screen as I was looking through Library of Congress for inspiration.  She was identified in the photograph as Susie King Taylor, and through research I learned that she was the first Black Army nurse. During the Civil War, she tended to the all-Black 33rd United States Colored Infantry Regiment. In my encaustic collage titled Susie, I included gauze and horsehair as material symbols of her life in the regiment.”

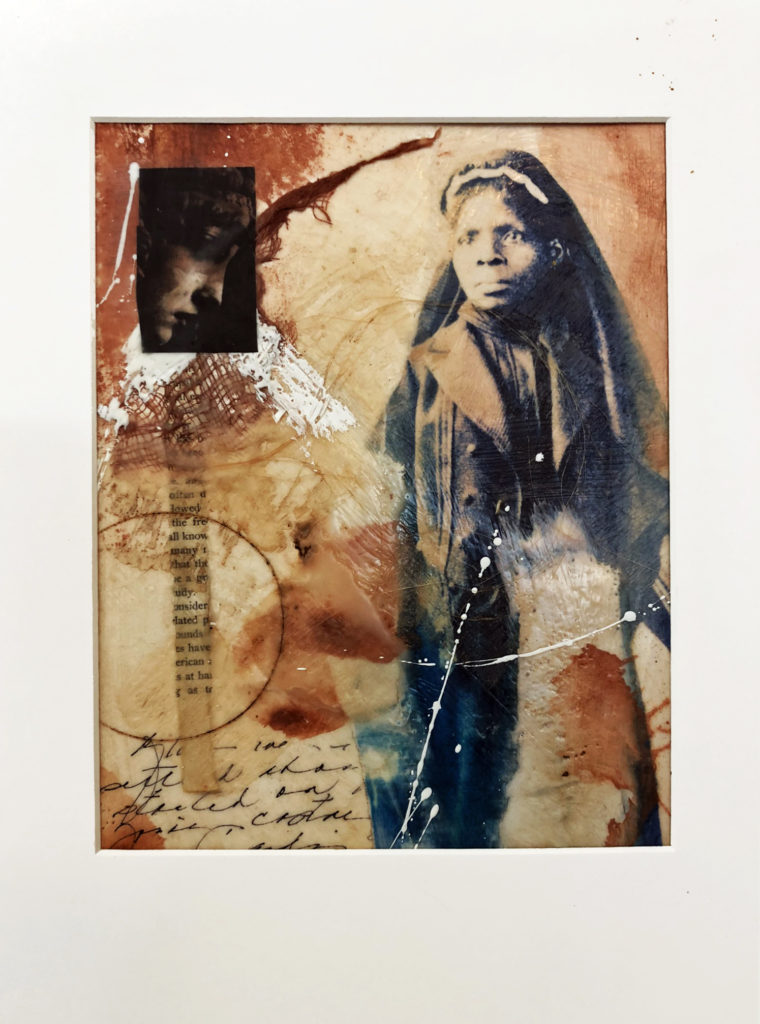
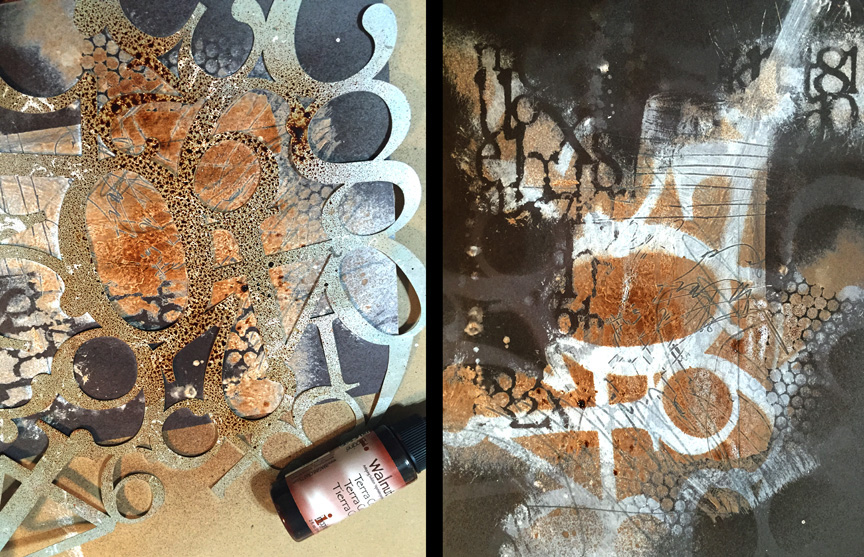
You can see the gauze and horsehair embedded in the beeswax layers in this detail. I used colors of indigo and sepia as the primary palette:

As always, photos and stories from the past continue to inspire and fascinate me as inspirations for my work. Susie’s story was one of the best discoveries I’ve made.

If you’d like to learn more about her, please watch this brief video about the life of Susie King Taylor, produced by the Georgia Women of Achievement when she was inducted in 2018. You’ll be glad you did.

See you next time, and take good care,

Lyn

“Where can I get . . . ? (my top five sources – non-Amazon!)

The New Year is a great time to identify the creative materials you use the most .  These are your signature media, your “desert island” necessities. This list can help you in your resolution to streamline and simplify your studio space once you know what you will really use.

I know what MY own signature media are. Here are the Top Five that I use extensively in my own work and in almost all of my workshops (Raise your hand if you’ve used walnut ink because you learned about it in one of our workshops!)

  1. Tsukineko Walnut Ink
  2. Beeswax
  3. Book Foil
  4. Sari Silk
  5. Artificial Sinew

I get a lot of questions about where to find these materials since they are not really mainstream art/craft materials. I prefer to buy from places other than Amazon (although the Big A is certainly fast and convenient).

But when I can obtain my signature materials from other artists or independent retailers, I try to share those sources.

Here they are – enjoy looking! :

Tsukineko Walnut Ink:

https://www.imaginecrafts.com/walnut-ink/view-grid/1351

I have always ordered my walnut ink spray from Imagine Crafts. They have friendly customer service and ship quickly.  It’s often hard to find walnut ink at places like Michael’s or JoAnns (a lot of people have never heard of it) but it’s always in stock at Imagine.

If you browse around the Tsukineko inks, you’ll see that there is a pastel set (Cherry Blossom, Cornflower, Willow, Lilac) as well as an earth-tone set (Java, Eucalyptus, Walnut, Terra Cotta). Either set of four bottles retails for $23. Any color can also be purchase singly for $5.70.

Beeswax:

There are many different forms of beeswax and thousands of ways to use it.  I use beeswax for encaustic collage and for assemblage. I use it on clay and on fiber. My preferred beeswax is all natural White Beeswax pellets, refined in the USA without any chemical bleaching aids. My favorite source for this is Swans Candles in Tenino, WA.

Swans has a fine selection of beeswax and other encaustic supplies (including Damar Varnish if you want to make your own encaustic medium). Their prices are excellent. You can buy a pound of Natural White Beeswax pellets for $9.95.

Most retail art stores now sell beeswax and other encaustic supplies, but you can expect to pay almost twice as much per pound. Even on Amazon, a pound of R&F Encaustic White Beeswax lists at $18.86.

Book Foil:

This foil, also known as Deco Foil, is generally used for transferring metallic finishes to craft projects using an adhesive. Here’s a link to a video that shows demos about that. However, if you’ve taken an encaustic workshop with me, you know that we also use it to create fine gold marks onto a waxed surface.

One of the best places to order this foil is Dharma Trading Company. They are generally known for their fiber art supplies, but you will love their site for lots of other reasons! For Deco Foil, for example, they have the best selection and lowest price of anyone, including Amazon. Currently, they sell a cylinder of five sheets, 6×10″, for just $3.89.

Sari Silk:

I discovered my source, Felt Better, on Etsy several years ago, and I have ordered from them many times.

This is what the owner, Michelle, says about her sari silk: “The beautiful, exotic sari ribbon I carry is all the best things about recycling that I love. First and foremost, it helps our fragile planet by making use of material that would end up in landfills. Did you know that it helps women too? It’s a fair trade product that works close with women co-op groups, insures they get a fair wage, that helps them support their families….and most importantly, no child labor is involved.”

I use sari silk for so many things – for journals, assemblage, spirit dolls, and just to hang in my studio for pure enjoyment of its colors, history, and textures. A 100 gram skein (about 45 yards) costs $12.50 at Felt Better.

Artificial Sinew:

Do the words “cat gut” make you shudder? What about “sheep sinew?” Those were traditional material used for lacing and tying leather and gourds. Fortunately, artificial sinew is now available because I use a lot of it! It’s a material I use for clay assemblage, bead stringing, fiber art, and almost anything else that requires tying one thing to another thing.

I used to buy it at Tandy’s Leather Store, but have discover a new online treasure trove. The Thread Exchange specializes in the kinds of thread that are not sold in stores, including a huge selection of artificial sinew. The company is based in North Carolina and its website is user-friendly.

They have almost twenty colors of sinew, although I am partial to the Natural and the other earth colors like Terra Cotta. A 17-yard roll is about $5.00 and a 265-yard roll is only about $15.00.

For 2020, I would like to make a commitment to bring into my workspace only those materials that I really need, use and love. Hmmmm… it’s not always easy, because experimenting with new things is part of the game.

So here I go, tempting you with great sources for wonderful materials that may be new to  — I hope some of these will inspire your work for the new year. Thanks for reading SHARDS!


Two Pamelas and me, scumbling and waxing to our hearts’ content

Wednesday’s Votive Candle Screen get-together was a de-light – I was joined in the studio by Pam B. and Pam F.  and the three of us spent a relaxing afternoon experimenting with surface design on paper for a candle screen project.  I’ve taught workshops on this topic before, but this session had a more intensive focus on hand-enhanced decorative papers.

This project is perfect for the holidays. Paper is folded and slit in a way that allows it to open in the middle for a little battery candle to fit inside. I wrote and article about this for Cloth Paper Scissors magazine a few years ago.

Alas, the magazine is no longer around, but I still have the article. Here’s an example of the folded paper votive screen:

We spent more time working on surface design than we did on decorating the finished votive screens.

First experiment – we covered a sheet of 9×12″ lightweight watercolor paper with three colors of acrylic paint, dry-brushing and “scumbling” the colors together. After that first layer dried, we stenciled over it with gold acrylic paint – here’s what that looked like:

Our next experiment involved Italian decorative paper with gold writing on it. We made loose brushstrokes of melted beeswax over the paper, then sprayed it with various hues of walnut ink. Here’s one of the Pamelas rubbing off some of the walnut ink from the cooled wax:

This paper folded beautifully into the votive screen shape:

Here are some more photos of various stages of the process of assembling the votive screens. I honestly don’t know which treatment I liked better – the scumble and stencil, or the beeswax and walnut ink.

The votive screens turned out well, but all of us decided that the hand-decorated paper surfaces were the real winners. Both of the techniques we used – scumble and stencil and beeswax and walnut ink –  would lend themselves beautifully to abstract painting, which will be my next workshop coming up in February of 2020.

Thanks to the two Pamelas for experimenting with me!

Here’s the list of materials if you want to try this on your own:

Votive Candle Cards Materials

  • 9×12 construction paper or other medium weight crafting paper
  • Two 4.5×11 pieces of decorative paper
  • 4 2.5” square pieces of translucent vellum or translucent rice paper
  • Two ½” bands of contrasting paper for side trim
  • Compass or large round hole punch
  • Craft glue or double sided tape
  • Stamps, stickers, metallic pens – whatever “de-lights” your heart
  • Small twigs, reeds or sticks
  • A battery votive tea light

As a special gift to you, I’m sharing the original article that I wrote for Cloth Paper Scissors with all of the directions and how-to photos for making your own mixed-media votive candle screens. I hope you enjoy it! How about making one for every person at your holiday dinner table?

VotiveArticleCPS

Happy Holidays, and thanks for reading SHARDS!

Photo by Food Photographer | Jennifer Pallian on Unsplash


Wax and Clay Talisman mini-workshop

Last week my friend, fiber artist Mary Ann Johnson, arranged a workshop for a small group of four, including her sister Rosalie who was visiting from out of town. The other two participants were artists whose work I have long admired – so it was a very creative afternoon!

This is a workshop that I’ve taught before, but always love, because of the variety of techniques. We worked with clay, paper, wax and fiber to make personal talismans. One of the most amazing parts of the process is rolling paper into beads, then (optionally) adding fiber for texture before painting them with beeswax.

Jean Dahlgren, one of the participants, brought some of her fabric beads (top right in the photo above), and they also took the beeswax beautifully.

One of the nice things about these beads is that you can write a secret message along the inside of the paper before tightly rolling the strip. Rosalie chose to make her beads very simple, without fiber embellishment, so she can see the structure better.

When we started working on the clay faces, some of us chose to add only walnut ink to emphasize the contours, and others added beeswax and metallic finished – bling. The formula for a raku-like effect is a bottom coat of silver, another of blue metallic, then red metallic, then gold metallic to blend all of the layers together randomly.

The handmade beads were strung on strands of Sari silk and sinew.

As an added attraction, we made simple paper origami boxes to hold our beads and our clay faces.

Besides making wax and paper beads for their talismans, workshoppers brought meaningful objects to tie into the silk and sinew strands. Rosalie added charms symbolizing each of her children and family members.

See how her Family Blessing Talisman turned out, filled with magic!

Speaking of blessings, there’s nothing more wonderful than creating meaningful work with a group of like-minded friends. Thanks, Mary Ann, for requesting this workshop!

Email me if you’d like to suggest a small-group workshop at my studio, and if you’d like to play with your own clay talisman faces, you know where to find them! Yep, my Etsy shop, Earthshards.

Stay cool and creative!


Screens and shelters as art

archaeological excavation shelter

screen panels of heavy paper and sticks

As part of my work with the “Unearthed” series, I’ve been working with panels of paper, wax, sticks and silk to construct three-dimensional sculptural objects that can be configured in different ways.

This has become a very exciting project for me, informed and inspired by shelters and screens for archaeological excavations as well as the idea of versatile art panels that can be viewed from many perspectives to conceal and reveal.

Here’s one that is almost finished. It is large, about four feet long and two feet high.

Lyn Belisle, Shelter Screen #1, 48″ x 36″ Paper, wax, silk, pigment, and sticks

This is a close-up of the surface of one of the panels – torn silk is adhered with beeswax to squares of archeological symbols printed on paper. It’s multilayered and complex. The surface is meant to suggest ancient shards and scraps that have been collected and stuck to experimental surfaces for further study.

Detail, “Shelter Screen #2”

Another great thing about working with these kinds of panels is that each panel has two sides. Here is the reverse side of that piece.

“Shelter Screen #2”, reverse side

The artwork can be displayed on a wall as a four-panel work, or it can be configured on a pedestal or table as a three-dimensional object.

Here is another Shelter Screen in the series that also has two different-sided surfaces. This one is slightly smaller, about 3.5′ long.

Lyn Belisle, “Shelter Screen #3”, Paper, wax, sticks, acrylic, pigment

The back of this screen features photos of one of my earthenware face shards in a series of altered photographs.

“Shelter Screen #3”, reverse side

And it can be hung, or folded or tied into a square with either side out!

Because I have very limited studio time these days with all of the Art League duties, I find that working with these shelter panels is like meditation. Each one that I construct is slightly different, and when they are stitched or hinged together, their possibilities are endless.

I love the way this process grounds me back to the basics of building. And the fact that they are inspired by archeological screen and shelters gives them a deeper meaning.

Here is my second “Unearthed” sculpture displayed in front of a Shelter Screen – they were obviously meant to be together!

It’s as if the past is reaching out into the present, giving me guidance. Maybe “Nine Antlers” has a hand in all of this!

“I held my breath as we do sometimes to stop time when something wonderful has touched us…” ~ Mary Oliver

RIP


Marfa – and wax on black exploration

In the 1970s, minimalist artist Donald Judd moved to Marfa, Texas, where he created giant works of art beneath vast desert skies

I’m back from a week in West Texas and the beautiful Davis Mountains. One of the best parts of the trip was visiting Marfa and connecting with minimalist artist Donald Judd’s vision. There’s a great NPR article about this – click here. I love the quote by sculptor Campbell Bosworth“You just come out here and you feel like, I want to make something; I want to do something!”

Maybe it’s the minimalist influence, but it must be true. The Marfa getaway ignited my creative curiosity, and as soon as I got back, I went into the studio and started working in black and white on an experiment with black substrates and beeswax.

I wondered what would happen to the translucent layers of beeswax when they were applied over a dark background.

I used an absorbent black paper and added some white markings with different kinds of media – crayon, stamps, paint:

I added a layer of beeswax – it made it kind of glossy, and did penetrate into the paper, which had been a concern. You don’t want it to just sit on the surface of the substrate:

More experiments – black and white (and a bit of walnut ink):

Like all experiments, some of the techniques worked well, and some were definitely “learning opportunities.” But there is a certain potential for interesting effects that are both chalk-like and smokey. I am going to push these ideas a little further and see what develops (like old black and white film).

Now that I’ve been “Marfa-ized” and infected with some new ideas, it looks like I may be spending more time at the studio, perhaps even developing a wax on black workshop!


Wax & Words workshop worked wonders :)

The Wax & Words Workshop was a winner. We all had a great time, and the new Semmes Studio at the Art League worked well as a venue.

As usual, the participants were the stars, pulling out creativity and originality and taking the process their own way with grace and wonder – thanks, y’all!

I’ll let the video speak for itself – if you can’t see the video window, click on the Vimeo link below.

Lyn Belisle Workshop: Wax & Words from Lyn Belisle on Vimeo.

There will be lots more in the Wax & Words eBook – hopefully by the end of July. What fun!

Workshop time: WAX & WORDS

A quick note . . Just wanted to let SHARDS readers know that I’m offering a workshop on Sunday, June 24th at the newly refurbished Semmes Studio on the grounds of the San Antonio Art League & Museum. I’m so excited to be teaching again, especially since this will be the first workshop since the new studio has been upgraded with a skylight and bathroom!

You can read about the workshop, WAX & WORDS, by clicking on the image, below. It’s a great way for beginners to learn about mark-making and encaustic techniques.

Hopefully, this will be the first of many creative workshops there. Here’s another link for details.

A portion of the tuition will go to the Art League – it’s a 501(c)(3) – and by the way, it’s membership time if you’d like to join. Art League members always get discounts in my workshops! Join here.

PS – and yes, the Semmes Studio is air-conditioned!

New critters on the block . .

Oh, boy – the First Friday Art Walk in Marble Falls is this week (February 2nd, 5-8 pm), and as part of it Marta Stafford’s gallery is having a bee-youtiful celebration featuring jazz, honey wine, valentine-inspired jewelry, and my beeswax photocollages and B Beautiful dishes.

I wanted to do something extra and different for this show, something that uses beeswax in a new way for me, and I came up with these five fun wall sculptures using earthenware, gauze, sticks, wire and beeswax and Secret Sauce (aka walnut ink).

Here’s the first one, called “Sacred Sentry”.

I’m calling this series “Earthen Wax & Wings,” and I have a feeling that I’ll be doing more of these. This one’s called “Cloudhopper” – a very happy creature.

Each piece has a tag with its name – and each one has a story that you can read in the faces if you use your imagination. Here’s “Icebound Angel” – so what’s HER story? You might not want to mess with her.

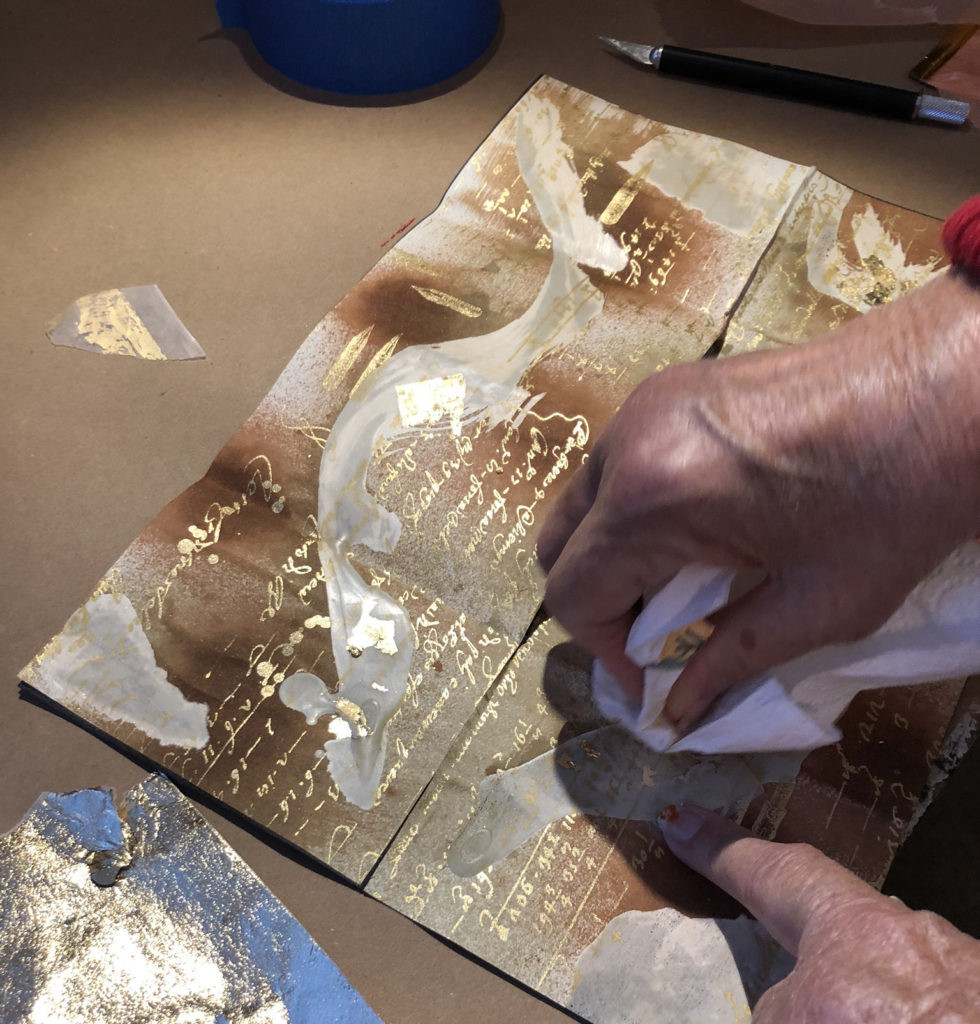
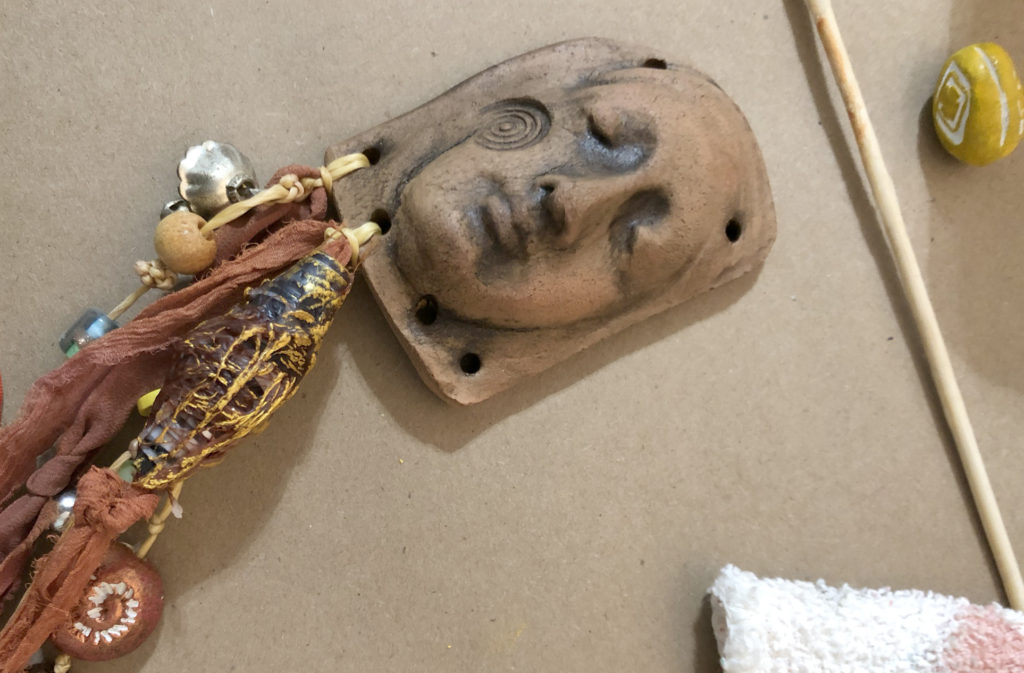
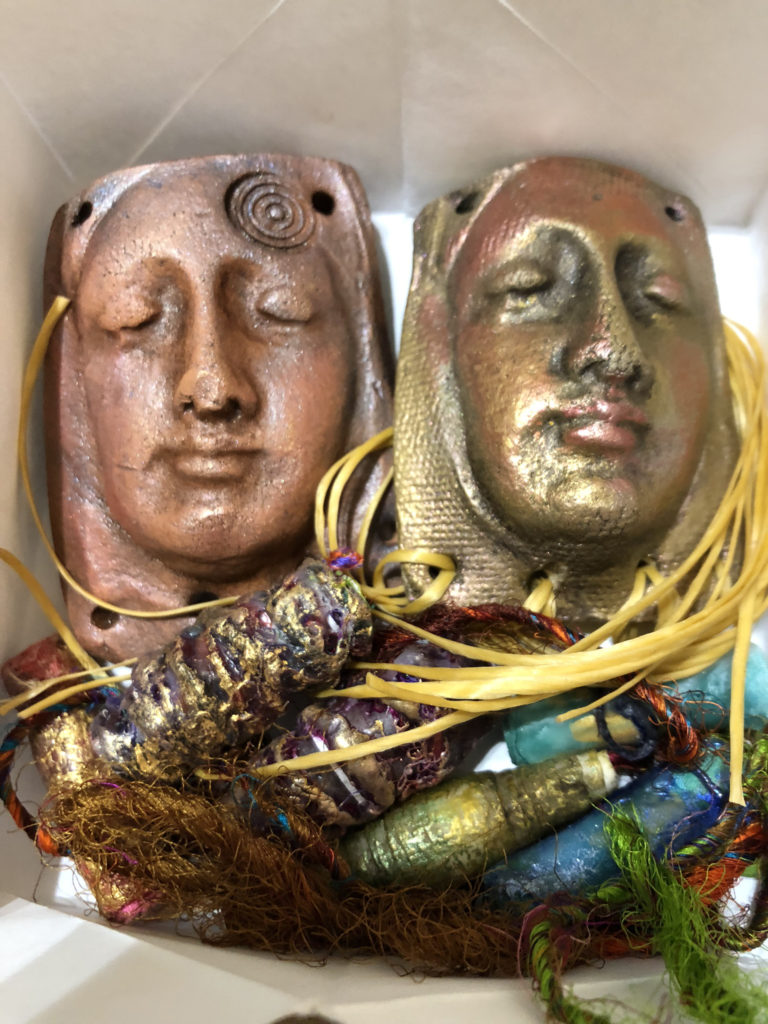
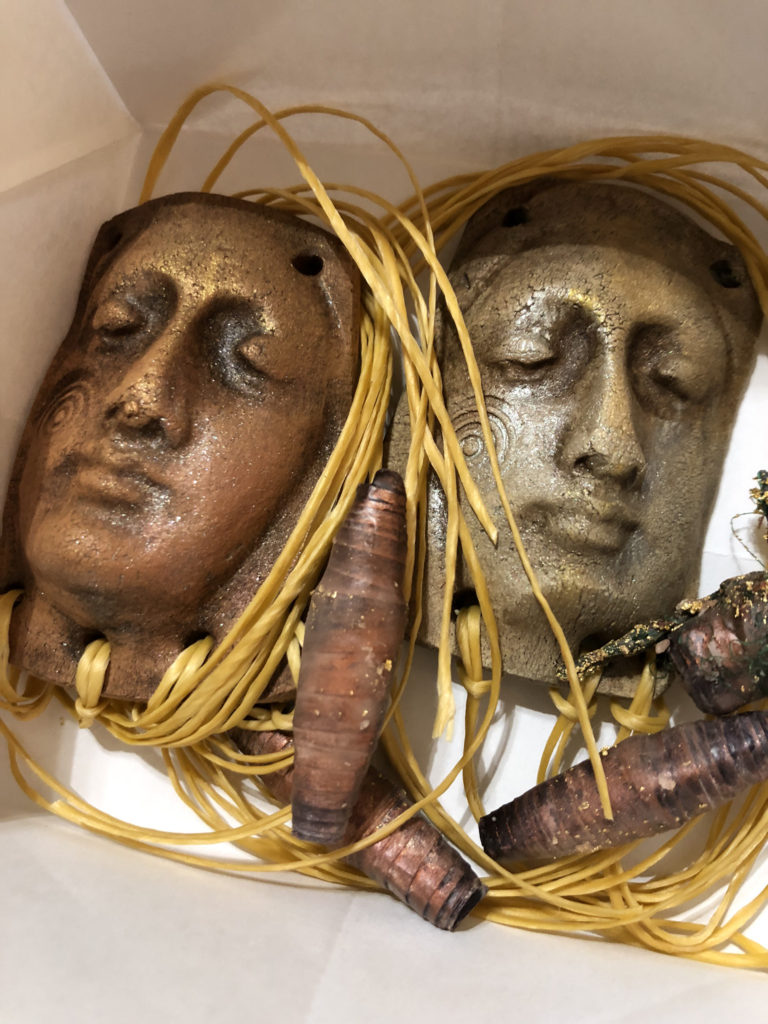
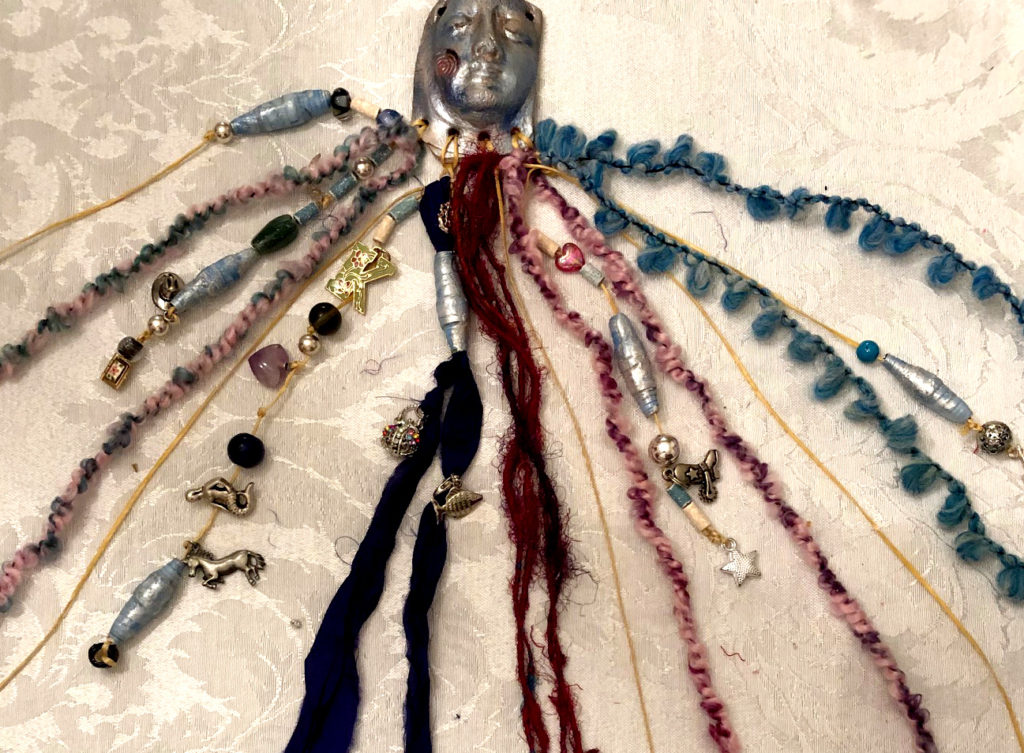
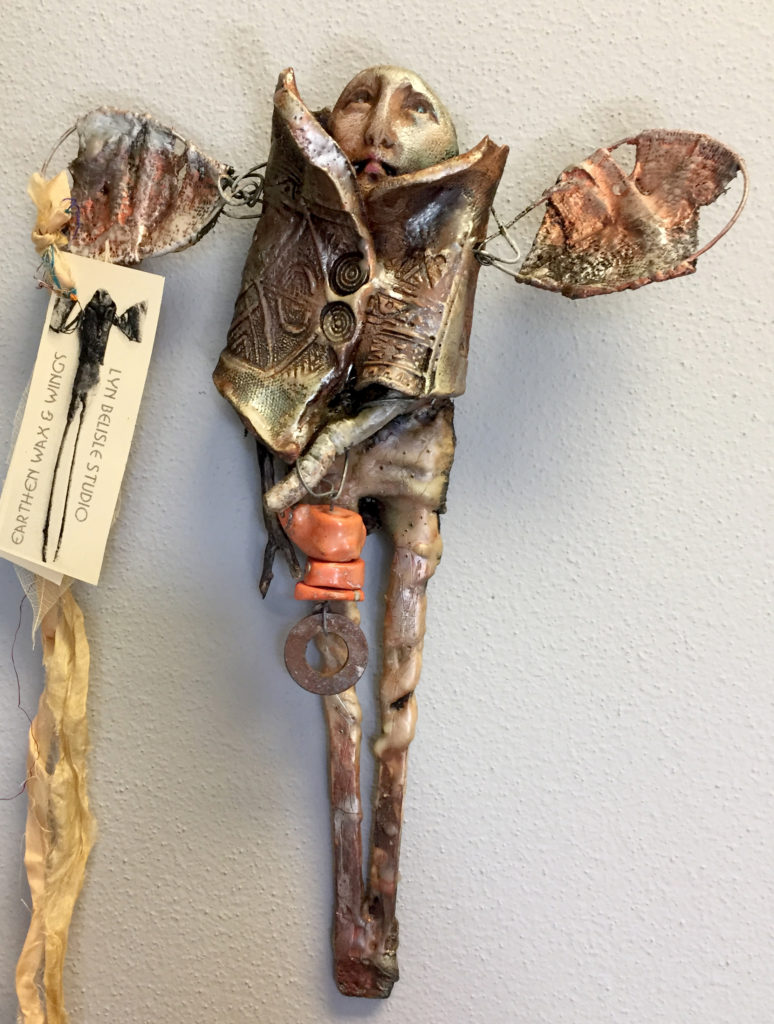
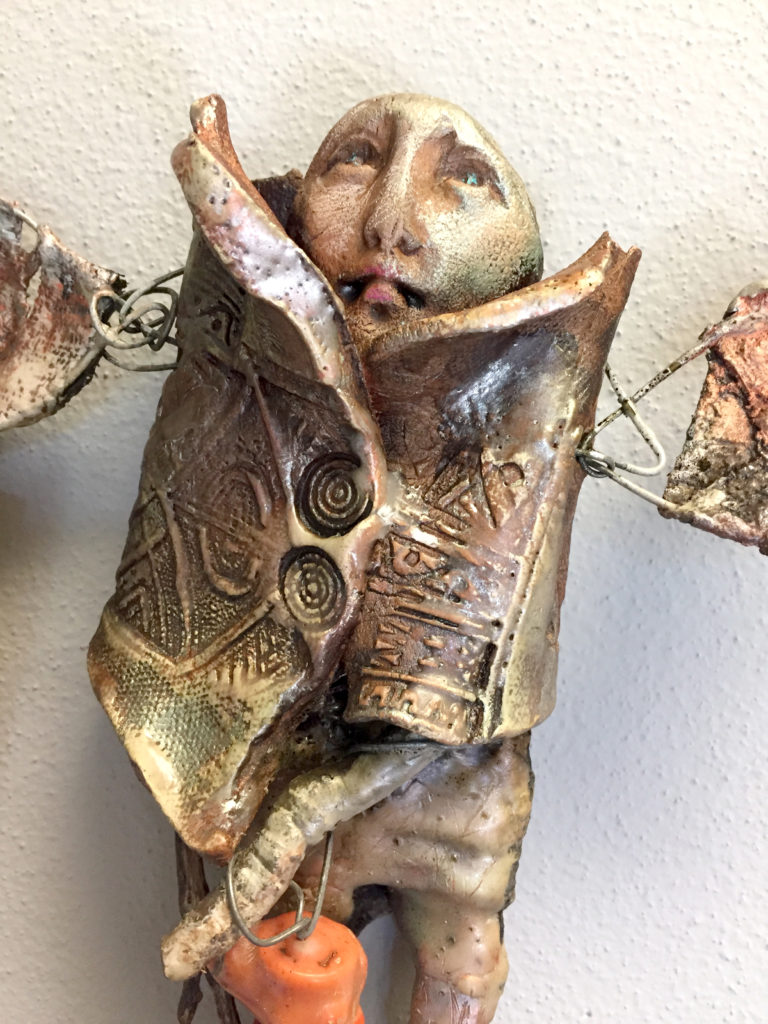
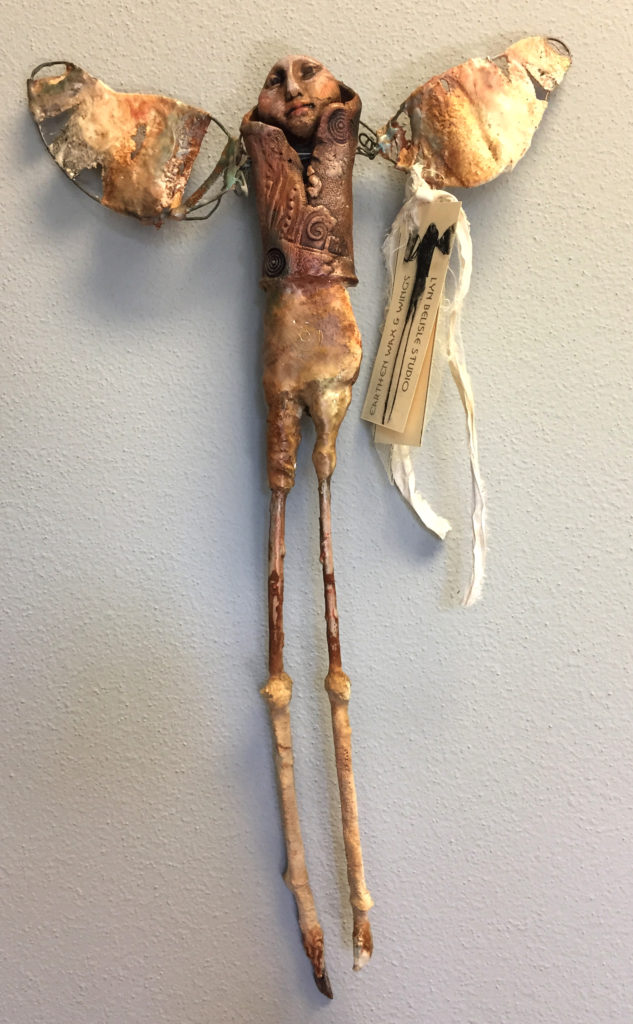
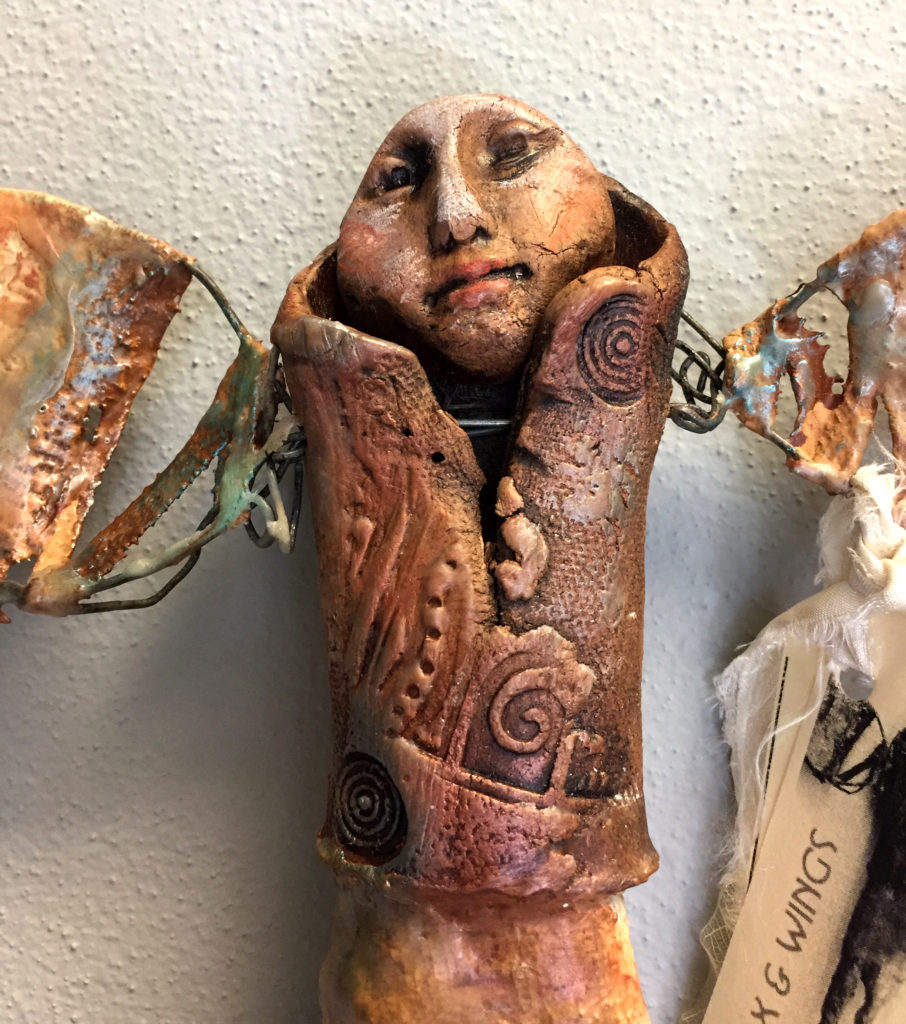
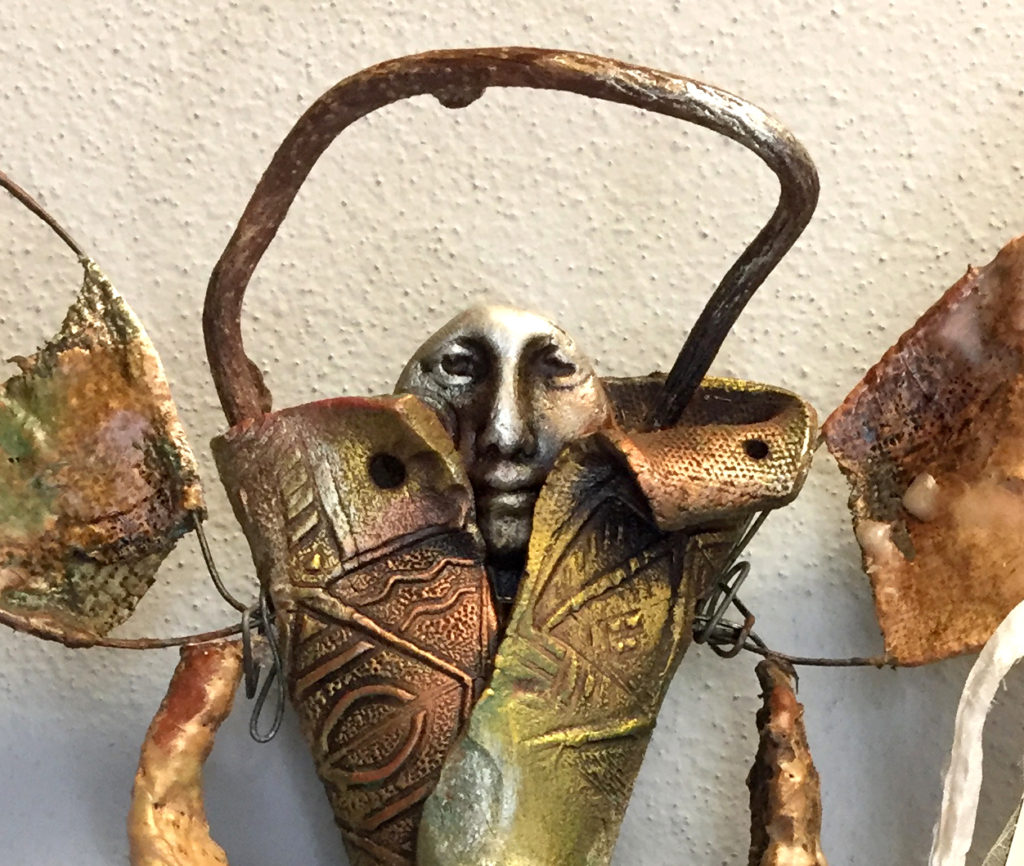
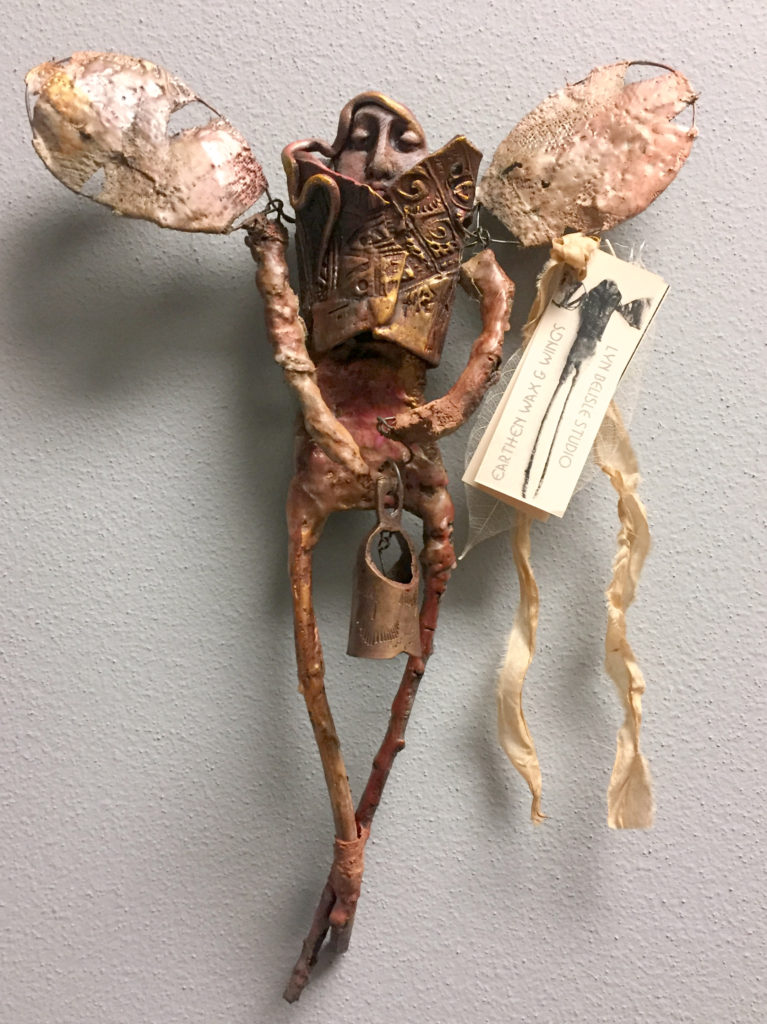
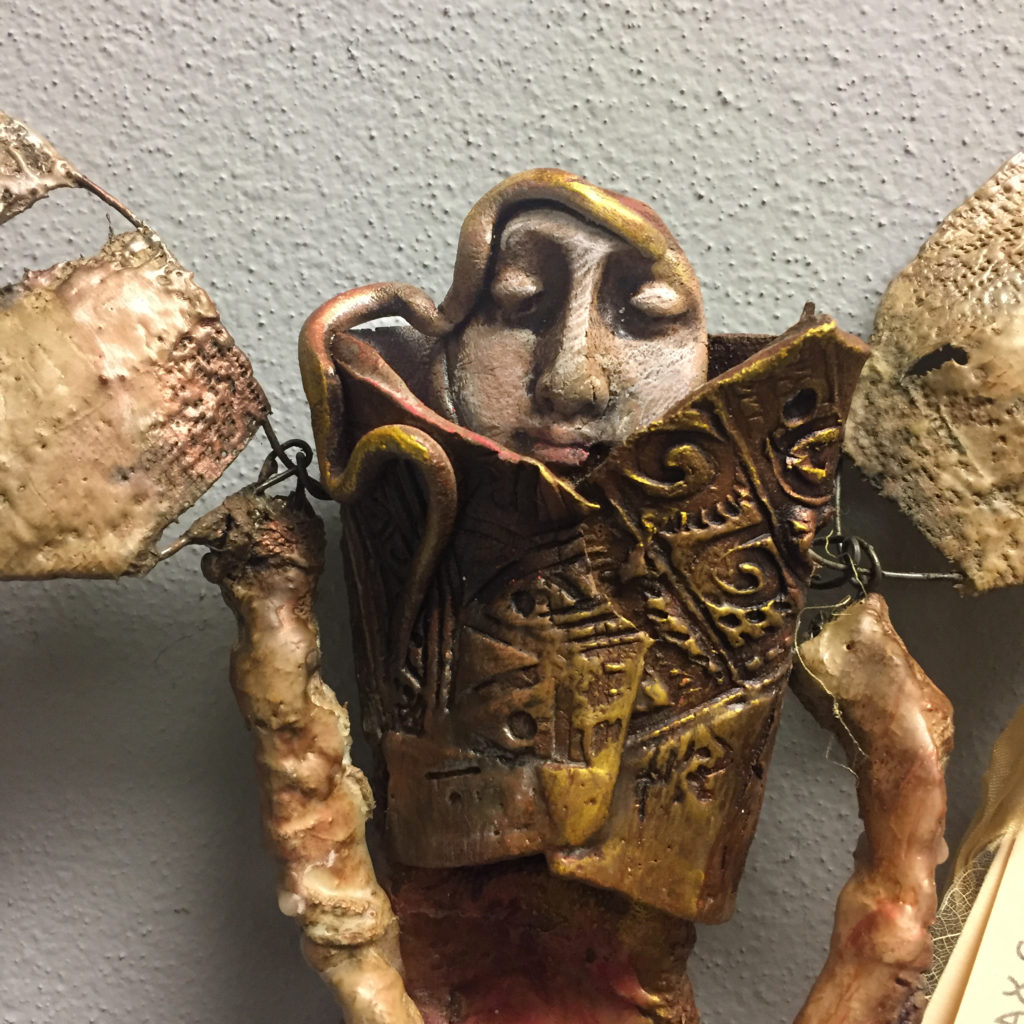
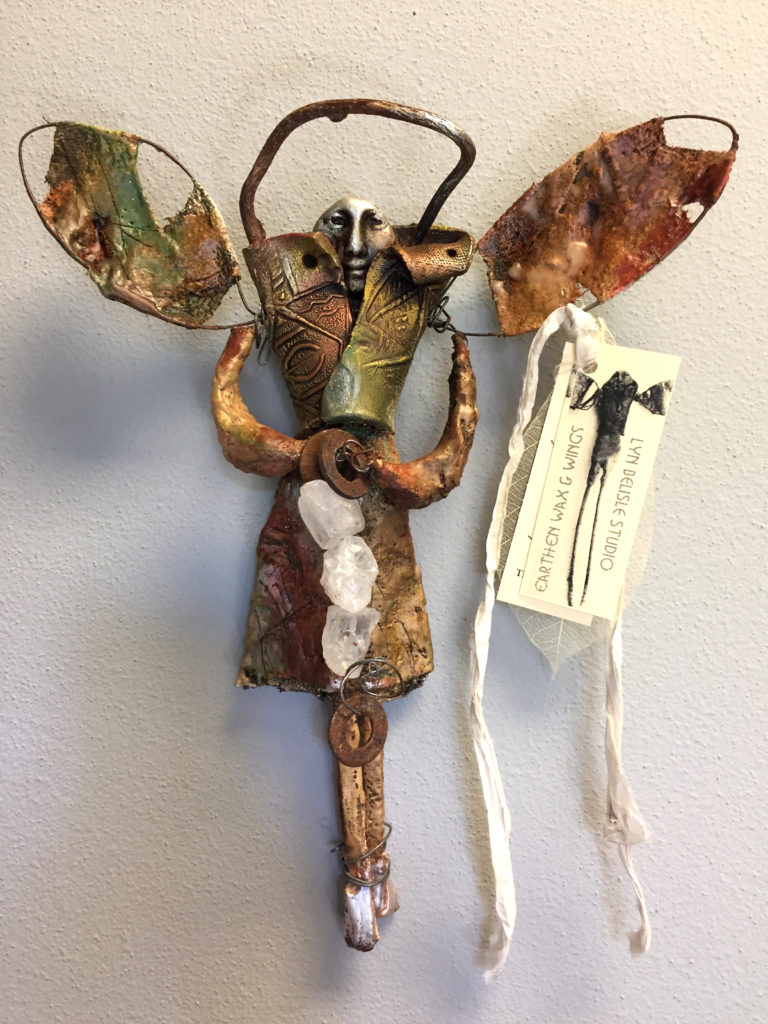
And here’s the “Messenger” – kind of androgynous? I guess they all are. Wings are non-gender specific!
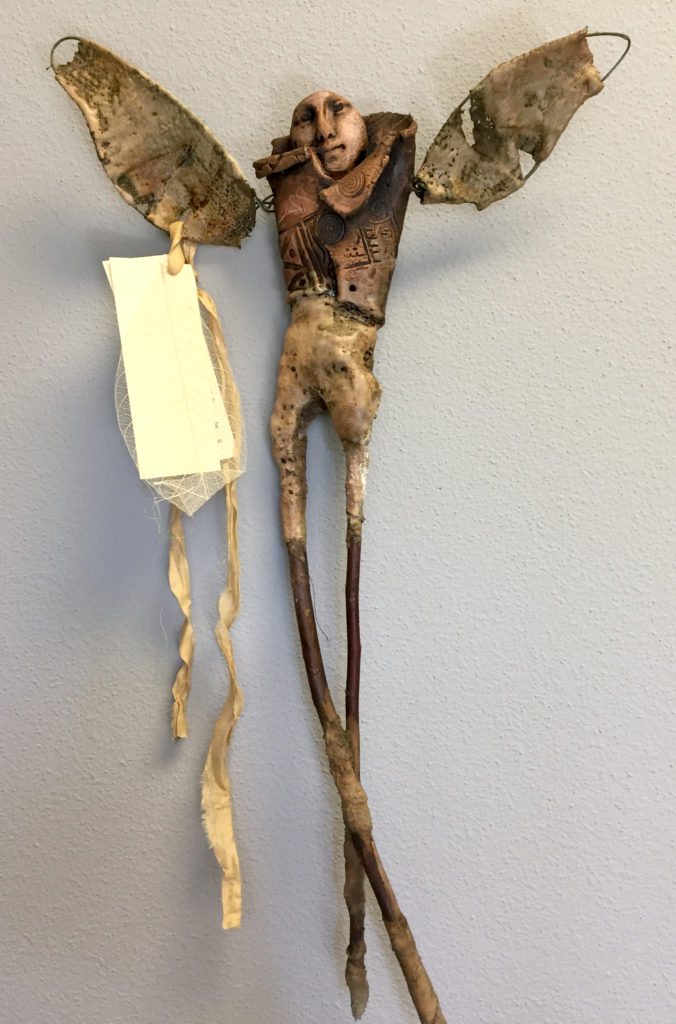
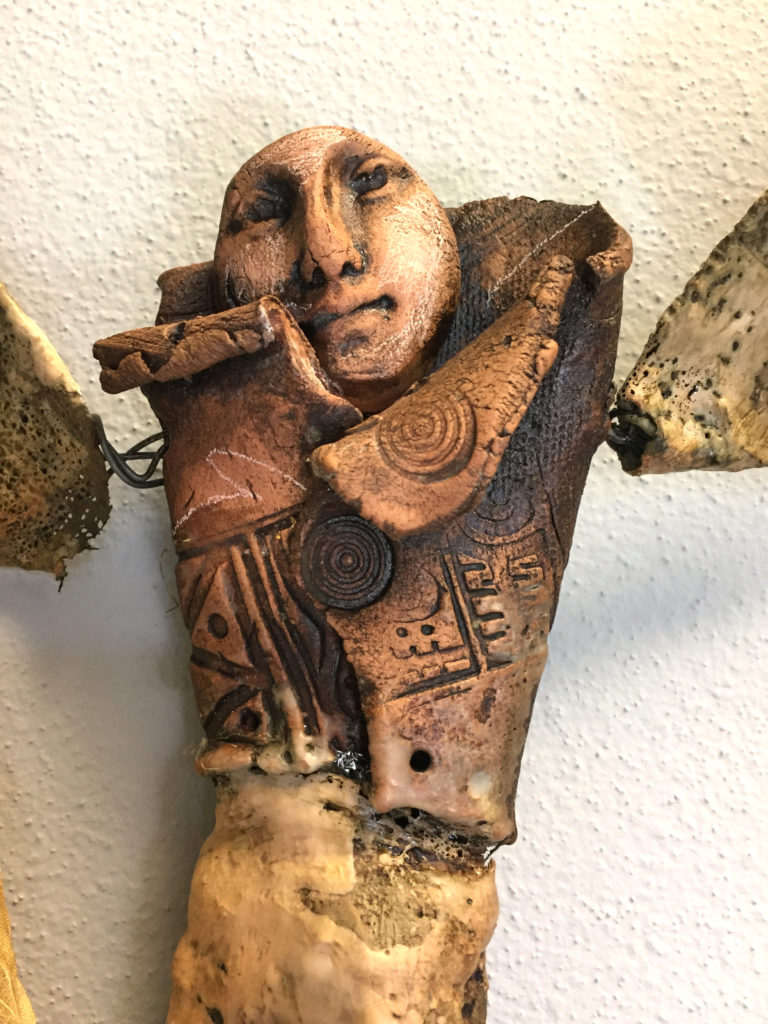
Finally, here’s my fave – “Peacemaker.” Simple and serene – I may keep this one.

It’s funny how things work – I made the little earthenware “blanket” faces weeks ago  without knowing exactly what I was going to do with them. Then I got an idea from Linda Rael that turned out to be the perfect extension for the earthenware.

And when Marta announced her “bee and honey” theme, I tried beeswax and walnut ink on the exterior and it all works together beautifully. Trust the process!

PS – the cataract surgery went very very well! Thanks for the good wishes – I practically have X-ray vision now!


Back from a week in the wilds of Washington

DSCN6941

I woke up Sunday morning to a temperature of 38F and a herd of elk lurking around the cluster of farm building where I was staying. It was the last day of the Spring 2017 Gaian Soul retreat, held this time at Cedar Springs Lodge and Farm, Skagit County, Washington, just south of the Canadian border.

The theme of the retreat was Tarot and Talismans. I taught talisman-making techniques, including beeswax applications on clay and fiber, and rolled paper/fiber/wax bead techniques. My dear friend, Joanna Powell Colbert, infused these techniques with mystery, magic and spiritual intent through her teaching of the Tarot. It was a perfect fit. We were all thrilled with the results.

I kept wanting to post pictures to SHARDS all of last week, but the internet connection was slow out there, so I just put a bunch of them into this video to share with you:

Tarot and Talismans from Lyn Belisle on Vimeo.

I also put up a page on my website for the retreat participants with links to the supplies that we used in the workshop, and you are welcome to take a look, too!

Click this Tarot and Talisman link.

Making the beads was such a success that I want to offer it as a separate workshop at my studio later this summer. The talismans took quite a while to complete – three days of fairly steady work, but you can make several dozen spectacular beeswax, fiber and paper beads in an afternoon. Stay tuned.

beadsbanner

I hitched a ride with my friend Lisa Sanger Blinn from SeaTac airport to the Cedar Springs Farm, which is about a two hour drive. We visited the town of LaConner both coming and going. It has great galleries, restaurants and shops. The Calico Cupboard Cafe and Bakery is fantastic. And all around La Conner, we saw acres of daffodils that are being harvested for commercial florists. Most were not in bloom yet, but some were – spectacular!

And, yes, they grow in boggy soil. There were also fields of swans and snow geese.

Thanks to Lisa for showing me the sights – for a Houston girl who works at Rice University, she sure knows her way around the Pacific Northwest!

And more special thanks to Joanna Colbert Powell and the Gaian Soul circle of women for inviting me back to teach the talisman workshop – it was a wonderful week!

Save

Save

Save

Save

Save

Save

Save