Fire up the pot(s) – a festive gathering

Last Friday, we got to participate in an amazing experience at Andy and Virginia Bally’s Studio near Canyon Lake. We had talked about planning a pottery pit fire for several months, and thanks to the Ballys’ hard work, it actually happened!

A pit fire is the oldest known method of firing pottery, dating back to 29,000 BC. It works as a kiln using a hole in the ground as insulation and fuel to reach temperatures around 2000 degrees farenheit.

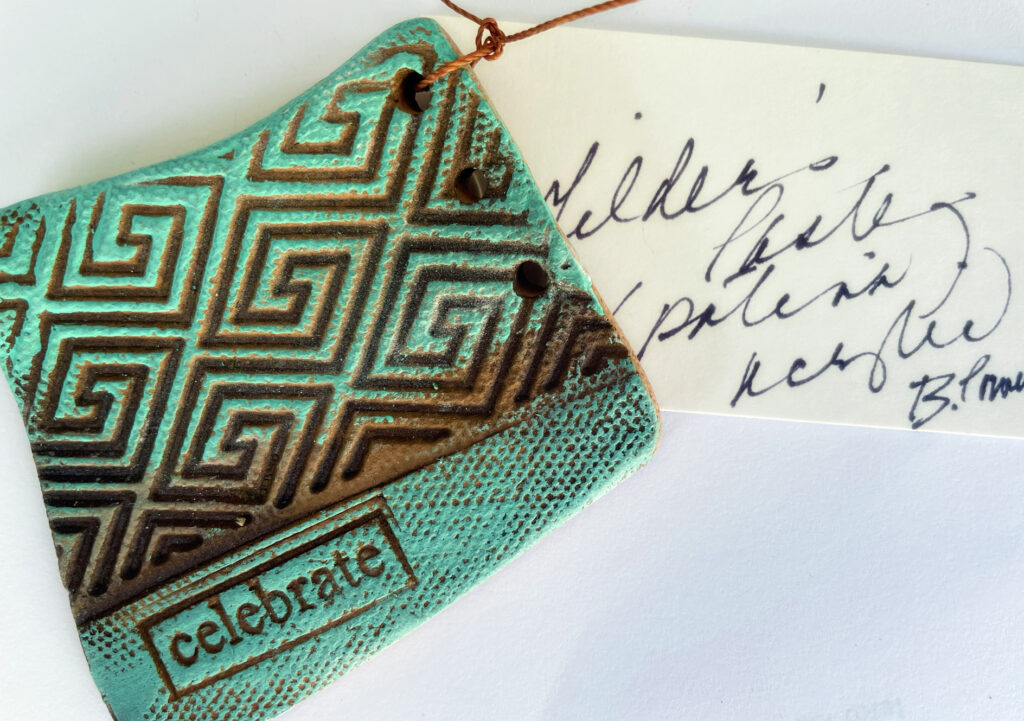
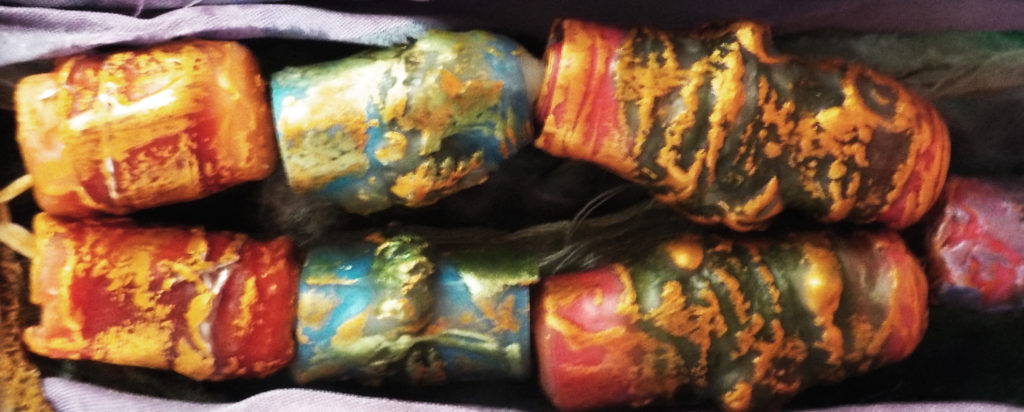
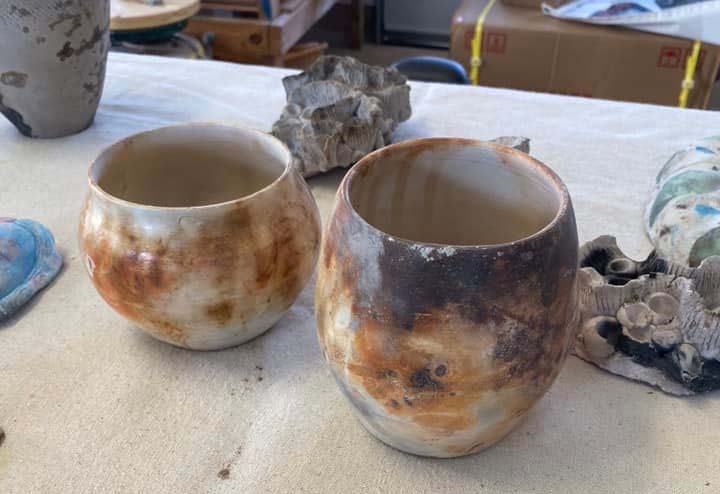
British potter Jane White says, “The process of pit firing has endless possibilities, the pieces seem to have been created by nature itself, by the organic material, and the fire, which transforms the surface of the clay into a myriad of different patterns and colours, and each piece that is unearthed from the ashes is totally unique.”

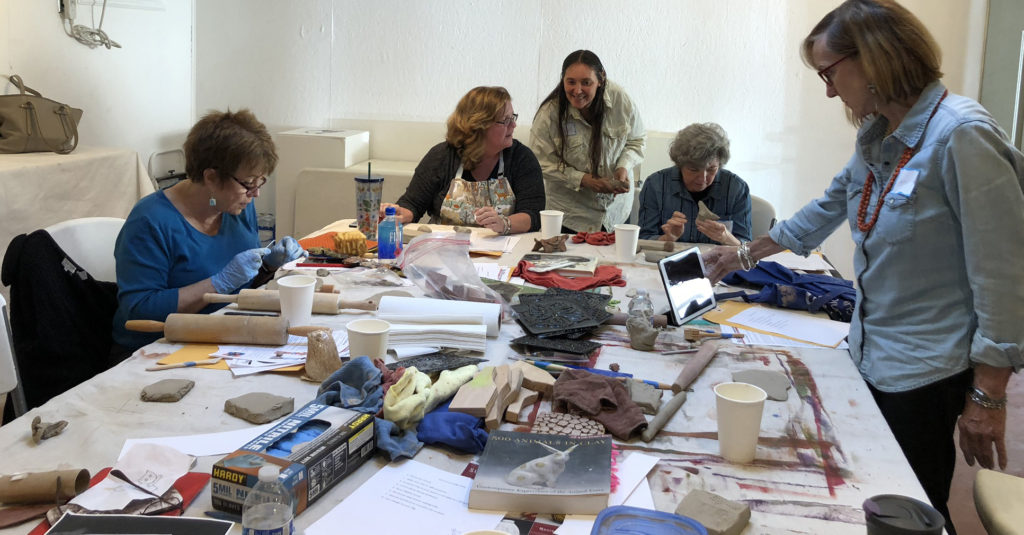
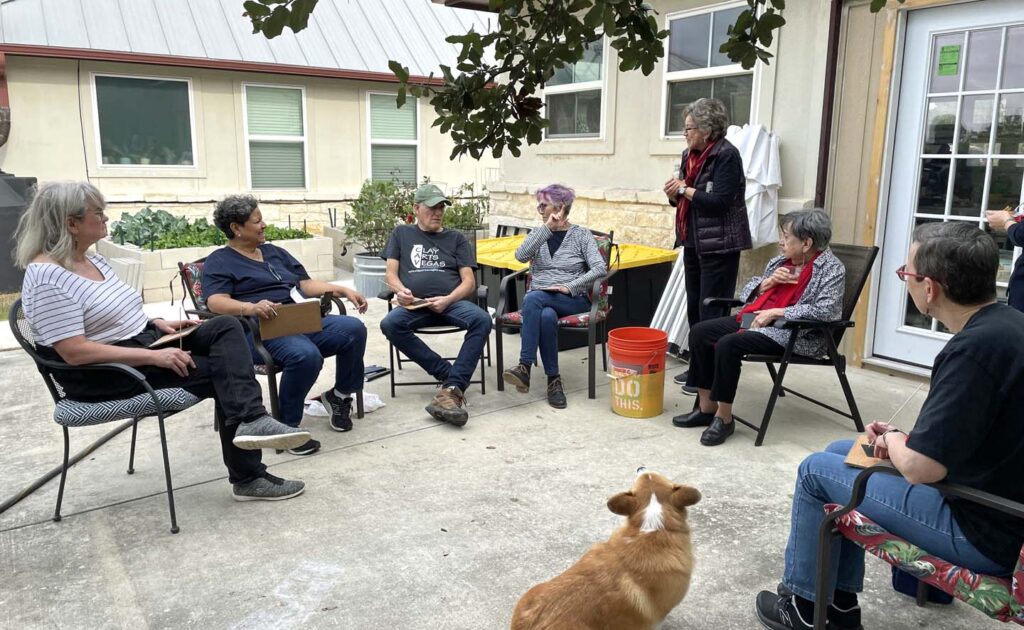
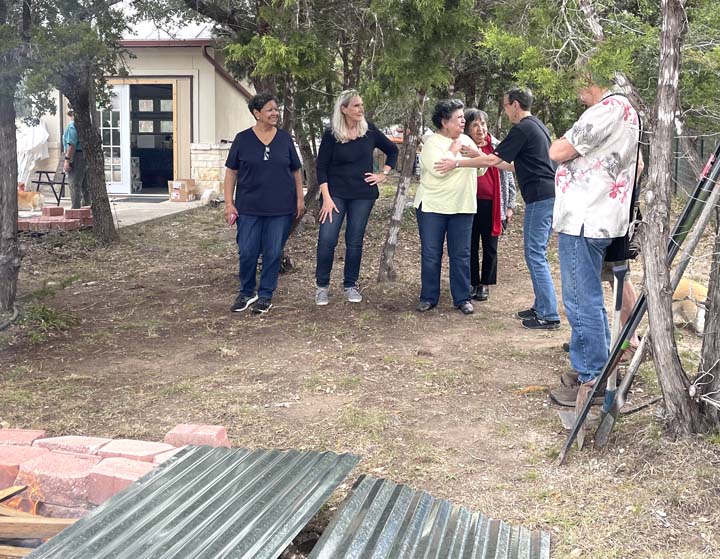
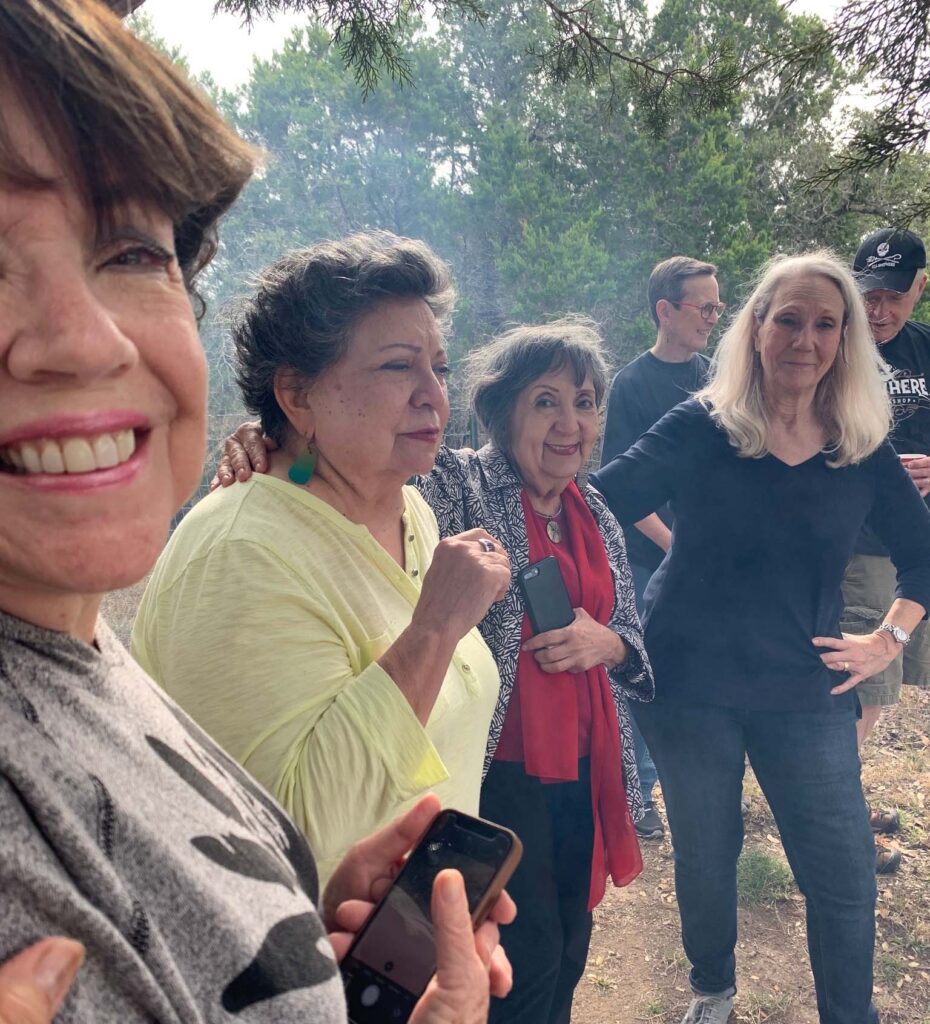
A motley crew of potters and friends gathered outside the Bally Studio to watch the spectacle.

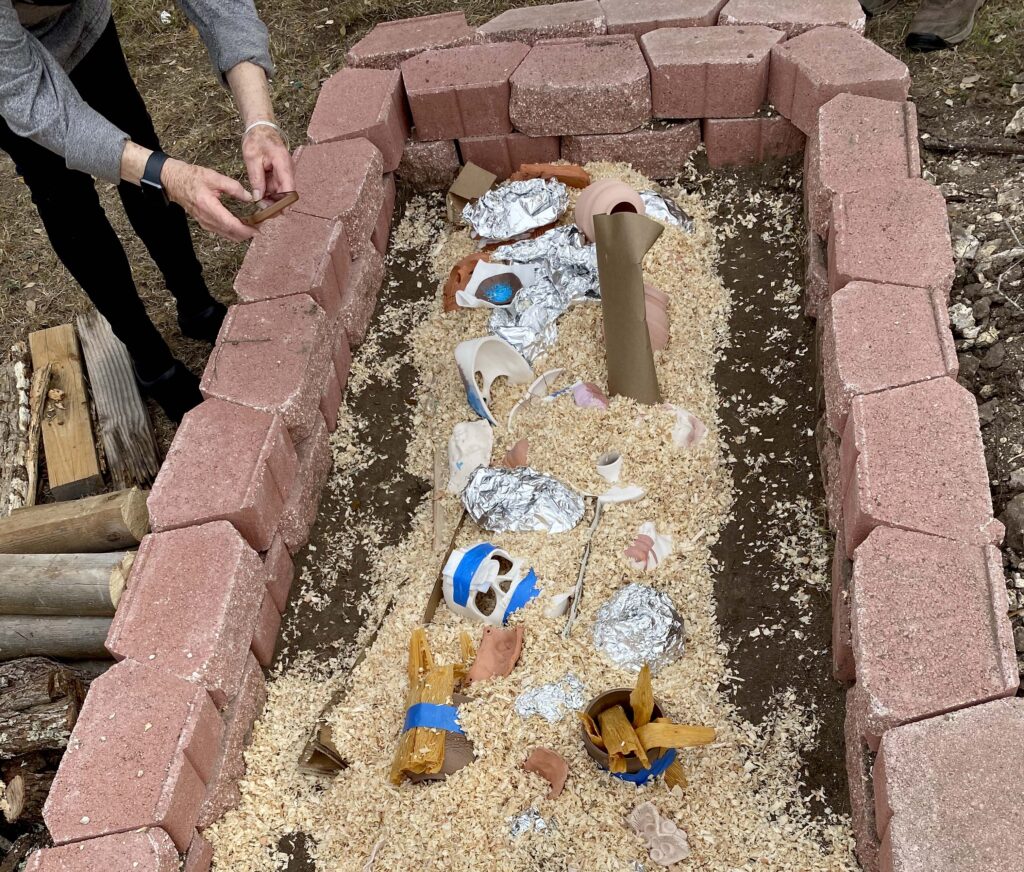
The pit was impressive. It was almost two feet deep and covered on the bottom with a deep layer of sawdust.

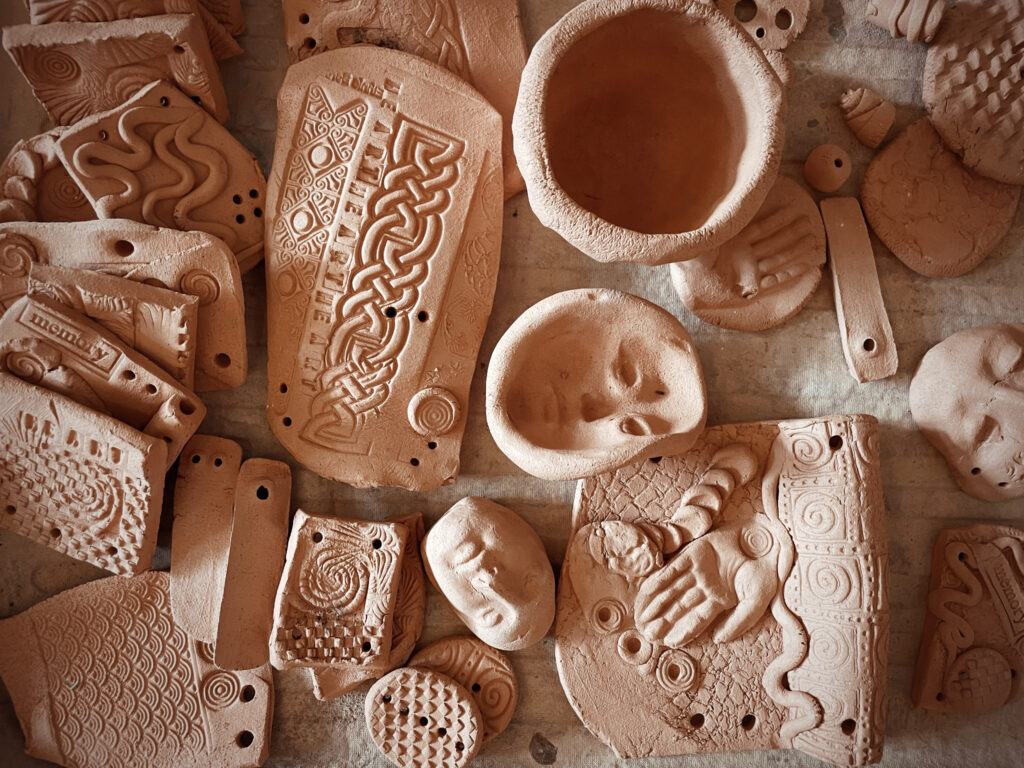
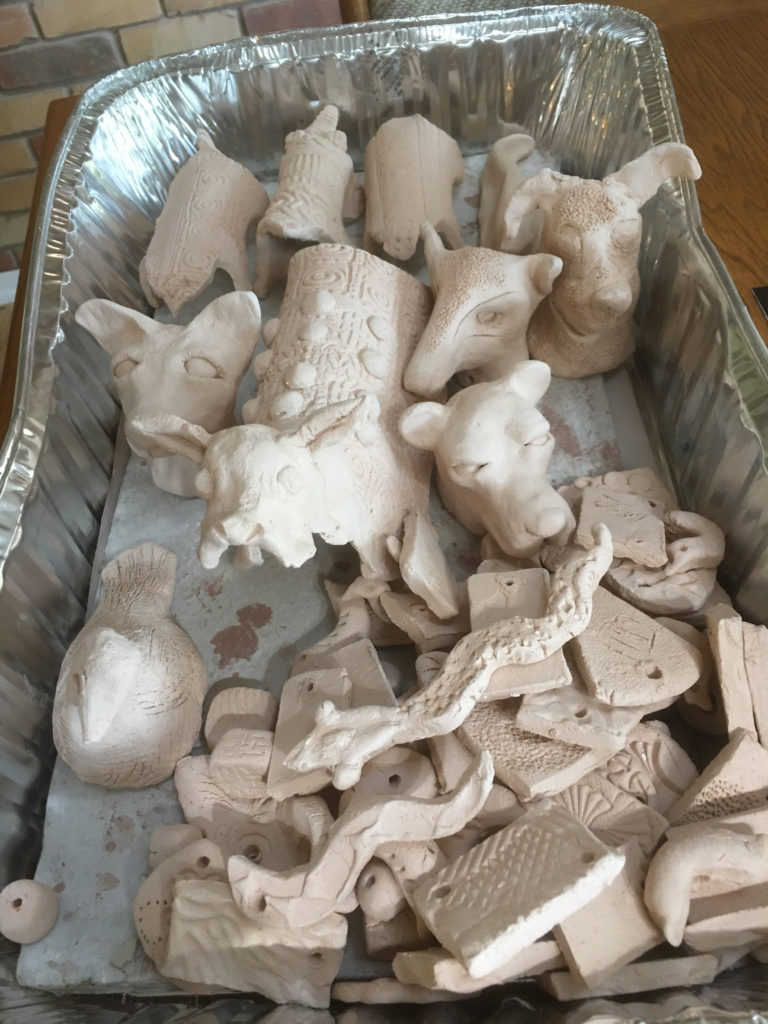
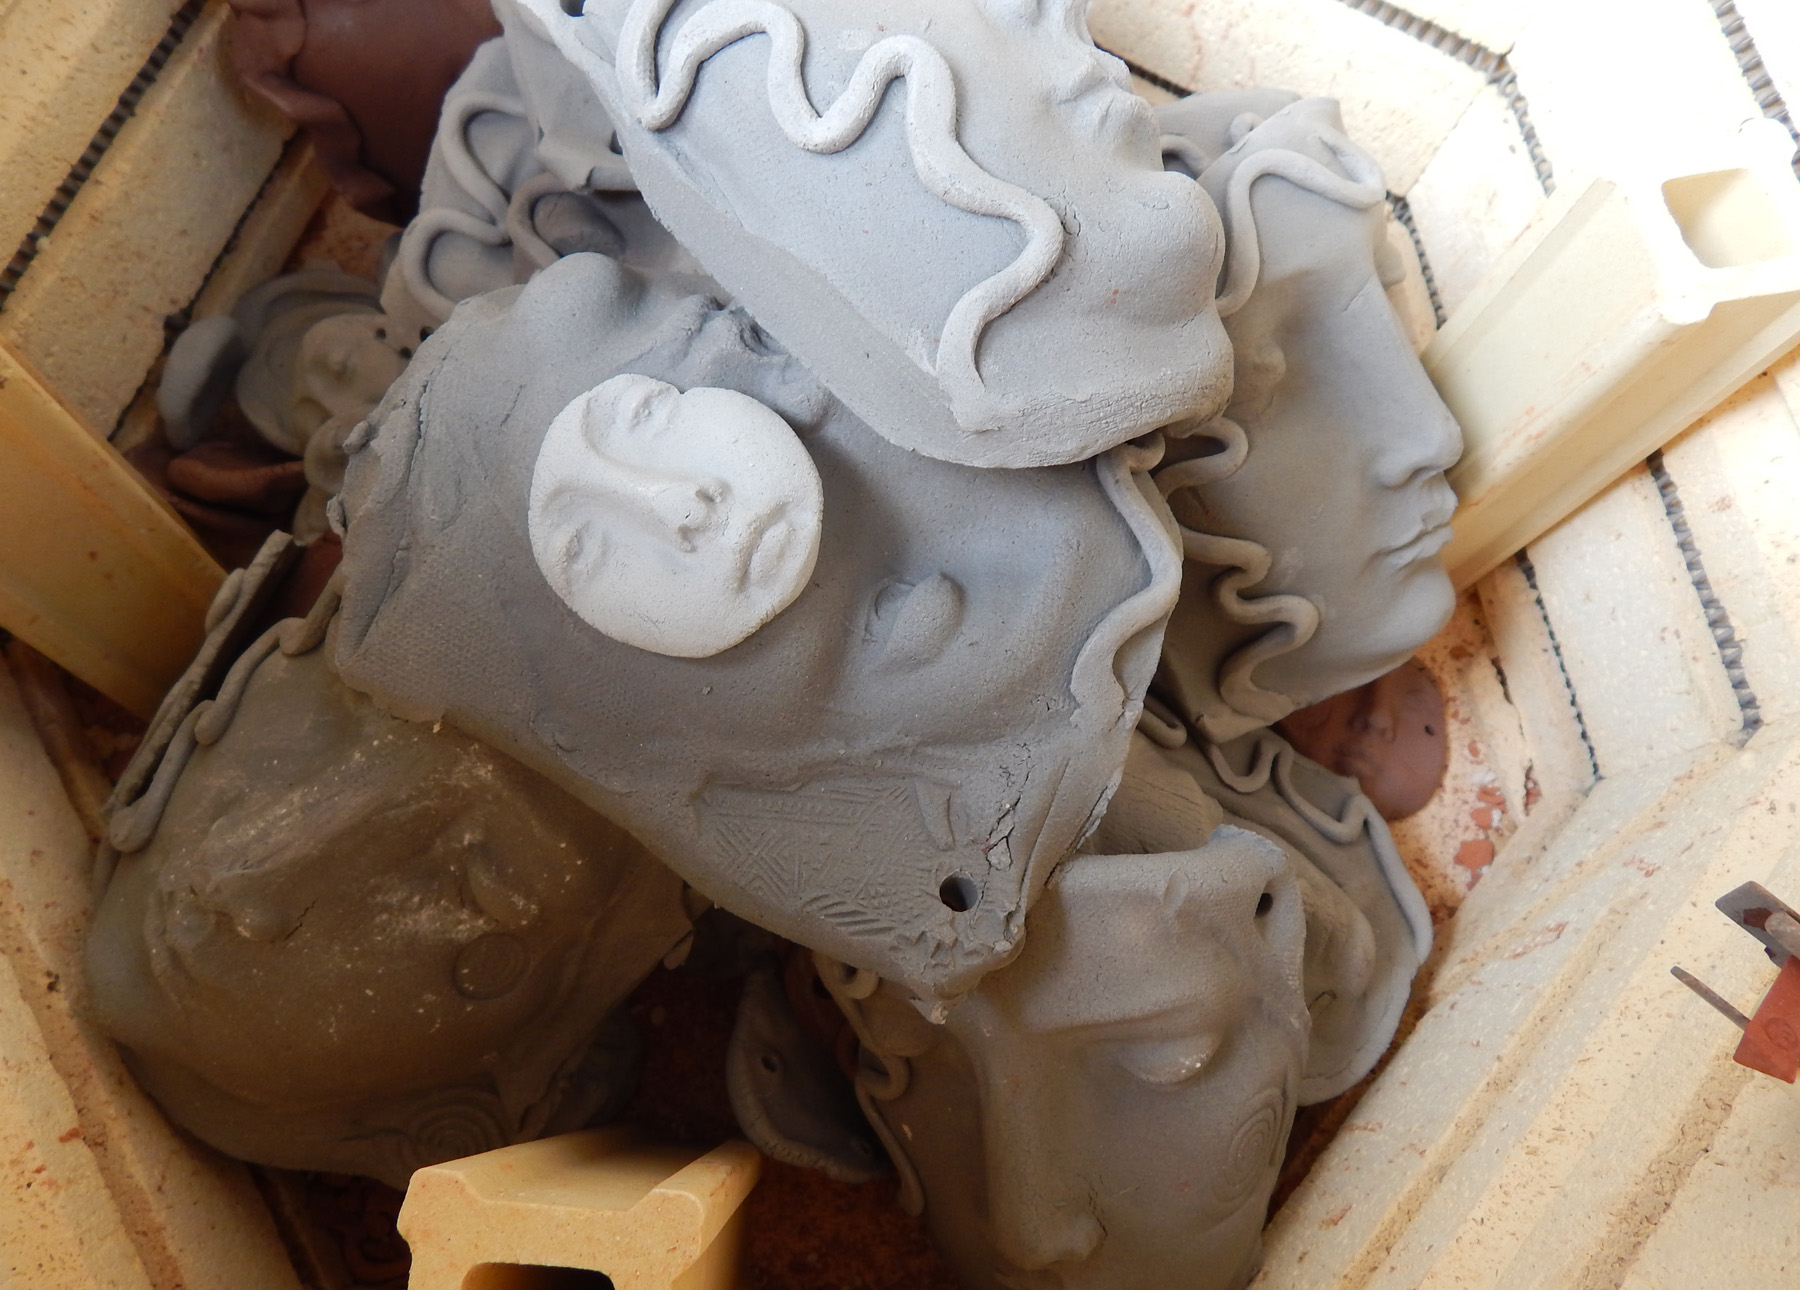
Here, I’m taking a photo of just the first third of the pit as it is being loaded with clay objects. The pieces are covered in all sorts of crazy, experimental stuff, including tamale shucks.

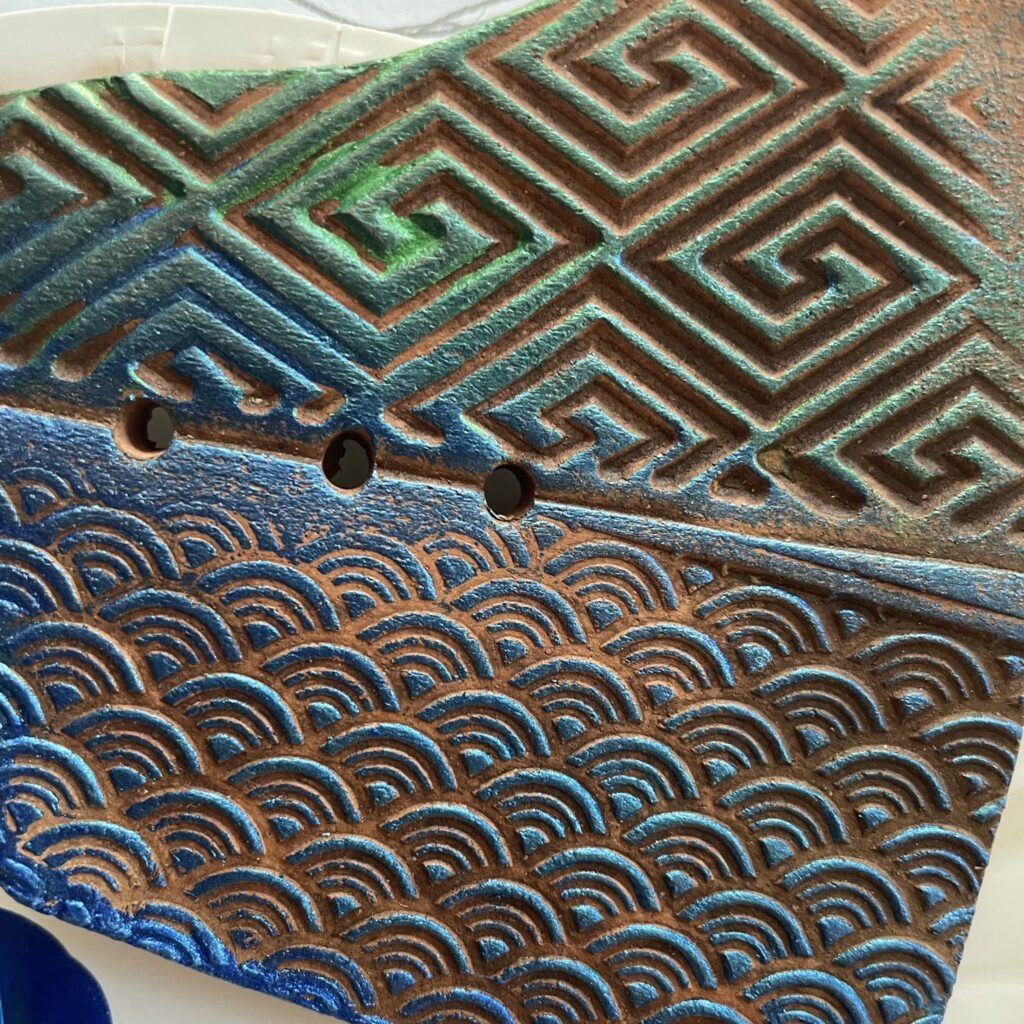
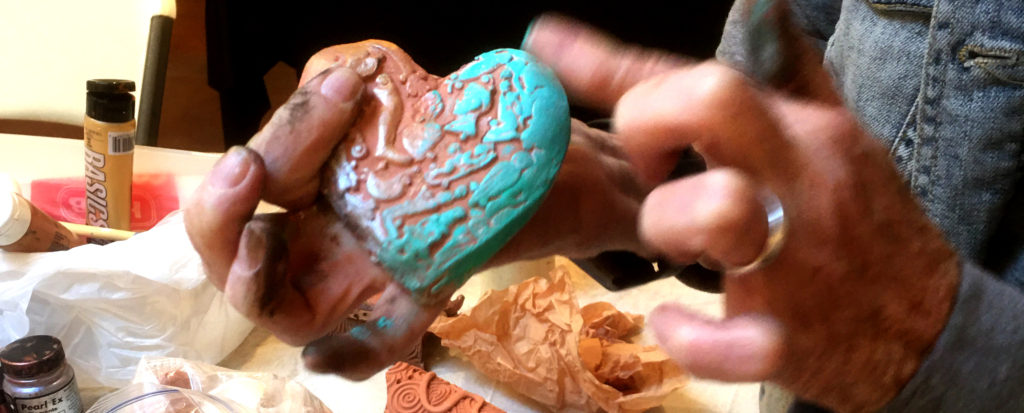
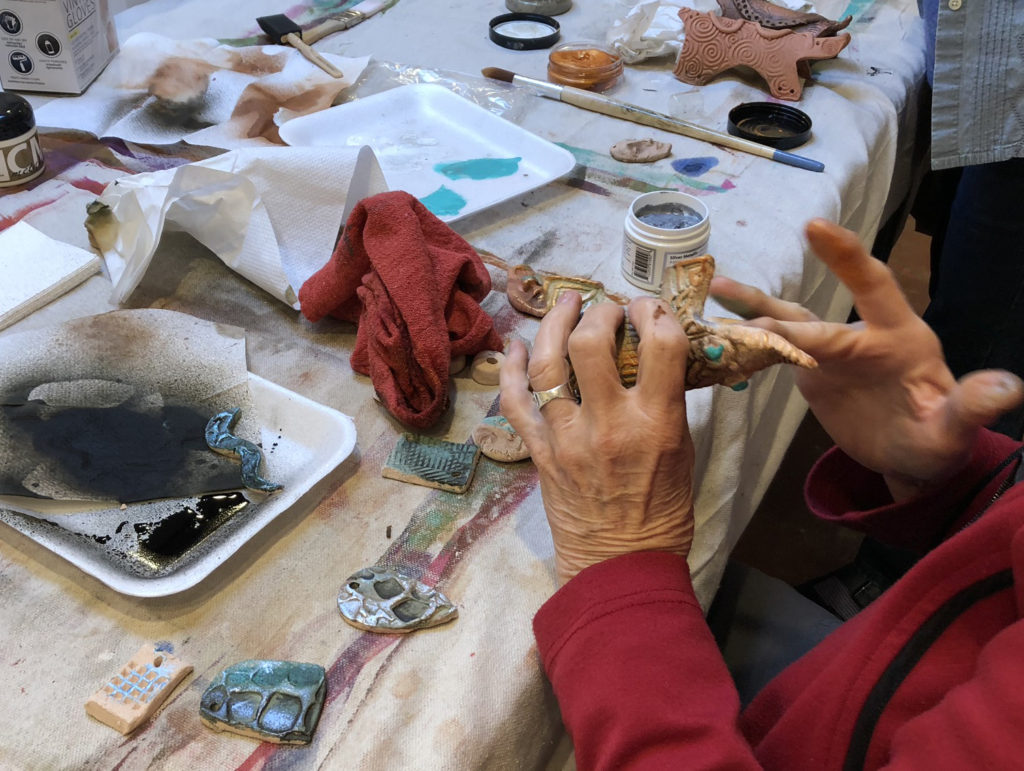
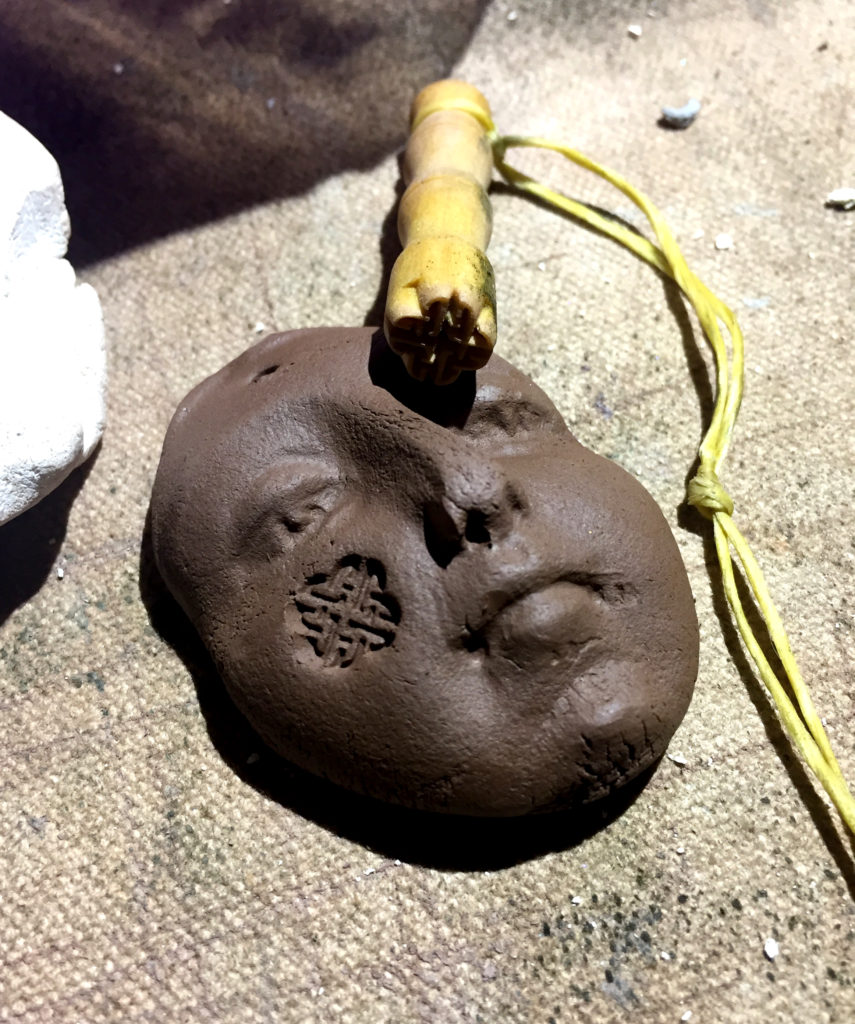
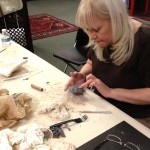
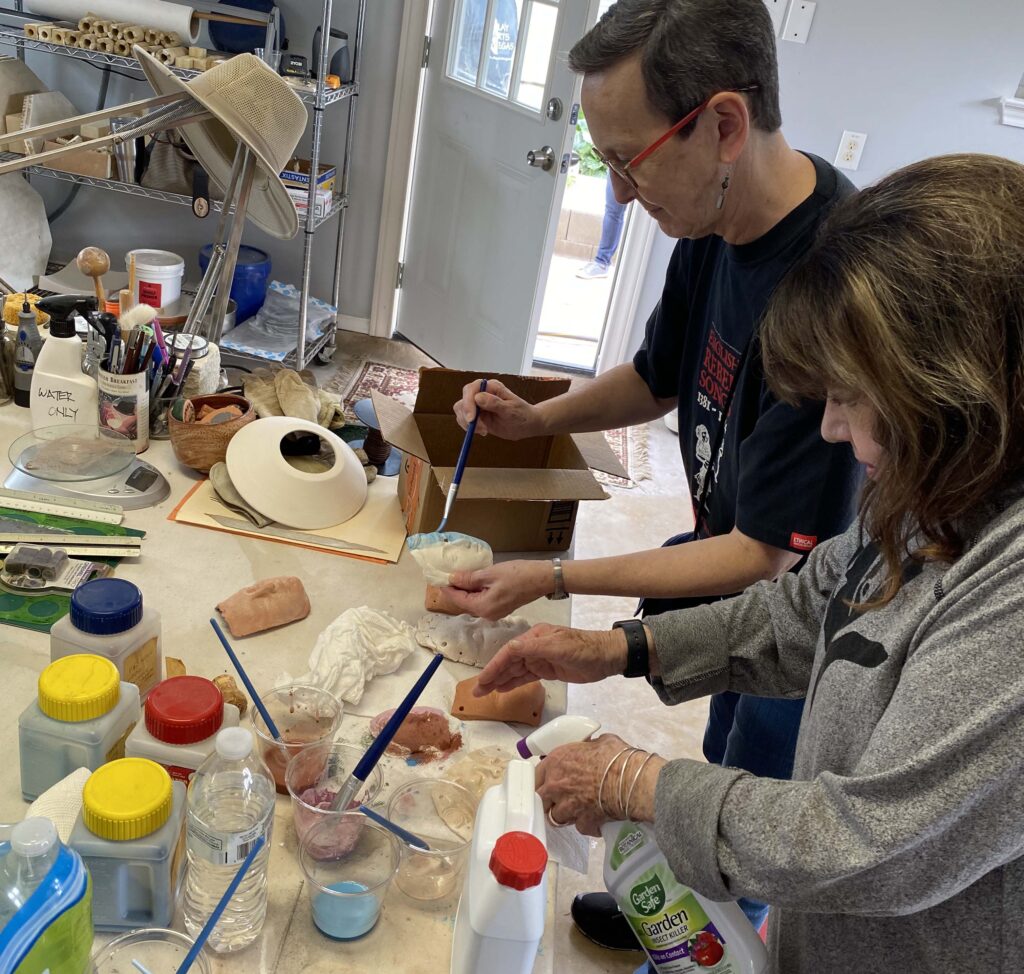
We also experimented with different colorants and chemicals on the surface of our bisque clay before adding them to the pit.Here, Julie and I are painting on Mason Stains (powdered pigments made of a combination of oxides and frits) and spraying on various chemicals including insect repellent and organic weed killer (!) to see how they would react with the flames.

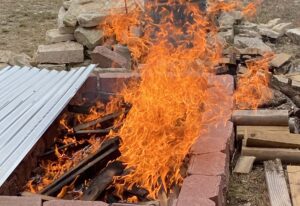
Everyone kept a close eye on the fire – Andy was the Fire Pit Master and added oak in a steady, slow controlled process.

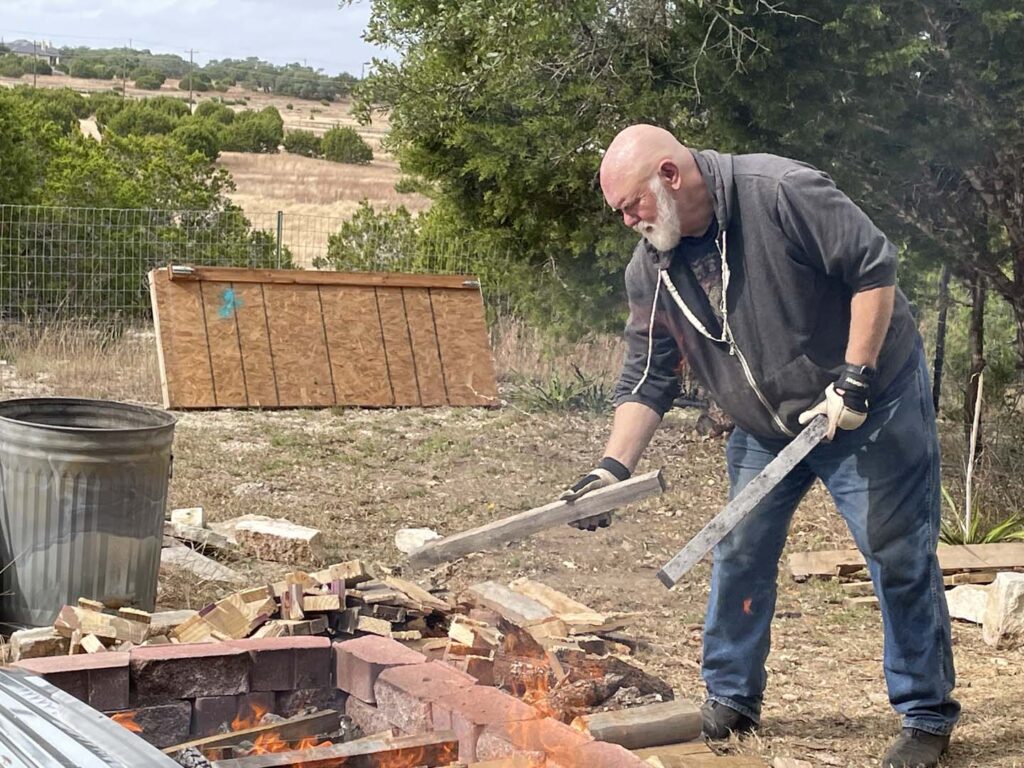
There is something about a communal fire that is exciting and sort of ancient. And we were all anxious to see how our clay would turn out, even though we knew it would take several days to cool and we wouldn’t get to see the results any time soon.

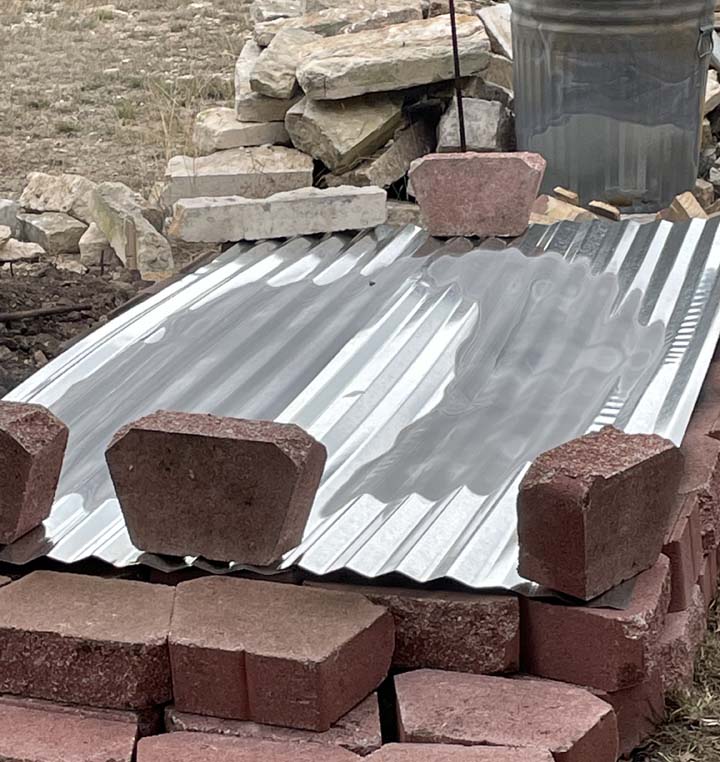
When the flames died down after several hours, the pit was covered with metal to keep in the heat and allow the pieces to cool slowly.

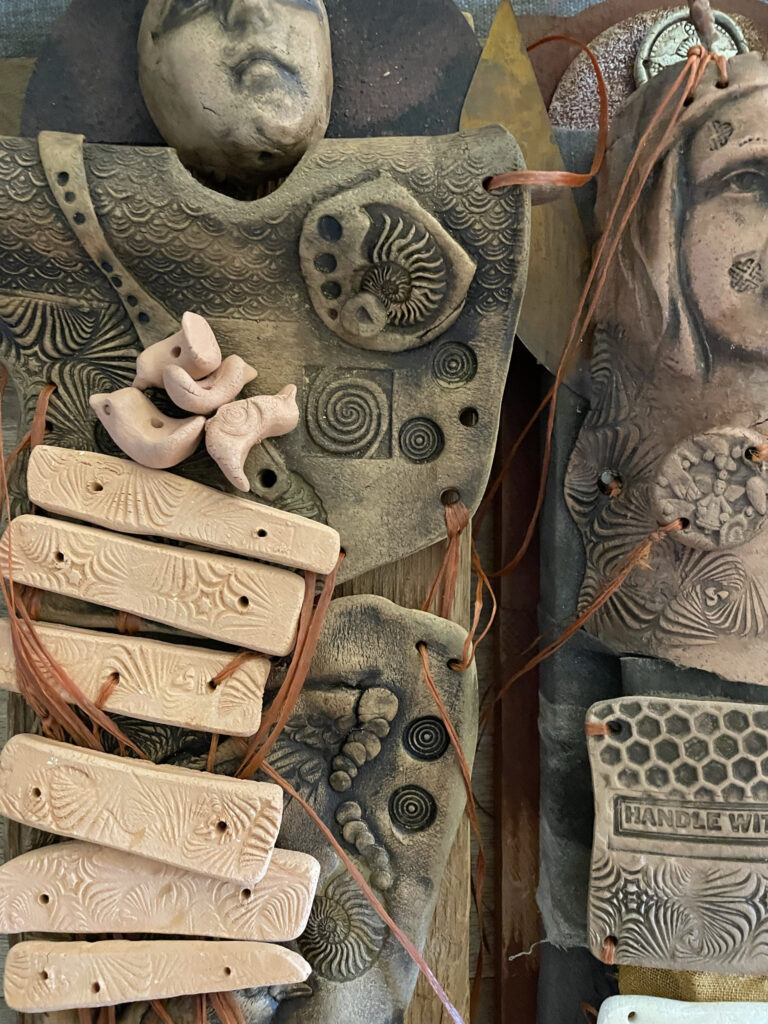
There was so much to learn and to experience. We all took lots of pictures. After Andy and Virginia opened the pit two days later, they pulled the pots from the ashes and cleaned them. Then they sent photos of our work.

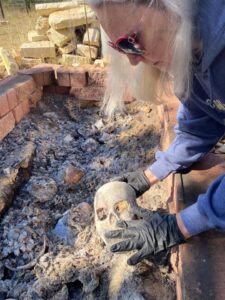
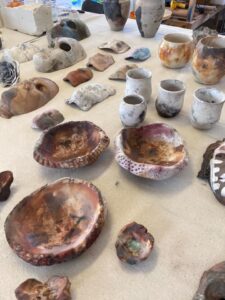
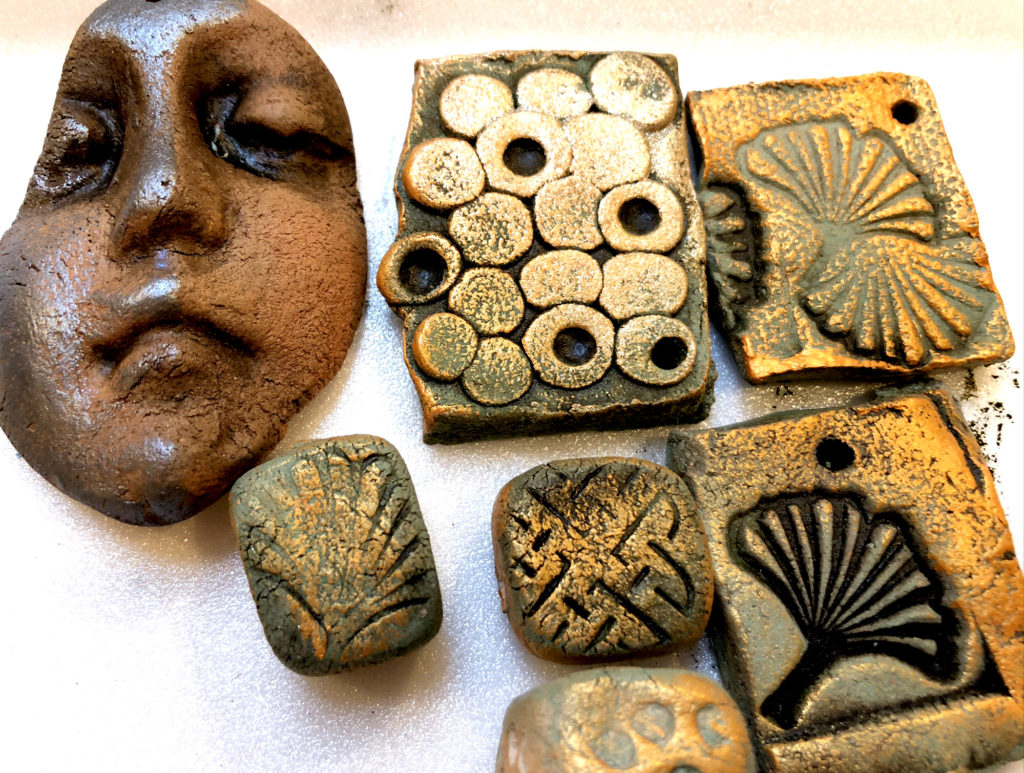
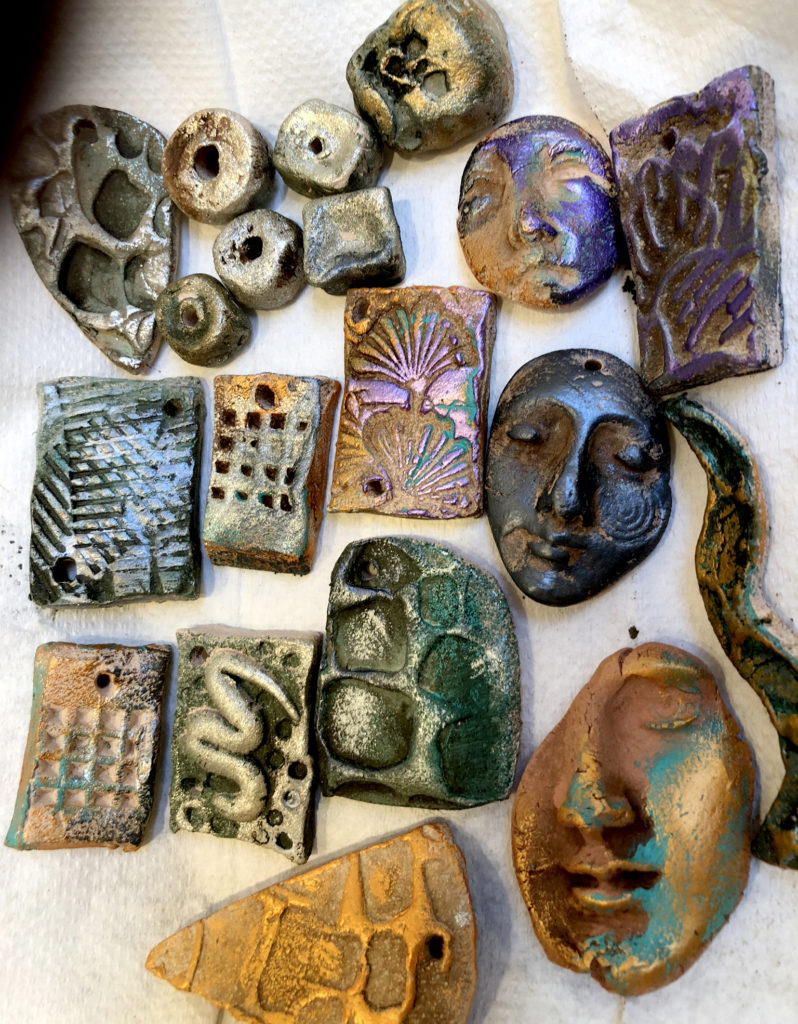
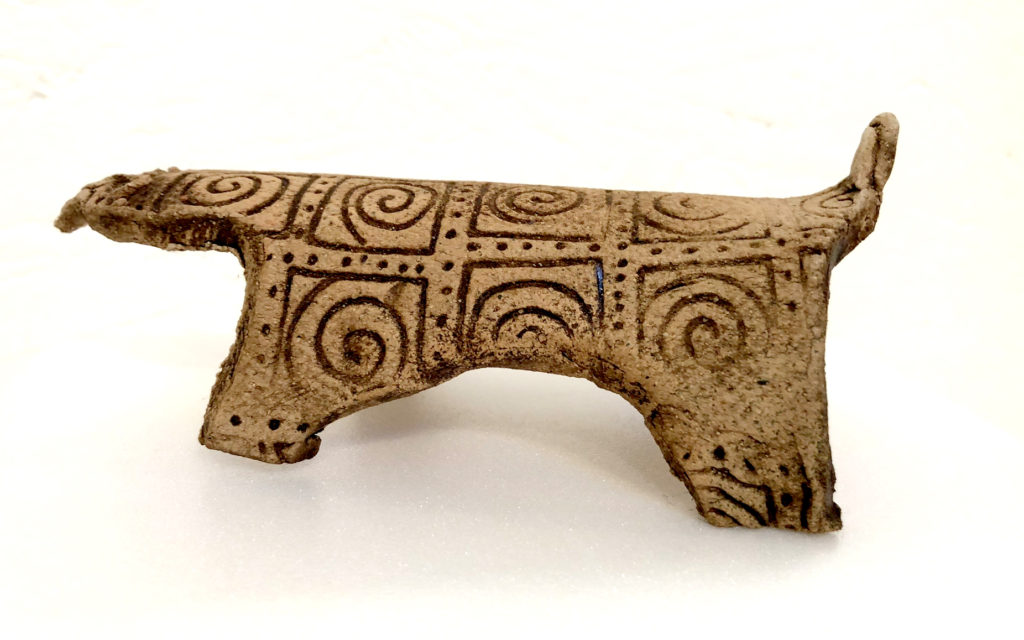
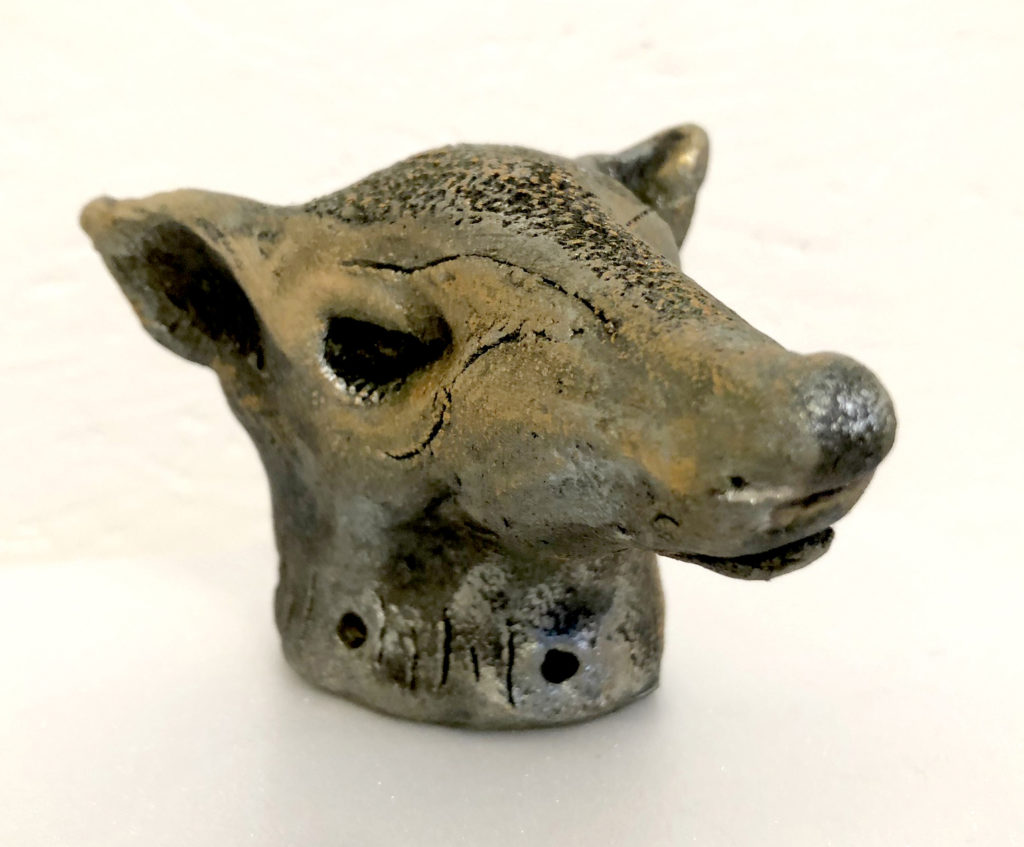
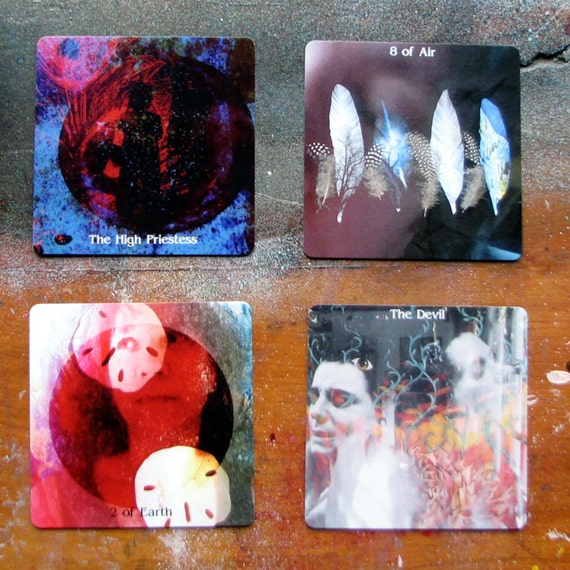
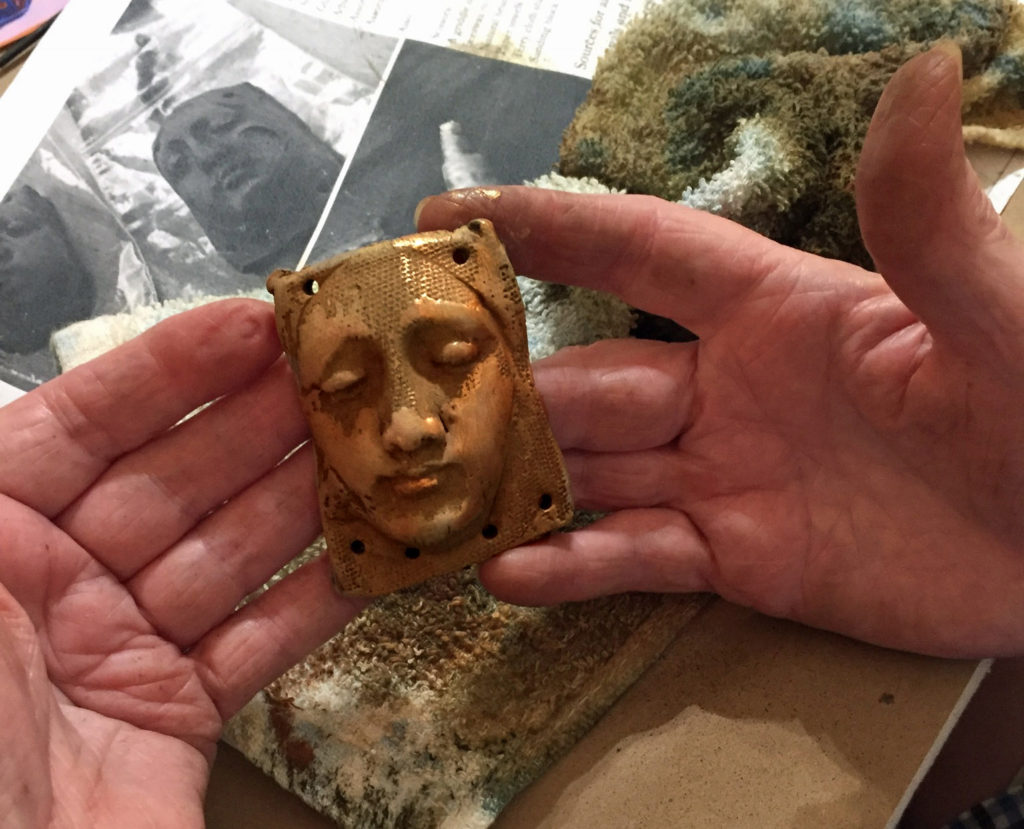
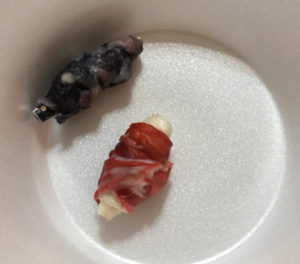
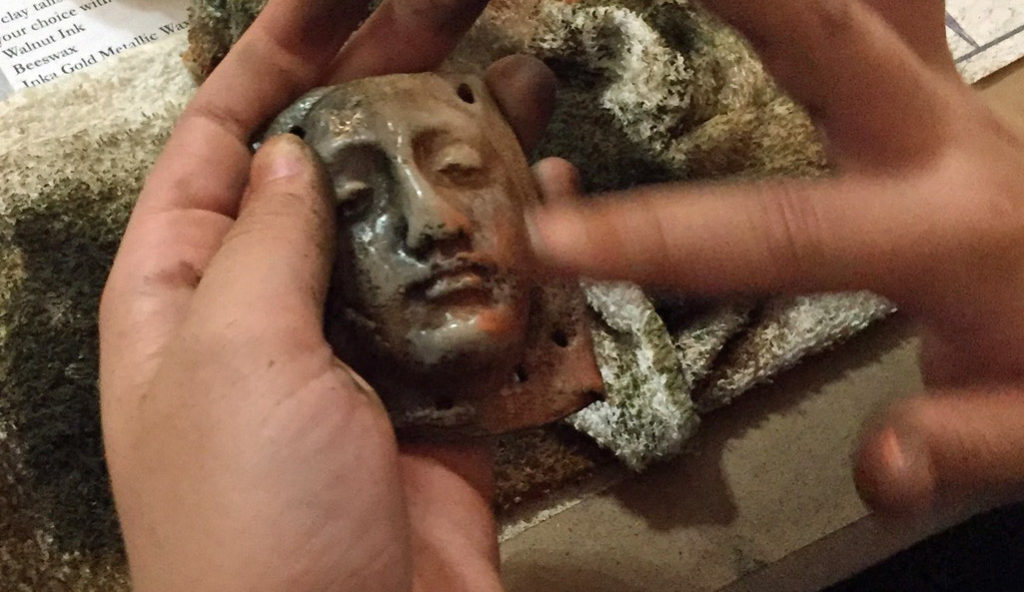
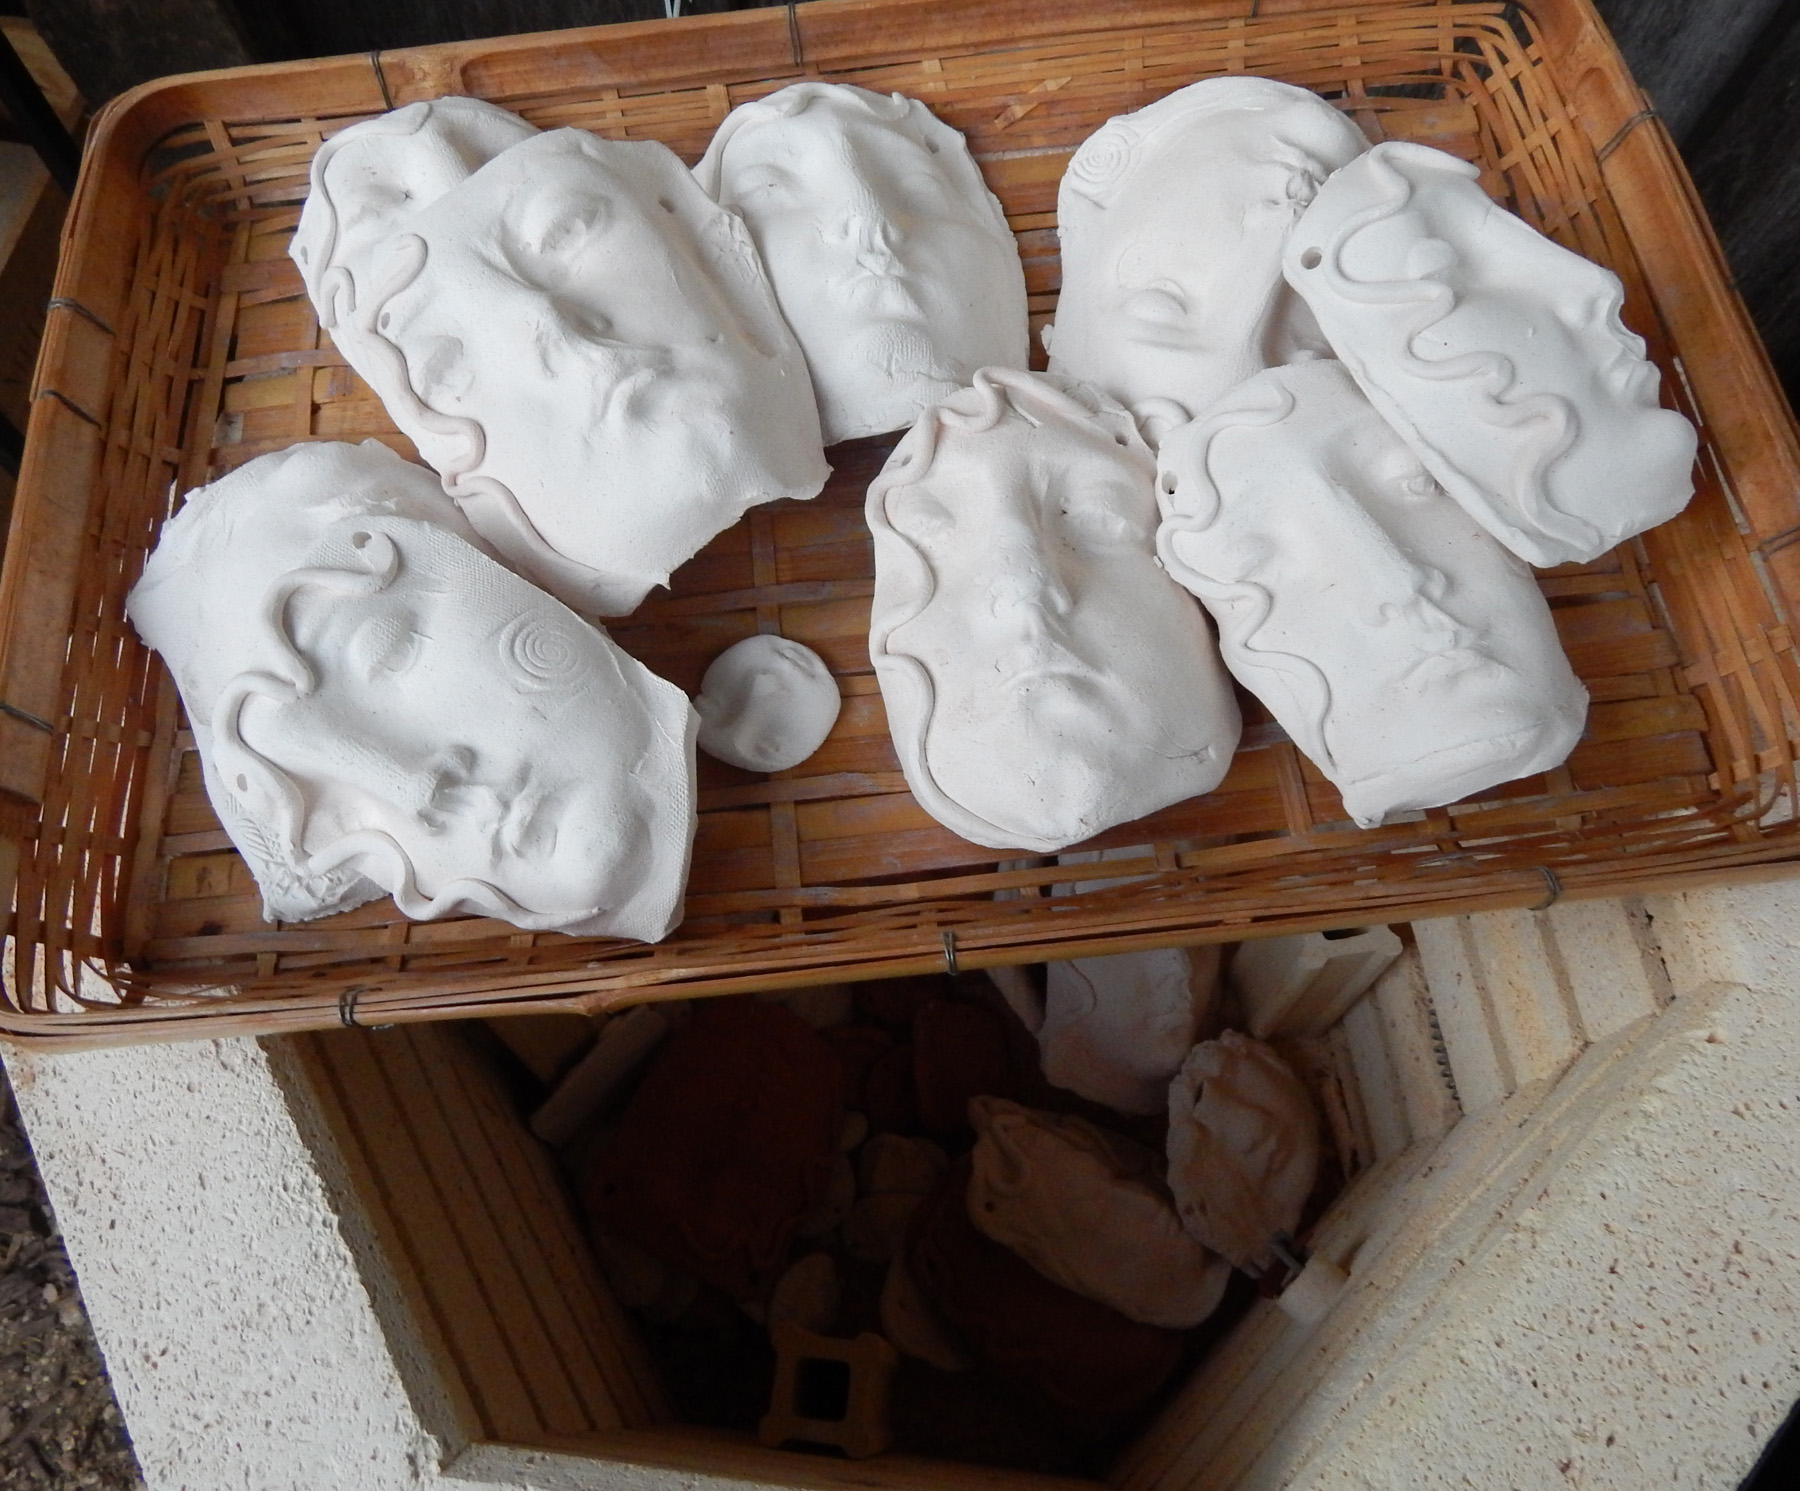
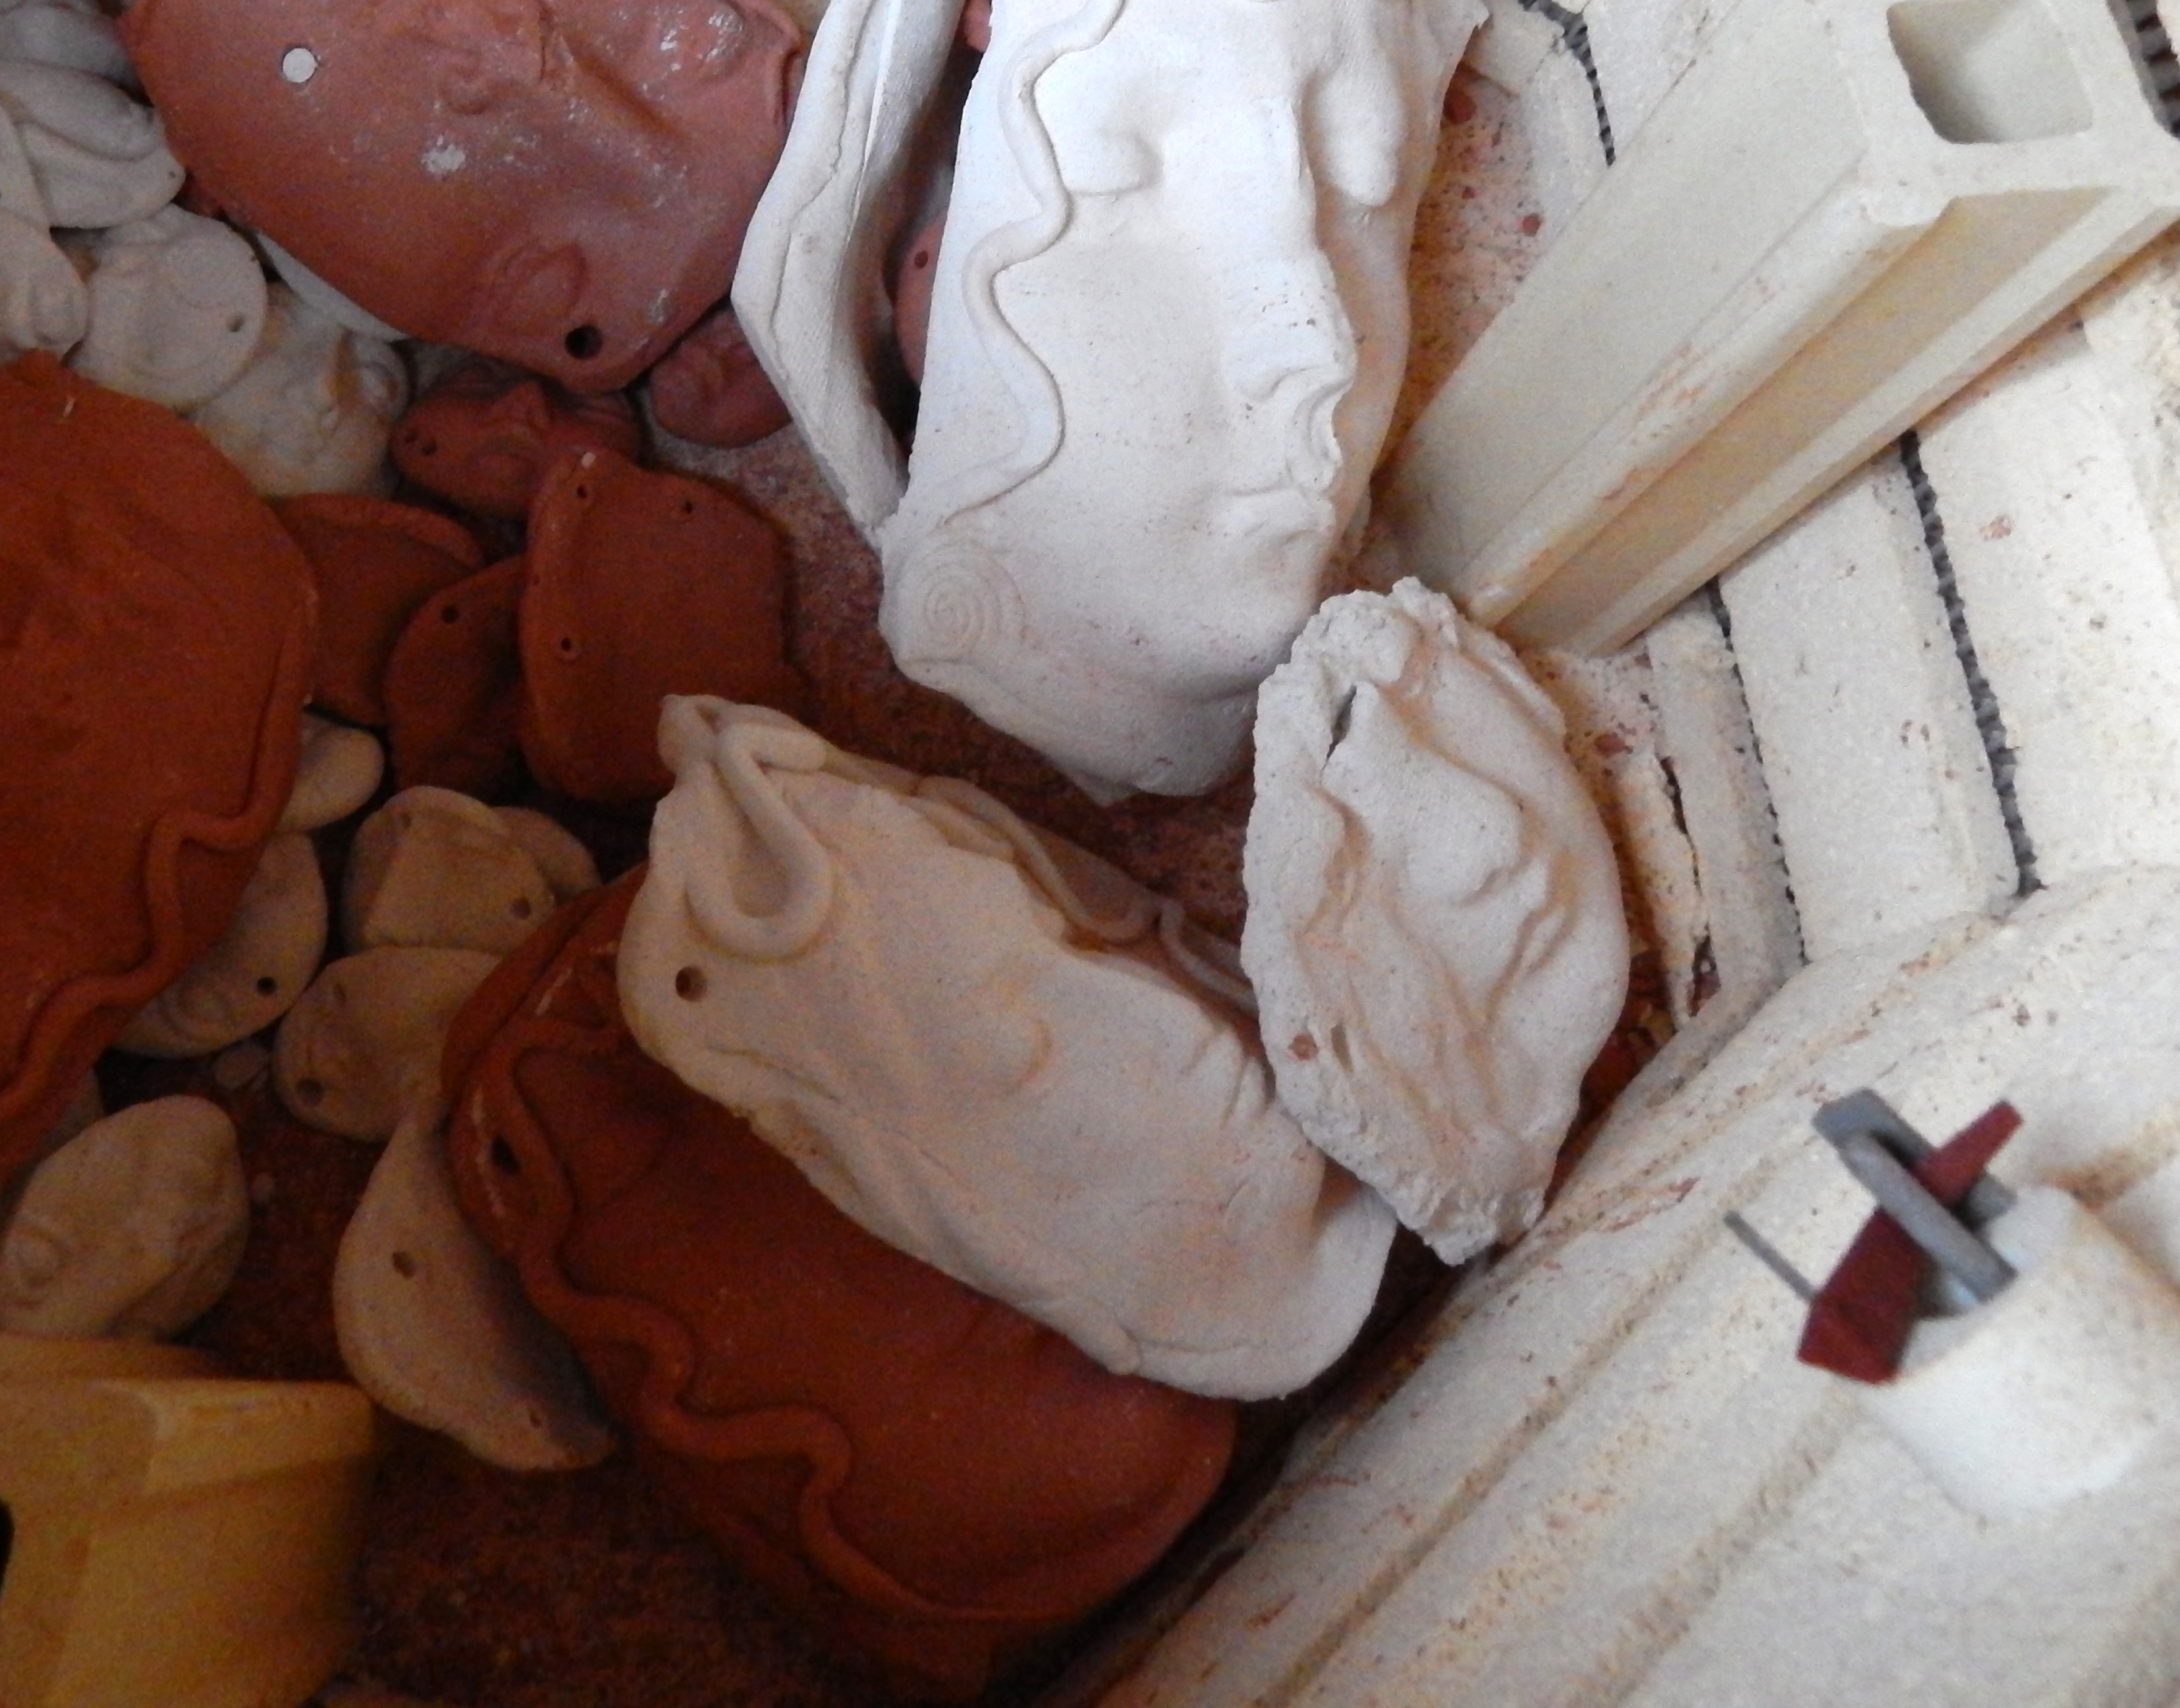
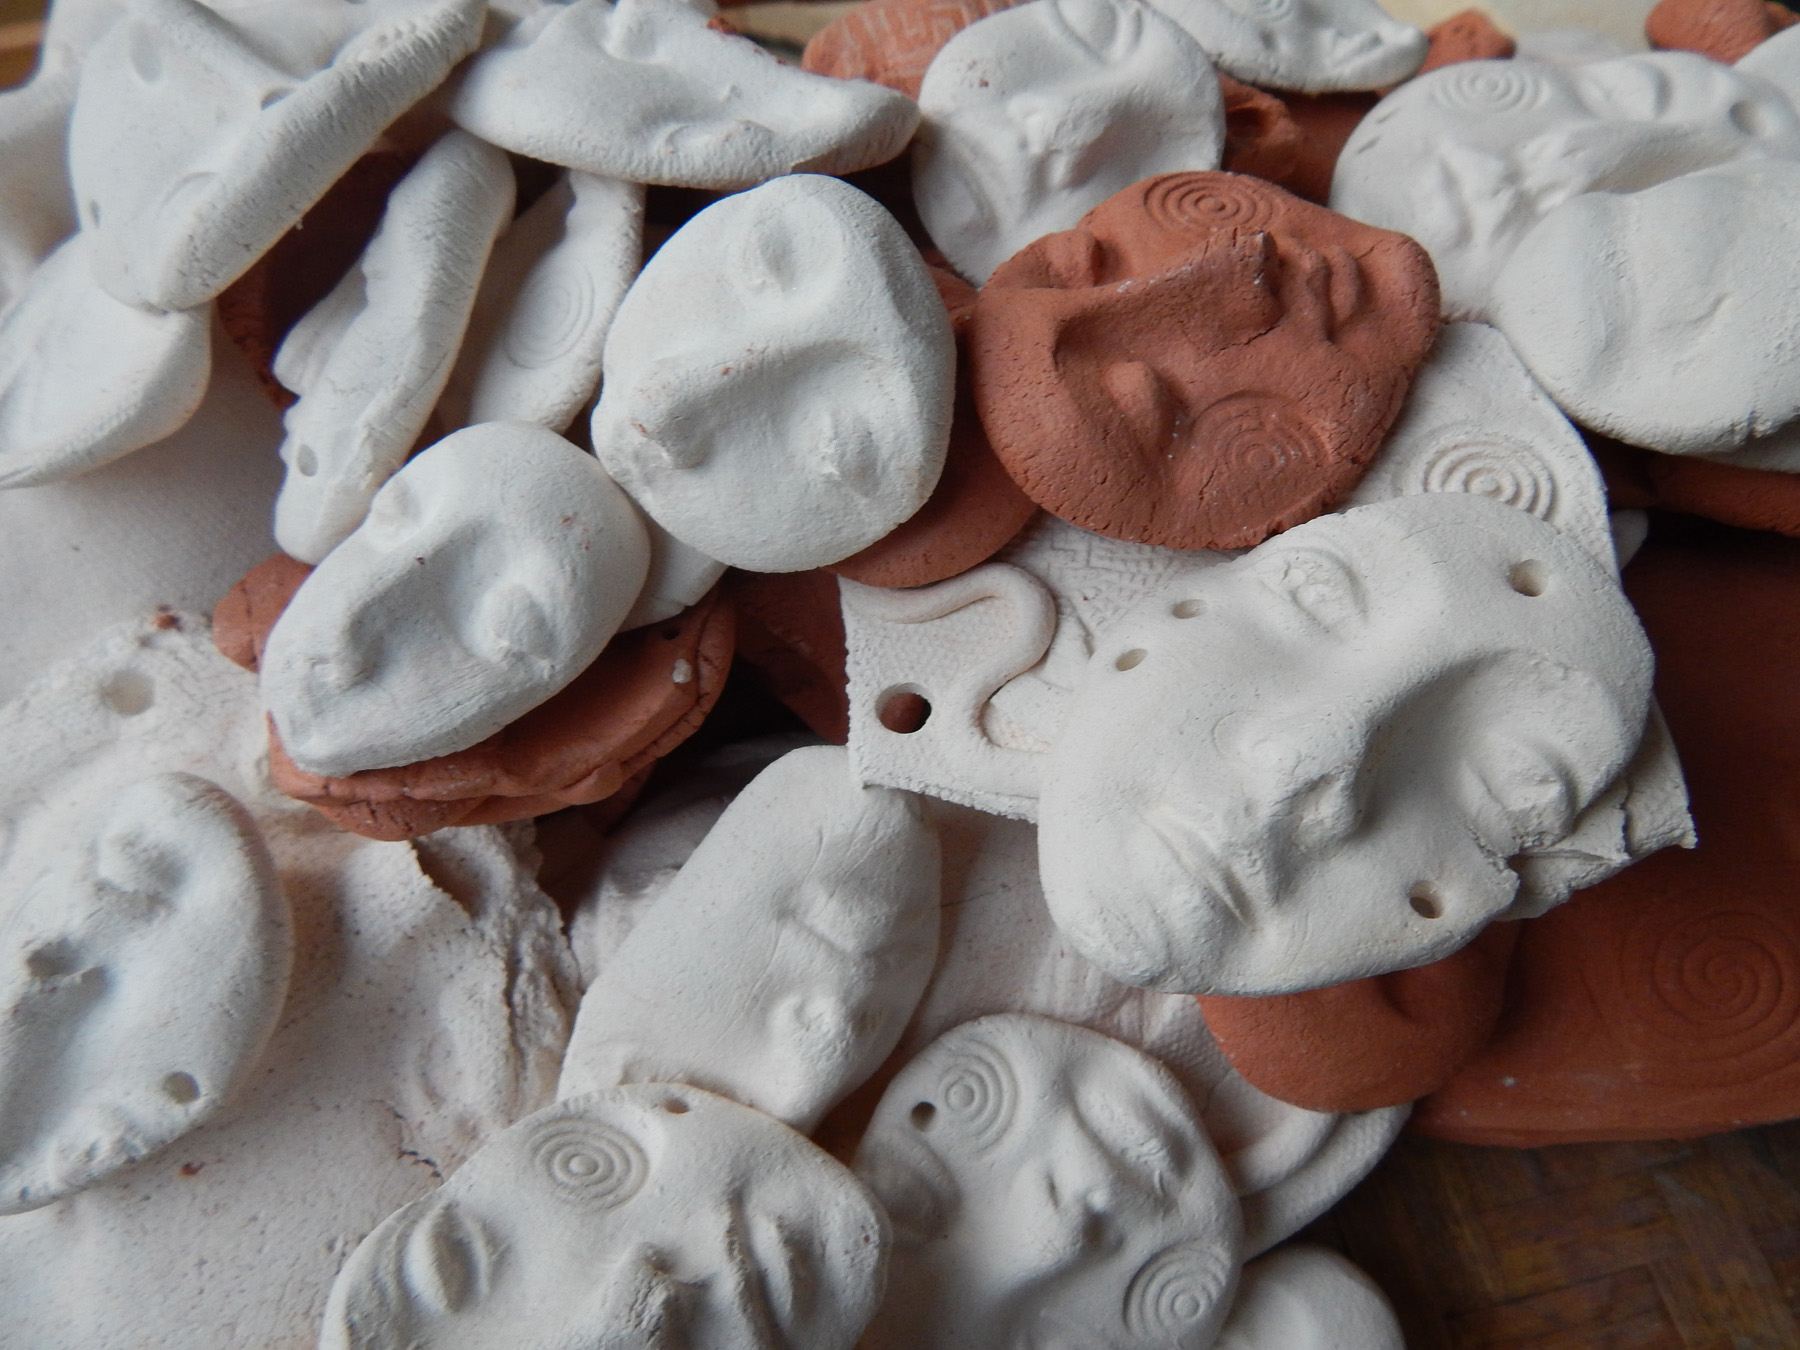
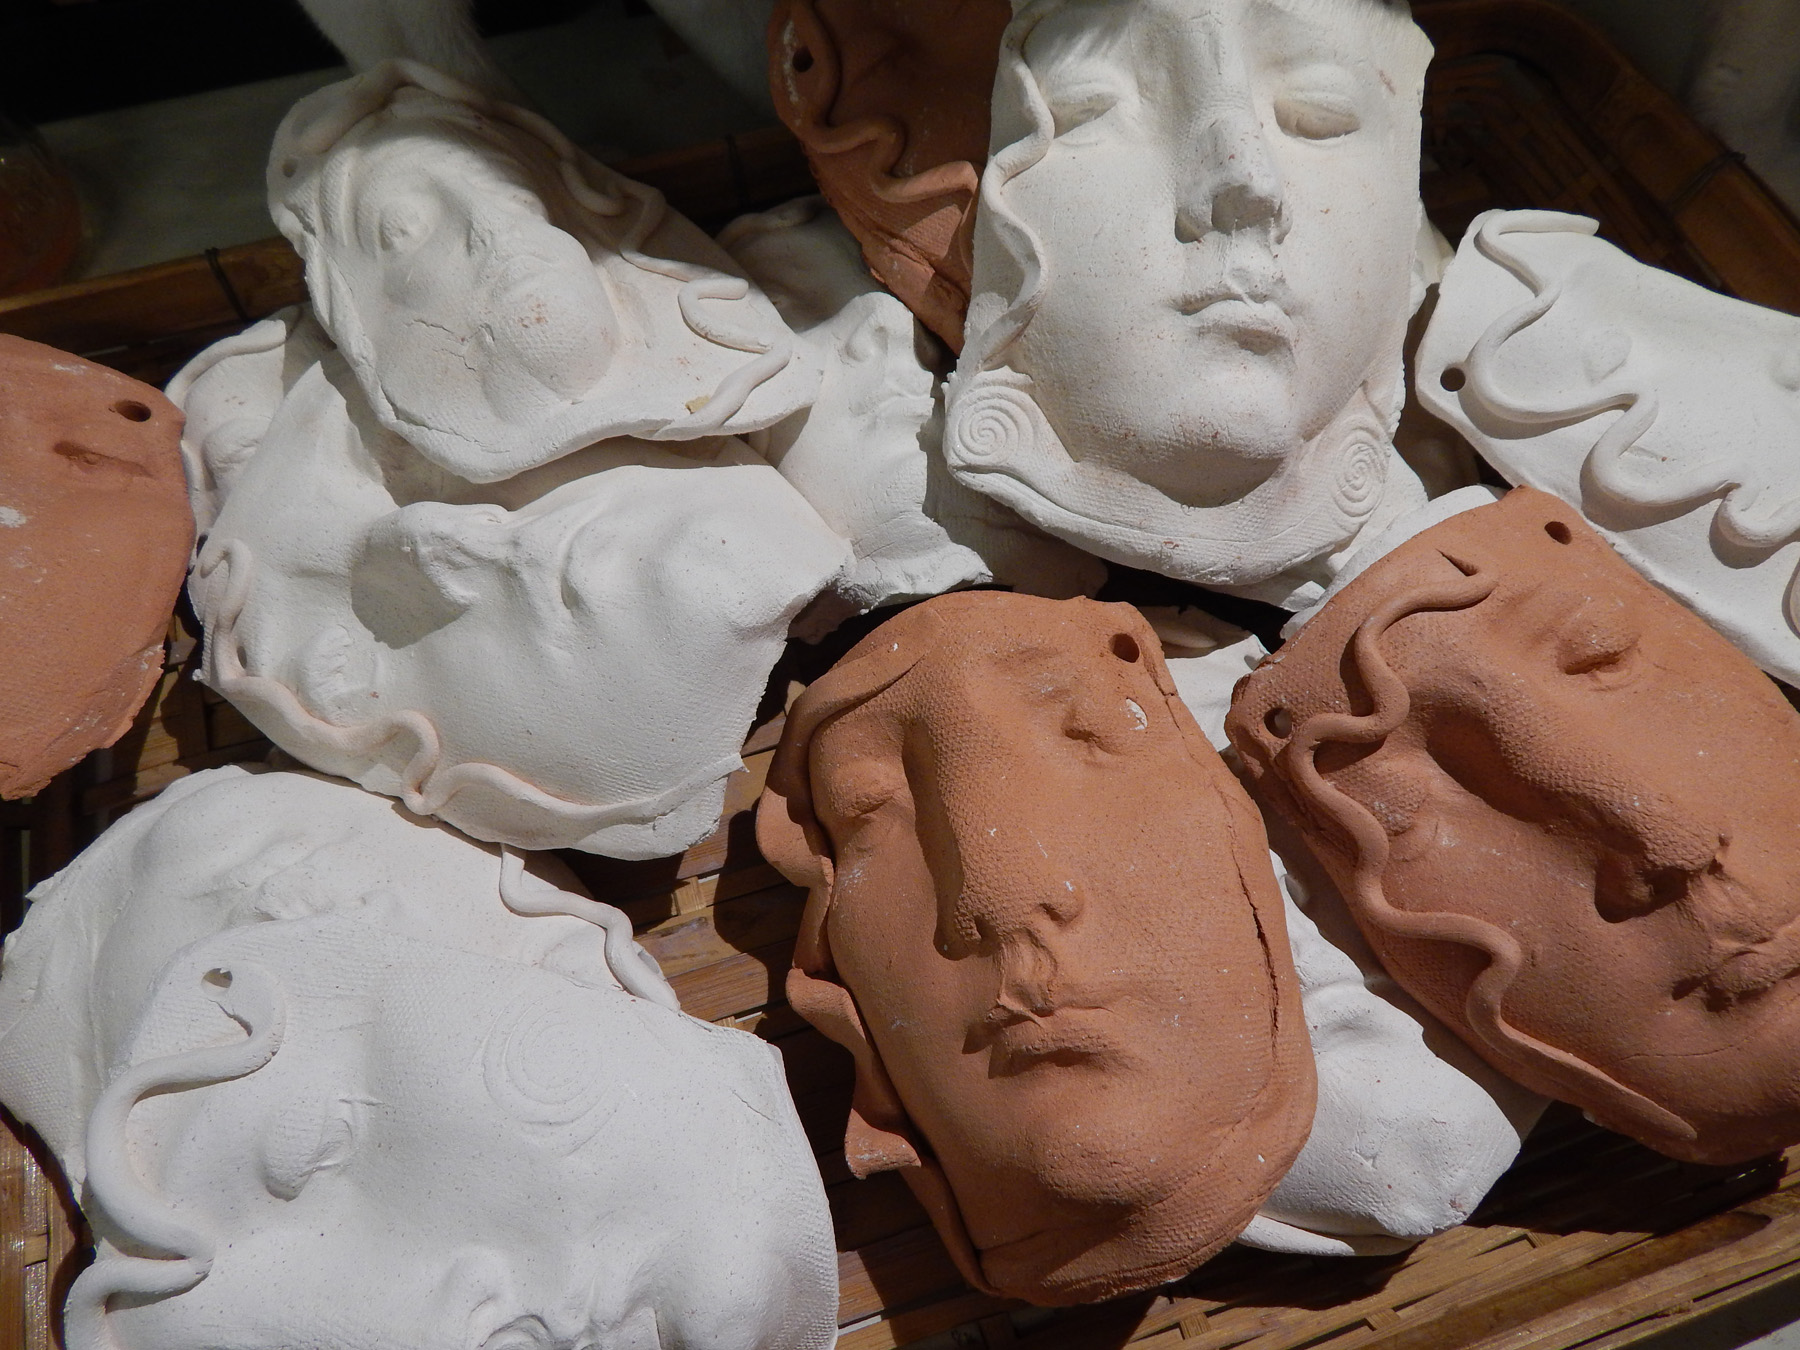
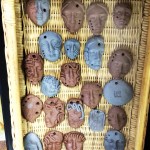
I had fired some face shards in the pit, thinking they would come out looking like ancient relics, and the did! Here are several of my pieces.

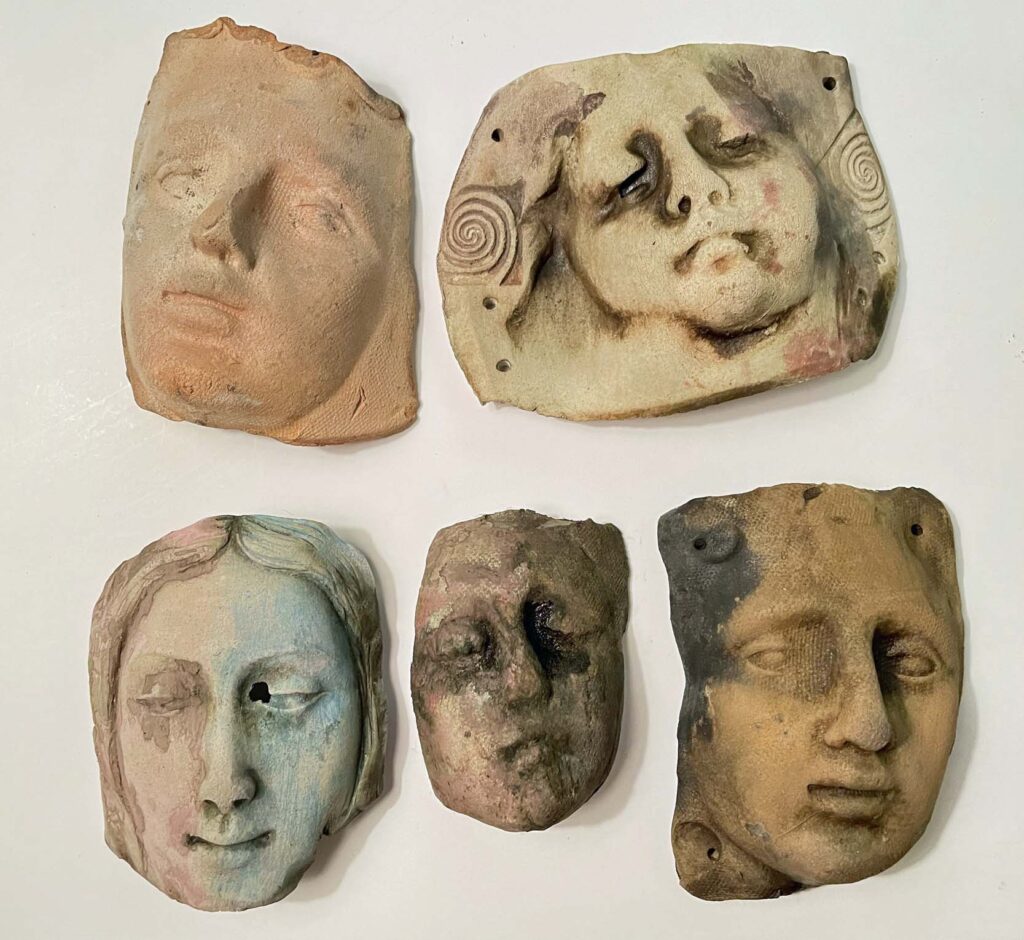
The face on the bottom left had Mason Stain applied before firing, and the face on the bottom right has traces of smoke “clouds.” All of us wish we had taken better notes so we could duplicate the results next time!

You can see the whole process and many more of the pieces in the video below.

VIDEO: A PIT FIRING AT BALLY STUDIOS

There is also a You tube video of a Masterclass in Pit Firing by Jane White at this link. You’ll learn more about the process and be amazed by the results.

Jane White’s Masterclass Video on Pit Firing

No matter what our age or circumstances, we can resolve to keep on learning new things in the New Year. Participating in the Pit Fire experiment reminded me that creative learning and seeking out new experiences makes life rich and meaningful. It connects us to our past and makes us more resilient for the future.

Wishing you a wonderful Christmas-time and looking forward to being with you in 2022!

♥Lyn

Shards and Santos, Clay and Collage

Happiness is teaching in Taos!

A week from tomorrow, I’ll be at the Taos Ceramics Center working with students in my Shards and Santos Workshop. The class takes place on two consecutive Saturdays – here’s a description.

In this workshop, we will create personal assemblages inspired by these iconic figures of Santos. In the first class, we will construct handmade textured slab-based clay components such as heads, bodies, and enhancements. We will also learn to make hand-crafted clay press molds. These components will be fired once.

Here are some examples of assorted assemblage components that I’m taking with me – honestly, working in assemblage is just like working in collage, only a bit more dimensional:

Continuing the workshop description —

The next week, we will build our figure, incorporating found objects such as bones and shells and bleached twigs into the final assemblage and perhaps include cherished objects and hidden words. We will explore the limitless possibilities of cold finishes, such as metallics and beeswax, to enhance the surfaces of the unglazed earthenware.

These santos, below, are in progress, and I’ll use them to show how the components are put together.

Since we will not be glazing and re-firing the shard components, I’ve been experimenting with cold finishes for fired clay for the last couple of weeks.

One of the most successful combinations I’ve discovered is Pearl Ex powder by Jacquard mixed with Gamblin Cold Wax Medium.  You can control the translucency and the color saturation, then buff the wax finish. It’s exciting to see how well it works on bisqueware.


Another technique I’m playing with is tube acrylic paint mixed with a bit of cornstarch to dull the finish.

In the sample below, the acrylic mixture mimics the look of Gilder’s Paste at about half the cost and with less potential toxicity.

This kind of experimentation is part of the fun of planning a workshop. And then I get to share with new people!

I’m grateful to the Taos Ceramics Center for inviting me – and at this writing, there’s just one spot left, so if you need a quick get-away, come on up to the mountains of New Mexico!


Animals, animals . . . . what a spirited workshop!

We finished the second part of the “spirit critter” workshop today at the Art League – beautifying our creations.

Leslie Newton did a very skillful job of loading and firing the kiln between last week’s session and this one. Not one ear or tail was lost.

Pan of fired nekkid critters

Today I got to teach some cold finish techniques for the workshoppers to experiment with on the test pieces and the animals. Cold finishes (or post-fire finishes) are amazingly versatile as long as the piece is not going to be used as a functional item – like a mug.

Potters are discovering things like walnut ink (yeah, my old favorite) and wax embedded with metallic particles. Here are some sample pieces that I used today to demo and test various combinations of walnut ink and metallic wax..

And here are some that were made by Jill Wilson, one of our participants, that show lots of possibilities.

When it came time to put finishes on the animals, a lot of participants liked the idea of the simplicity of just using walnut ink to bring out the texture. Here’s an example – this little guy is almost Pre-Colombian looking – very minimalist and whimsical.

By contrast, this piece has layer upon layer of metallic wax and walnut ink which gives it the look of cast bronze.

This is an example of a cold finish formula that I demonstrated today – there are a thousand variations:

  • Spray the bisque-fired clay liberally with Java walnut ink and let it sit for five or ten seconds.
  • Blot the ink with a shop cloth, then dip one corner of the cloth in water and wipe away the color on the surface, leaving the ink in the contours.
  • With your finger, add a layer of silver Inka Gold metallic finish.
  • When that is even, burnish it with a cloth, then add another partial layer of blue Inka Gold, being random and leaving spots uncovered.
  • Add another random layer, this one gold, and blend in with the blue as you go.
  • Rub on a bit of Jacquard powder in Interference Blue. This will give you a raku-like finish.

If you want to see the whole process, click on the links below to see how the animals were created, start to finish:

DAY ONE – BUILDING THE ANIMALS

DAY TWO- COLD FINISHES AND COMPLETION

Many thanks to the participants – Jill Wilson, Lisa Stamper Meyer, Vera Smith, Becky Hadley, Kimberly Anderson – and especially to my co-teacher, Leslie Newton!

Let’s do it again next year!


Creative collaborations

Earlier this month I got several emails from mixed-medial artist and tarot maker Dawn Zichko, whose work I’ve known and liked for quite some time. I wrote another SHARDS post about her about five years ago.

Dawn has a great blog called Mental Mohair which often features a daily card from her Everyday Tarot deck, which you can find in her Etsy Shop.

Four cards from Dawn Zichko’s Everyday Tarot deck

In her first email, Dawn sent a photo with a short note that said,

“Lyn, I thought you might enjoy seeing progress on a collaborative piece.”

Here was the photo (below) – very intriguing – and some of my faces were part of the collaborative design. I asked her if I could share the photo, and she requested that I wait until they had worked a bit more on it.

I’m including that unfinished version so you can see the structure of the body.

The following week she sent photos of the completed collaborative piece along with this description of the process:

Lyn, we created the Earth Protectress in ritual space. In brainstorming at earlier gatherings, the creation of a goddess was included in the list. So we all thought of creating her. In the sacred space we chose the parts we wanted to work on by chakra.

Essie (not her real name as she would like to remain anonymous) created the head/Third Eye/Crown, Patricia created the torso/Heart/Solar Plexus, and I created the base/Root and neck/Throat (this is the part that needed reconstruction — oh, the analogies!).”

The other women let me take her home and run with the additions. The clay faces, hair, pouch, and skirt were all done by me, but the additions were discussed with Essie and Patricia before working on them. I am blessed they trusted my creative ramblings. It was truly a touching experience to create this being in togetherness and sacred space.”

I think it’s just glorious – the whole is greater than the sum of the parts, and yet each part is amazing.

Artist collaborations can be tricky – sometimes it’s obvious which person did what part, but in this case, there is a seamless sense of sacred purpose. Thanks, Dawn, for sharing this work!
_________________________________________________________________________

Have you ever gotten involved with a collaborative project? How’d it work for you?

I have to admit, it’s something I’ve rarely tried, certainly not recently. But a lot of my artist friends, particularly fiber artists, love the collaborative process.

Surprisingly, there’s not a whole lot written about collaborative visual artwork, but I did find this thoughtful post called Cloth, Creativity & Collaborating with fiber artists Cas Holmes and Anne Kelly.

And I also found an engaging article about a mother’s painting with her five-year-old daughter called Making a Masterpiece Together.  Here were their guidelines:

1. We would each add one color to the canvas everyday.

2. We would do our painting while the other one was out of the room, so they would be surprised.

3. We would try not to paint completely over the other persons art work.

Those are great rules! They would work for any kind of collaboration, whether the artwork is done for a sacred and serious purpose like Dawn’s was with her friends, or with an informal group and just for fun.

The trick is always going to be keeping an open mind. No fair thinking “You messed up the part I did!”  Instead, you gotta think “Look how you enhanced my work.” Right??

Photo by Ella Jardim on Unsplash


. . .that’s when I knew her name

One of my favorite poets and people, Pamela Ferguson, contacted me recently to see if I’d teach a Wax and Talisman workshop for her small group, and I said “Of course!”. Pamela had taken the Small Worlds workshop last March and I wrote about her work here in an earlier post.

Teaching this talisman workshop is so rewarding – it’s the subject of my latest ebook, and one of the most personal workshops that I offer. So I was excited to be teaching it “live,” especially when I found out that Pamela’s granddaughter Caitlyn would be in the group. It’s fun to see how different generations respond to an art challenge.

Pamela’s group came to the studio yesterday and we had a thoroughly enjoyable afternoon. The workshop has three components:

  • Personalizing the earthenware face piece and painting melted beeswax wax on the surface
  • Making rolled paper “blessing beads” and adding texture, beeswax, and metallic enhancements
  • Tying symbolic ribbons and cord to the focal piece and stringing the beads

Every step has meaning and intention. I asked the students to let their intuition lead them and to see what would happen. I also asked them to name their pieces when we finished.

This is Caitlyn’s piece – she is a senior in high school and very perceptive about herself and others. She adores her grandmother, Pamela.

Her blessing beads are beautiful, and I like the way she has grouped them at the bottom edge of the face. During discussion time, I asked Caitlyn what she had named her talisman. She said the name kept shifting as she got deeper and deeper into the process, but it had ended up as “Venus” – not what she’d expected. We all understood what she meant !

This morning, I got an email from Pamela saying how much they had enjoyed the workshop. Then she told me that Caitlyn had started talking about her talisman as they were driving home. Her words were almost an impromptu poem, which Pamela wrote down.

Read Caitlyn’s poem and look at the talisman she created which inspired it – lovely.

Talisman
by Caitlyn
Venus is her name –
    the two sides of her face
    the two sides of love
 
The light side has golden glow
The ribbons are bright, peachy,
      lots of strands, beads, charms.
 
The other side is dark –
the walnut stain soaked deeply.
The copper tear by her eye was accidental
      but love can cause pain.
That’s when I knew her name –
      the tear, the dark side.
And those ribbons are thin, stringy –
black, gray – sadder somehow.
 
I didn’t mean for her to be Venus
      the goddess of love
but that’s how she came out.

It’s all about trusting the process – letting go of what we expect and letting the intuitive take over. I’m very glad that Caitlyn’s work and poetry expresses this so perfectly – she didn’t mean for her to be Venus, the goddess of love, but that’s how she came out!

But wait, there’s more! Pamela, a published poet, had her own insight about the process. She sent me her poem this morning, as well – it’s titled “Paper Bead,” but it’s about much, much more.

Paper Bead

     by Pamela Ferguson


Cut a strip of paper,

long

narrow

Write a secret word,

a power word

a sacred one –

a promise – a passion –

a vision word.


Glue the strip

almost end to end

side to side.

Coat your word

with protection.


Lay a skewer on the almost end –

roll the strip onto the tiny dowel

until your word is cocooned within –

held by the power of your hands

the dowel

the glue.


Bedeck the roll with ribbon

or string or yarn-

chain or silk or sinew.


Seal in place with that most

basic of adherents –

pure, warm beeswax.

Coat the cocoon.

Seal your word

in the unique world you make

and remake each day.

Add its shape and your word

to your memory’s bliss.


Then do another.


Don’t you love the way the creative process works with work and words? I especially like Pamela’s last line, “Then do another.” It means that we can do this any time, this expressing our best thoughts through our art and our poetry. It’s so comforting and liberating.
Thanks, Pamela and Caitlyn, grandmother and granddaughter, for sharing your artwork and your poetry.
PS I’m always happy to arrange a small group workshop for you – you don’t even have to be an artist or a poet!


Save

Save

Save

Save

Save

Lotus and clay

First, the Lotus – as in yesterday’s Lotus Book workshop at my “Studio Cinco(one of the participants told me that the address, #515, was very auspicious). Must be true, ’cause the workshop was really fun!

This is such a simple project, but it’s deceptive. Working with a small scale sometimes makes it  difficult to pull off a striking composition. However, fiber artist Mary Ann Johnson shared some absolutely gorgeous Asian papers that made us all look good! Take a look.

This slideshow requires JavaScript.

One of the great things about these workshops is the sharing of information and sources. Yesterday while we were working on our Lotus Books, Leslie Newton from the San Antonio Potters Guild and I discussed our favorite new source for clay and tools, Roadrunner Ceramics.

It’s not just a store for potters – mixed media artists can find all kinds of stuff there. I was there last week and got some great stencils ($4 each) as well as some needle tools for incising wax.

stencils

Roadrunner also has these rolling pattern stamps that would be good for inking paper and texturing paper clay.

I found a teeny tiny stamp for my shard faces – they have all kinds of these little guys.

stamp

So add Roadrunner Ceramics to you list of cool art stores in San Antonio. They are located near DeZavala and 1H10 and they are super friendly and helpful.

Have a great week! Is winter over for good??

Save

Save

How (not to) fire a kiln

Being away from the Studio for two weeks meant playing catch-up when I got back. There were a lot of things I could do art-wise while I was gone, but creating earthenware and firing it was not one of them. Sunday was Clay Day – I made about 60 small and large face shards and small sculpture pieces such as pendants. Monday was hurry-up-and-dry-so-I-can-fire-the-kiln day. I loaded the kiln Monday afternoon even though some larger pieces were still damp (gulp). This is a huge NO-NO. I don’t want to see you guys trying this.

Do you see the little face on top of the big face? It’s completely dry – you can tell because it’s white, but the big piece underneath is gray. It’s damp, and anyone with any sense wouldn’t fire it at this point, but I propped the kiln lid open, let it stay on Low for a few hours, and crossed my fingers that it would dry out and not shatter in the firing.kiln1

There’s really nothing mysterious about loading and firing a kiln. Most electric kilns like my Skutt have a kiln-sitter that uses a pyrometric cone made of clay. The cone is designed to melt at a specific temperature (in this case, about 1800F). When it melts, a three-prong device trips and turns the kiln off. That metal rectangular thingy has dropped down, indicating that the #05 cone on the inside has melted.

kiln2

The Kiln Gods were kind – nothing broke, amazingly enough. Here’s the first tray just out of the kiln, still very warm.

kiln3

Here’s the bottom layer, waiting to be unloaded. If you look on the right, you can see the slumped cone and the tripping device with the middle pin in the down position.

kiln4

So despite my Bad Practice of loading damp greenware, I got away with it – this time. These pieces are now ready for me to figure out how to use them – as Scent Shards? Sculpture pieces? Stay tuned 🙂

kiln5 kiln6


Sunday earthshard workshop

There’s something about the new studio space that is inspiring – either that, or I had some incredibly talented clay workers in yesterday’s workshop. Could be a bit of both, but take a look at some of the earthenware ornaments they made –

I love the combination of clays and the embellishments! These will be fired late today or early tomorrow, and then we will meet at Ann Pearce’s Jewelry Design next door to pair these works with beads, leather cord and findings to make one-of-a-kind necklaces and pendants. I’ll take pics of the final creations.

Next workshop, March 3rd, Spirit Dolls, is already full but I’m going to have a second one later in the month on March 24th – email me if you’re interested.